Y’all.
We have an epic problem.
And I don’t use the word epic flippantly and without consequence like most of the universe.
 Do you see that? Melty, muddy snow.
*hold me*
We don’t have the good fortune of having a mudroom. Apparently 114 years ago, architects weren’t concerning themselves with mudrooms. (or linen closets, coat closets, or pantry’s… just sayin’)
This is where we walk into our casa.

What happens when a girl gets sick of stepping stocking-footed into cold puddles throughout the kitchen?
THIS:

La la la la la!
Let me show you how. This is an EASY build!
This is what you’ll need: (includes affiliate links)
- (2) 1×3 maple boards (8 footers)
- sheet of Plexiglass (24” x 48”) …you’ll only need half
- Sheet of 1/4” MDF (24” x 48”) …you’ll only need half
- Clear Silicone
- bag of ‘River Rocks’
We started out by cutting the 1×3 boards down on the miter saw as follows: (2) 48” and (2) 12.5”. We chose these dimensions because we wanted our ‘drip tray’ to be 4 feet wide, and deep enough to accommodate Nick’s GIANT boots. You can adjust the dimensions to fit your needs.

We drilled angled holes with our Kreg Jig for easy assembly, glued the ends, and screwed these bad-boys together.


Now that our ‘frame’ is built, It’s time to cut the Plexiglass and MDF to size! The goal here is to have a water-proof system (plexiglass) that’s still sturdy and supported (MDF) for the bottom of our ‘tray’. We cut them down to 48” x 14” (the exact dimensions of our ‘tray’ thingamajig). We used our table saw, but you could use a circular saw or band saw too! Whatever ya got!

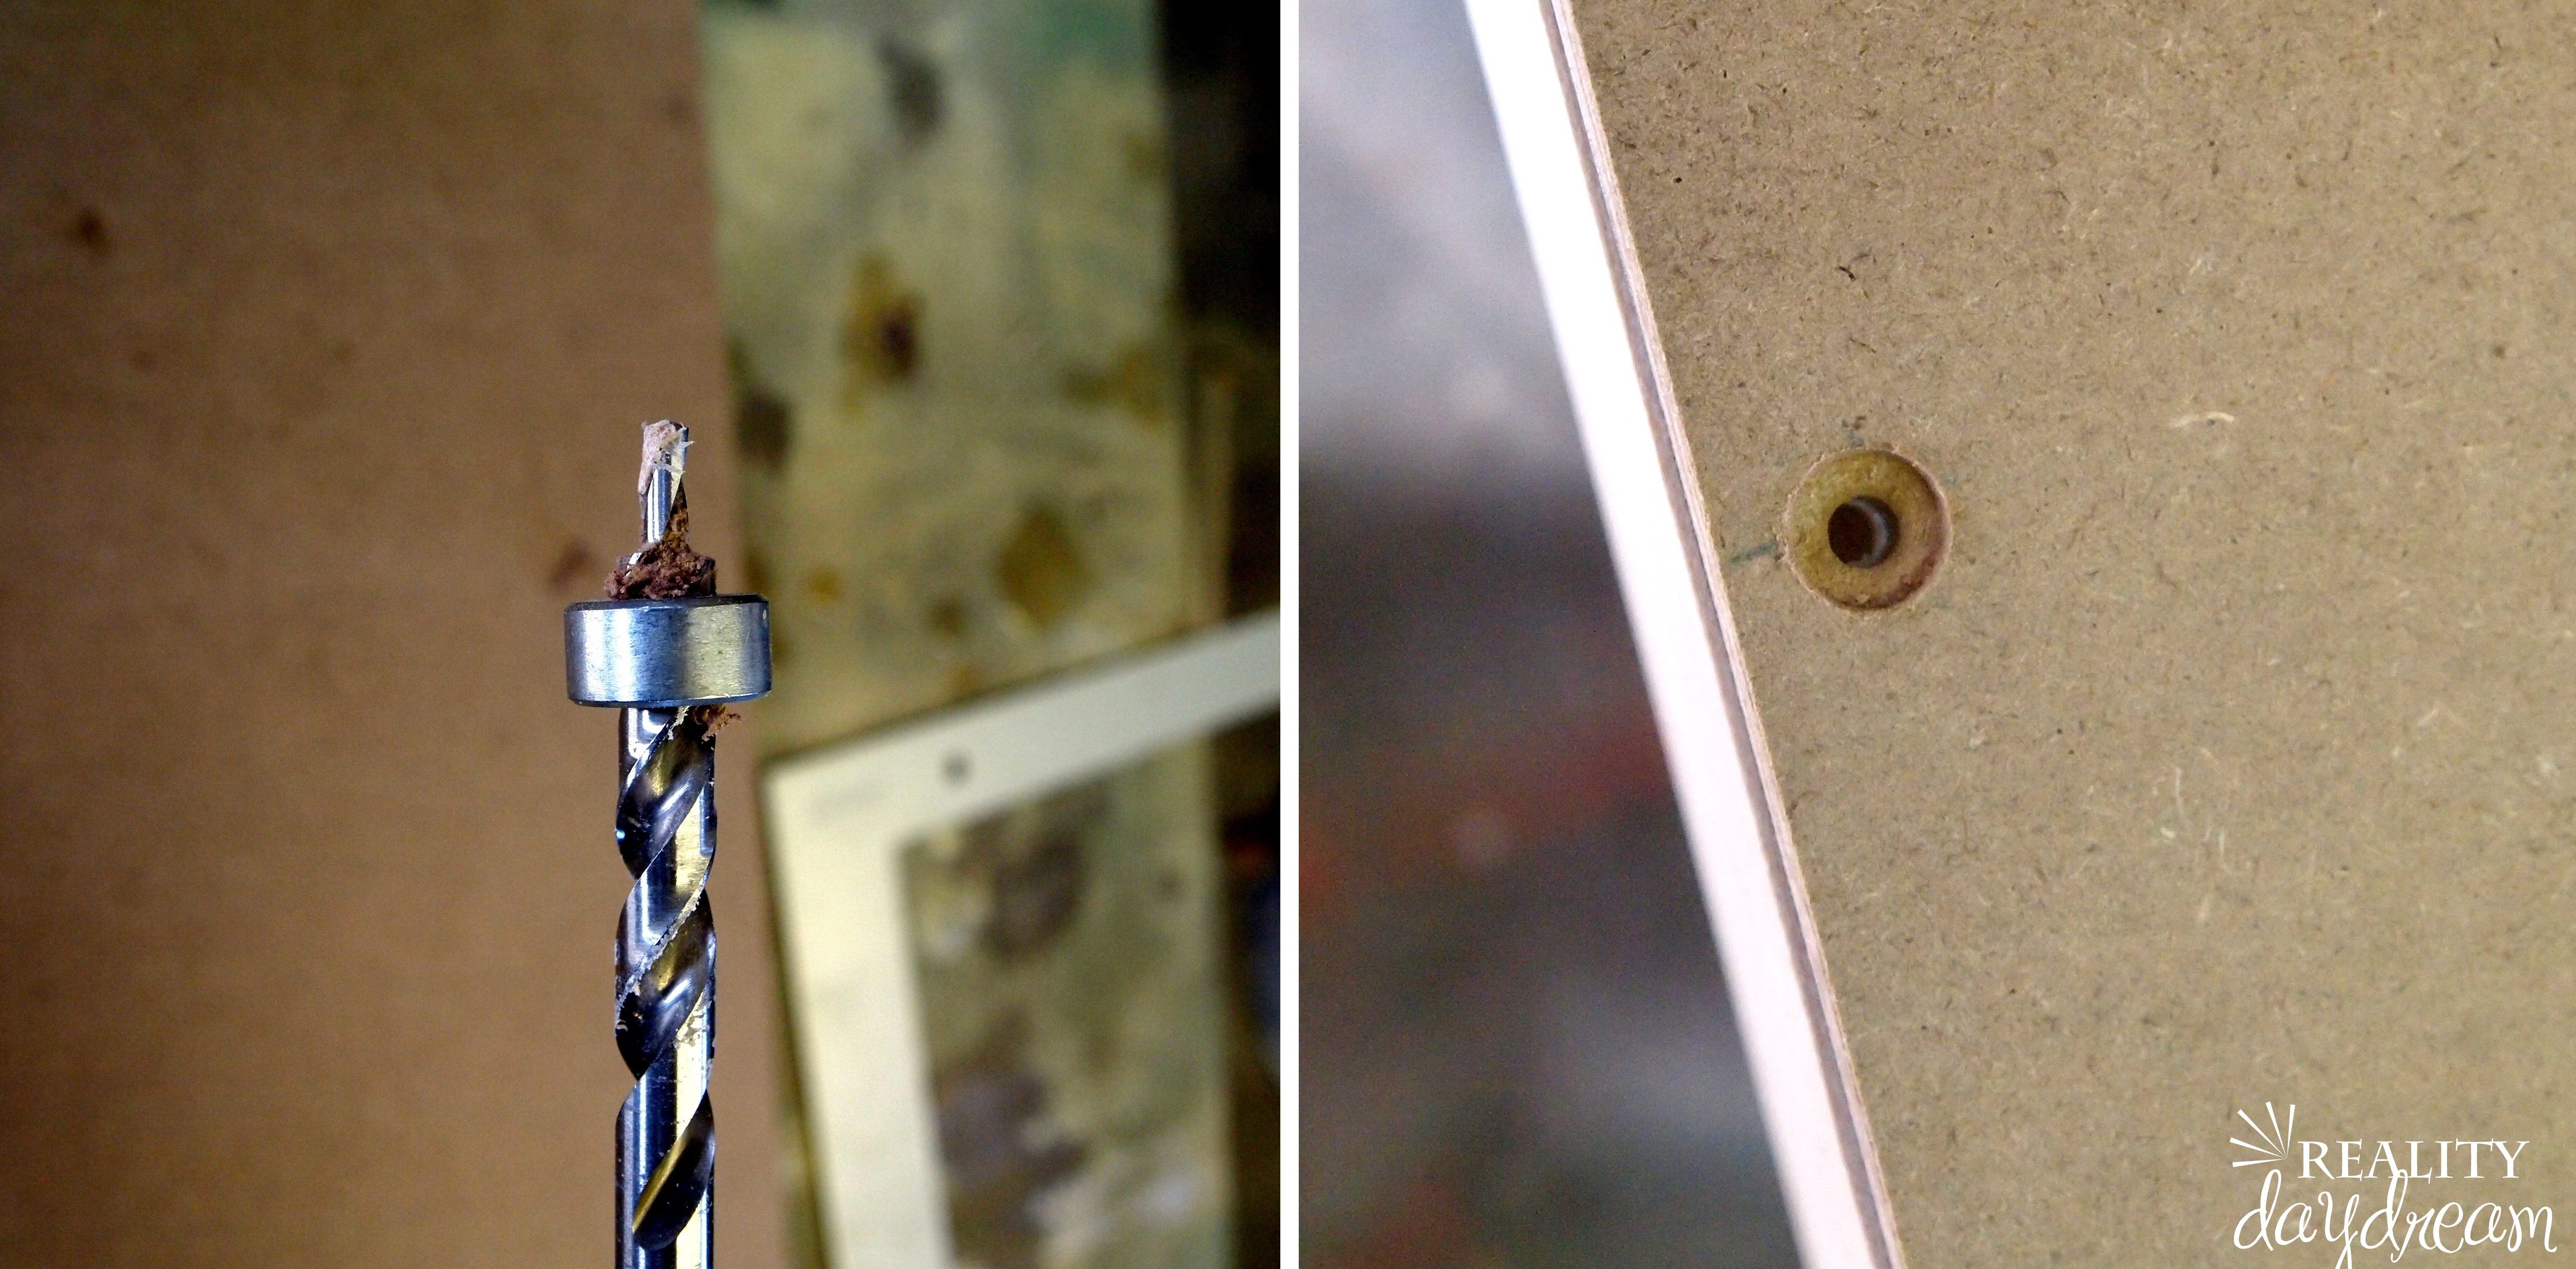
We used the Kreg drill bit to drill counter-sink holes 8” apart. You can use two different size drill bits to achieve this same effect. The reason we needed counter-sink holes is so that the screws will screw in far enough that they won’t stick out and scratch the floor. Make sense? We used 1” fine thread screws.
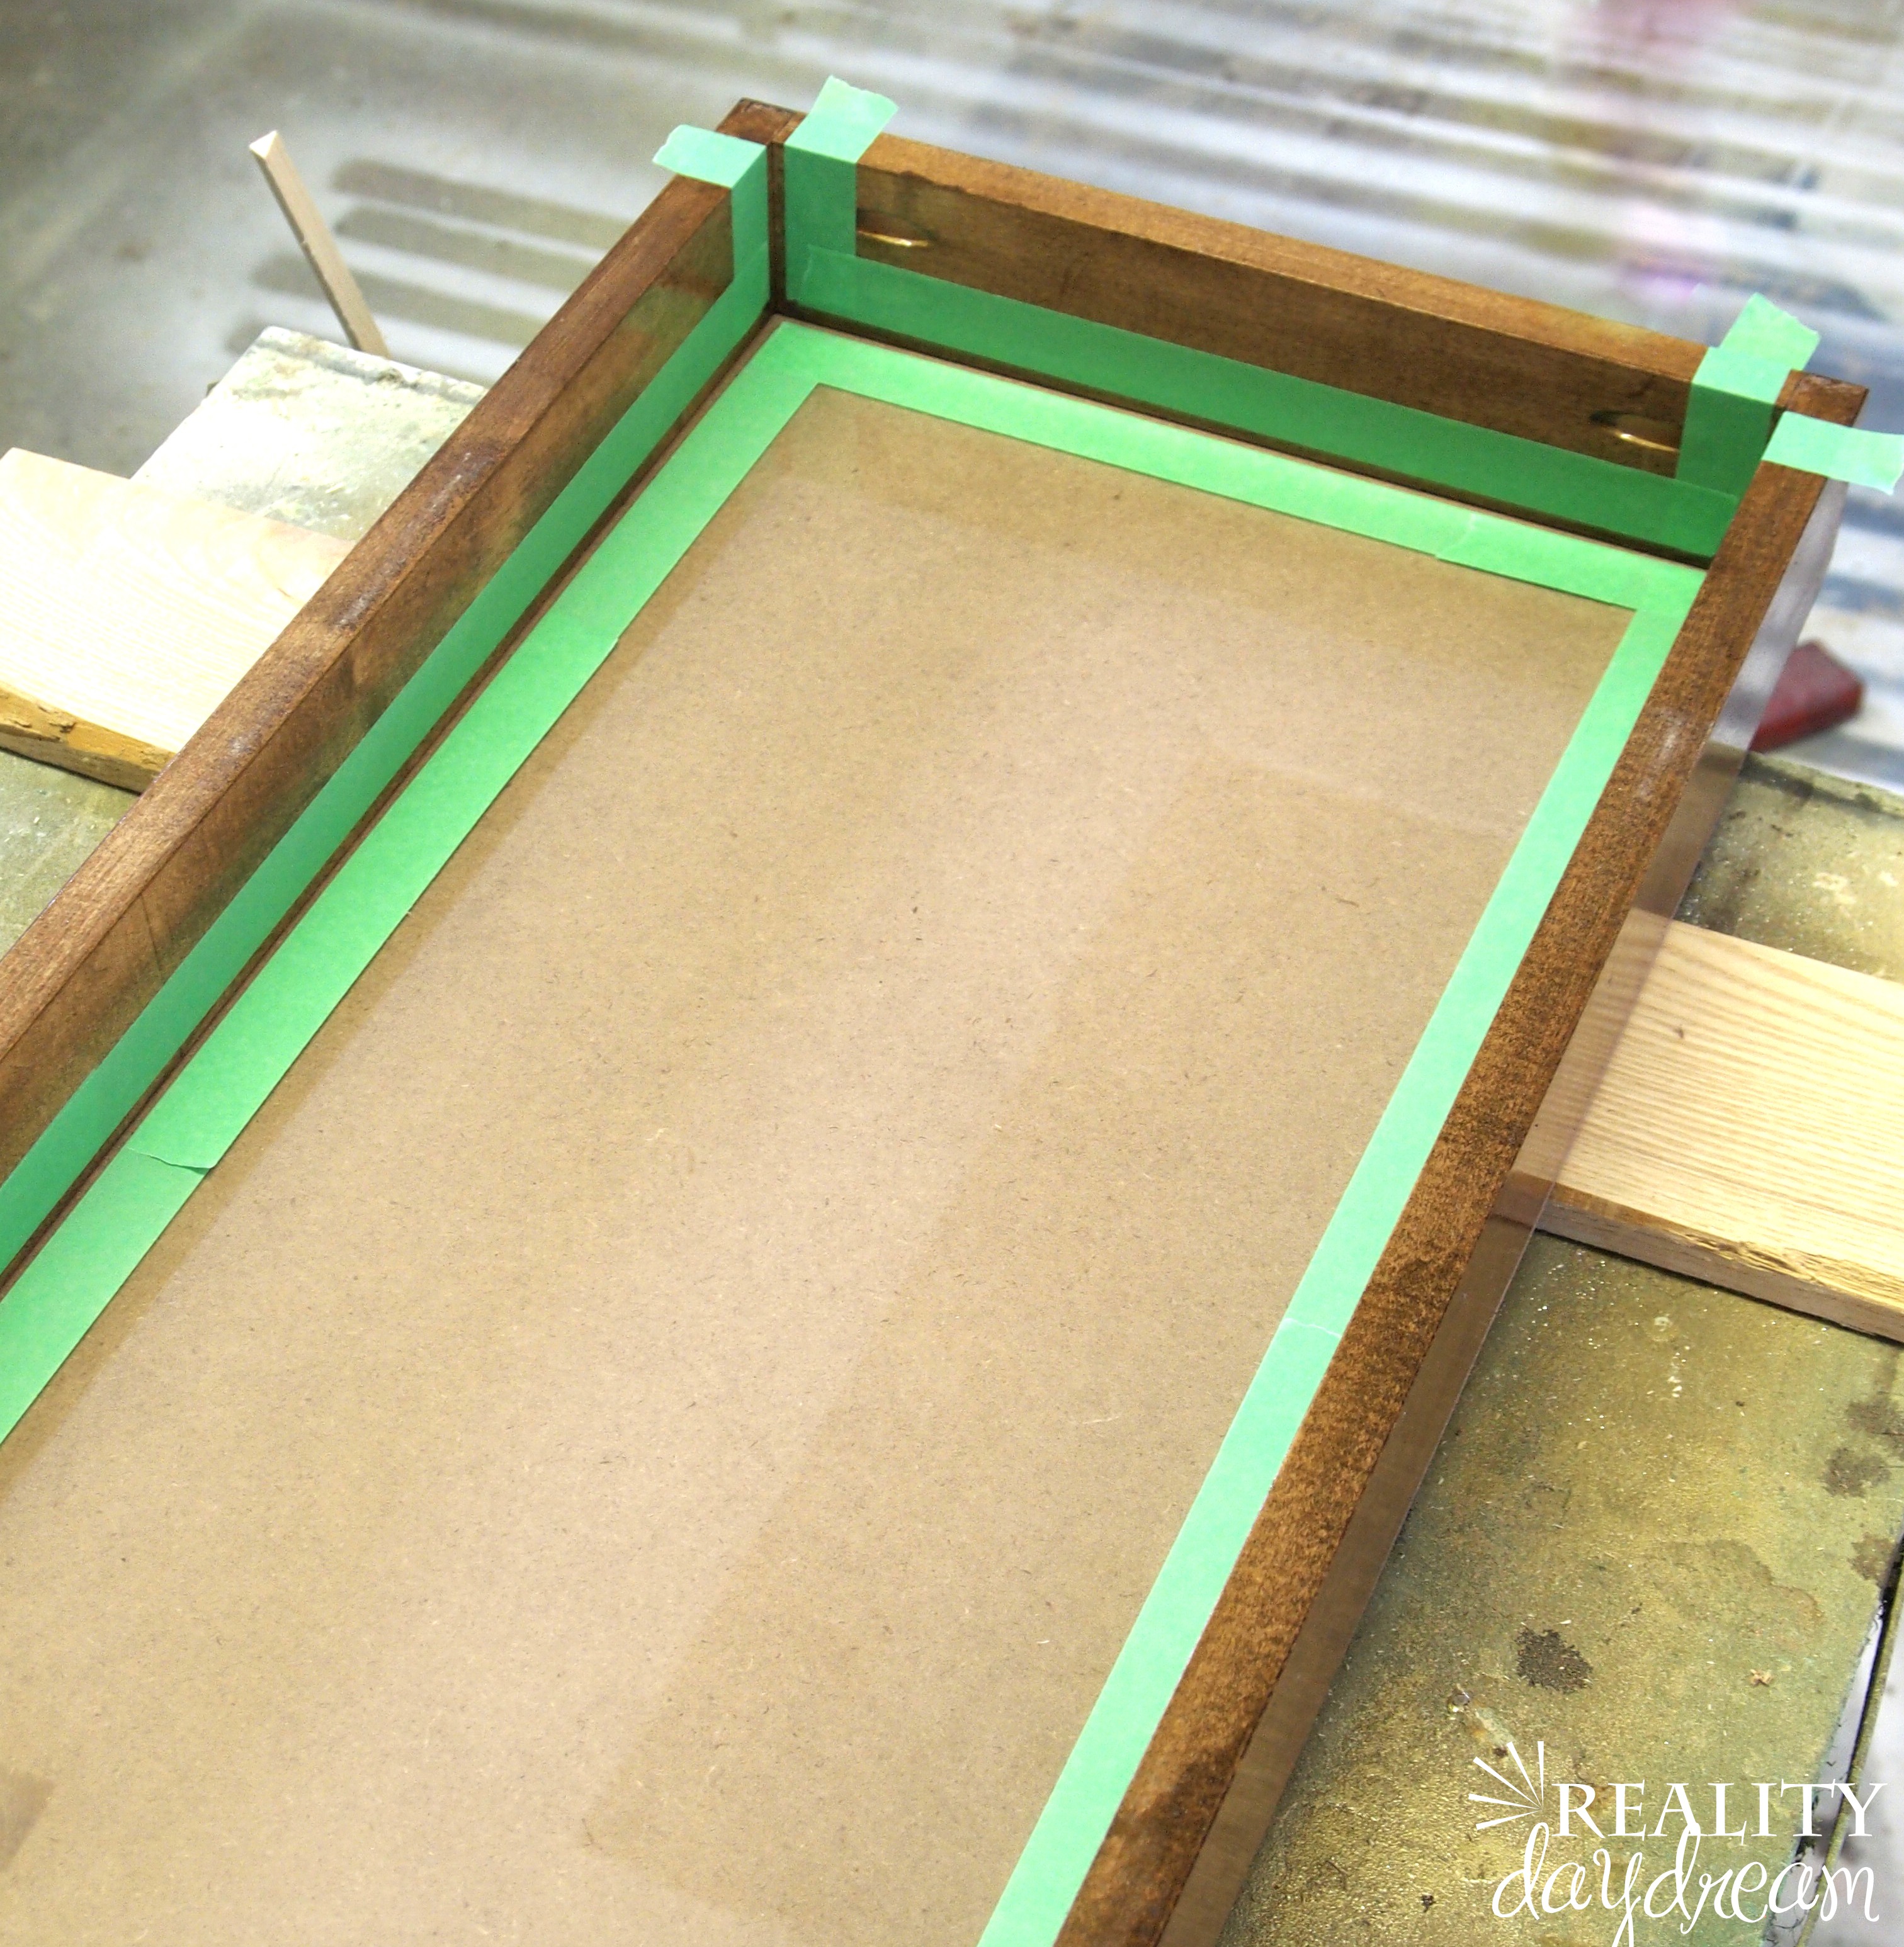
I stained the ‘tray’ using Rustoleum Dark Walnut, and then varnished and let it dry overnight. Then we taped things off in preparation for the silicone (to seal all those cracks)! You can see that we didn’t bring the tape all the way to the corner. That way the silicone will get where it needs to go, and after we smooth it out, we can remove the tape and have a perfect crisp line!

All that’s left is to dump in the ‘river rocks’!

We ended up rinsing our rocks in a 5-gallon bucket, because they were pretty dirty. Then we just spread them out in our ‘tray’, stood back, and admired our handiwork!

Isn’t it THE BEST when you’re able to identify a problem in your home… and come up with a solution?!

No more dirty puddles!
No more wet socks!

I love how simple this was to build… and it comes at a perfect time since we’re in the midst of a perpetual snowy polar vortex that gets tracked into my kitchen. And believe it or not? The girls leave the stones alone!
Are you lucky enough to have a mudroom? Do you have a system for shoe storage? Let’s chat!

UPDATE! We’ve overhauled our whole entryway and kitchen since writing this post! There are tutorials for everrrrrything! (including those cubbies for hats and mittens! Check it all out here!

Disclosure! we’re SUPER HONORED to have been chosen as a “Lowes Creator”, and were provided with a Lowes gift card to help with the cost of supplies… but as always, all ideas, thoughts and opinions are 100% our own. Because that’s how we roll yo.
Related:
-

I have a fun and easy building project for you! And while I do end…
Hi there – I am finding this waaaaaay after the fact and it is brilliant – can I ask? Do you have to take all the rocks out to drain the water or does it just evaporate – we live in Canada – I am just wondering where the water goes and the logistics of draining the tray 🙂 Do you have to clean the bottom of the box over time?
The water just evaporates! And it’s brilliant! In the spring, after it’s not muddy anymore, we dump the rocks into a 5 gal bucket, and spray down the tray to clean it. Then just store it all in the garage until the next winter!
How did you make the calendar in the frame? Is it a big chalkboard or did you use chalkboard paint on something?
Hi Debbie! We have a tutorial for how we did the chalkboard calendar. Here’s the link!
https://realitydaydream.com/2013/02/dry-erase-chalkboard-calendar-fun-funky.html
We got the frame at an auction, but you could easily build your own using trim pieces. We have a tutorial for that too! 🙂
https://realitydaydream.com/2014/02/build-a-custom-frame-out-of-trim-pieces.html
Debbie, the frame was a garage sale find that we repurposed for this calendar! You can find gorgeous chunky frames at thrift stores, garage sales, auctions, etc! Then we just painted the backboard of the frame with chalk paint. Here’s the tutorial if you’re interested:
https://realitydaydream.com/2013/02/dry-erase-chalkboard-calendar-fun-funky.html
Just wanted to say I just discovered your posts and I’m so happy. I had no idea you were pregnant! You have great creative ideas. I’m an Interior designer and antique dealer partially retired. (Screwed up back and knees from lifting and moving furniture). Congrats on the upcoming event! Just keep on keeping on!!!
Hey Mary, you’re so sweet! This is actually an old post, and I’m no longer pregnant. In fact, that bouncing baby is very sassy and turning 5 next month. 🙂
Can you please tell me what paint color this is!!! It is perfect, exactly what I want!
If you’re talking about the wall color, it’s called Emerald Green by Pittsburgh Paints.
I am, thank you!
Aahhhh this is perfect! We have a small tiled area when you walk in the front door, much like yours. A shoe rack doesn’t cut it. I was planning on building a coat rack etc, but could not for the life of me figure out what to do with shoes. But this is perfect, will have to do before the winter! Thanks!
Thank you for the great idea!
I will be adapting it at my church for use under wet baptismal gowns. I’ve tried to find a commercial solution but it was either the wrong size or too clunky/inappropriate (garden trays, beer dip trays, etc.). I plan to use a white decorative fill for a more “pure” look and maybe a cover screen/mesh to keep the kiddies out.
I love that you didn’t feel the need to glue down the rocks. I do childcare, we live in a split foyer & that is our main entry. I have 2 boot trays but still need the rocks. Everywhere else I have seen them, they recommend hot gluing each. &. Every. Rock. down. ummmmmmmmm no. I am so going to just dump some rock in the trays & call it done. Thank You!
Why use maple? It is very expensive.
James, we usually use pine for almost everything, but we wanted a hardwood for this project so it would be more heavy-duty. And the tighter grain will make it less likely to rot if we missed sealing a spot and moisture leaks in.
Agree, I am going to try oak pallet wood. Just for cost and aesthetics . Thanks for the great web site.
Living in San Diego, California we don’t have snow to deal with. Got anything that catches dog hair and leaves? I have a couple of terriers with hair that acts just like Velcro! They go outside, play in the yard and come back in and it’s dog hair and leaves everywhere! I love your idea for wet and muddy shoes but I don’t think it’ll work for me. Let me know if you come up with a solution! LOL
Looks awesome. I love rocks in a tray anytime. Where do their wet socks go?
Wet socks can go on the furnace vent right next to it… haha! 🙂
What an awesome, practical and good looking solution! I would love to have this at my house, but alas I have a 12 year old autistic dude with a rock fascination living in my house. He’d have that empty in a New York minute:) I was thinking of something like that for plants, higher up and on a much smaller scale, though!
Love it! And those cute little matching shoes are the perfect accessory!
Ha! I made one of these last week too! But I purchased a boot tray for under $5 from Lowes and then added the river rocks to it. My two year old wouldn’t leave the rocks alone, so I hot glued them to the bottom! Voila! Works perfect for those wet snowy shoes!
This is the prettiest drip tray I’ve ever seen! I love those kinds of stones. Our back entry way is gross too. I finally took 2 11×13 pans and put them on the dryer so when we come in we put our shoes/boots on there so they are out of the way. Then when they dry I put them in our shoe caddy hangy thing. Yours is way prettier. I’d have to find a way to have it off the ground since the only space to put it would be where the heating vent is. IT would need legs 🙂
Hehe… thanks Nicole. 🙂
That’s a bummer about your vent placement.
Ah, came out so nice! What a perfect solution to the mud issues!
That is amazing!!! I never would have thought about putting the rocks in there but they make it so much better—any yuck can just drip down through them and get off the shoes/boots! Awesome instructions and tutorial!!! I love it!!! Sharing!
Thank you Beth! And thanks for sharing!
What a clever idea! I have the same problem at my house, no mudroom! I am working on getting more handy with the saw, but I am hoping my husband will be nice and make this for me. Love it!
I made something similar for my step daughter for Christmas. I bought a premade tray and I hotglued the river rocks to the bottom so our future granddaughter can not run off with them.
Genius! Great minds think alike… eh? Has the hot glue been holding up ok?
Your updates still aren’t showing up in feedly, just FYI. When I remember to check instagram and see yours your pictures then it reminds me to check in here! I don’t mind really…it’s like finding a snickers you forgot you had.
Cheri, can you RE-subscribe on Feedly? Or will it not even let you do that?
I never thought of that…I’ll give it a try and let you know. I suppose initially it will show all your posts as new.
Yes, we have a mudroom. A mudroom with CARPET. We have two boys, ages 5 & 7, who run a small scale free range poultry operation. This is a bad combination!
And YIKES about the carpet! You need to build one if these for your mudroom!!
I love this, Bethany! Do the rocks absorb any of the water, or does it all collect in the bottom of the tray? I need a customizable solution here in KC too! xo
The water just trickles down through the rocks, and if there’s enough of it, it will pool at the bottom. But that’s why we put plexiglass and sealed the corners with silicone. Everything is waterproof and wont soak into the wood. And throughout the day, the water will just evaporate!
This is a great idea and I love it. However, with two little grandsons running around, those rocks would not stay in the tray. They would be all over the house and Inevitably I would have a broken tv screen, window, oven – you get the picture! Maybe when the boys are at least 10 years old, I could get th is done! Also, love the girl’s coats. Just bought the same one for my granddaughter, Rowan to wear next year. It is so darn cute!!!!
this is lovely! But, I also LOVE the orange painted letter/pen organizer on your shelf. I picked up the exact same one at a garage sale…..do you have a tutorial on how you painted it? I’m sure I could figure something out, but I love the inspiration you give! 😉
Thank you Emily! I love it too! I got it at a thrift store several years ago, and it’s one of my fave things!! I painted it orange and glazed with white. Here’s the tutorial! (it’s a really old post, so please ignore my ameteur-ness and how it’s not very detailed 🙂 )
https://realitydaydream.com/2010/11/best-lunch-break.html
aw, thanks so much! Can’t wait to go check it out…..don’t worry about the ameteur-ness…..we’ve all been there! (heck, I still am!) 🙂
I love this! Not only did I pin it, I printed it out for my husband. We have a shoe tray that we bought at Lowe’s, but it just isn’t getting the job done. The water collect in the bottom of it, and it’s still a mess. Our other issue is that our 15-month-old loves to play with shoes and drags them all over the living and dining rooms.
Haha! You’ll have to let us know what your hubs thinks. 🙂
I was just on Pinterest, and noticed that several friends have already pinned this as well.
Haha… That’s awesome !!
nice complement to that entire landing zone you have there. well done.
I love it! I’d need one just as deep (men’s size 14… might have to even add an inch 😉 )
I wonder if fake grass would work as well…no possibility of stolen rocks. There is NO way my niece would leave the rocks alone. She likes to collect them on walks. Taht might look too much like the dog toliet boxes, however….
I may have to just keep the rubber mat. 🙁
Hmmmmm! Fake grass! Hadn’t thought of that. If you try it let us know how it works!
Love this project and this post showed up in my bloglovin feed for the first time! yay!
I’m sooooooooooo glad! It’s been so frustrating for us. I’m happy it’s fixed FINALLY!
I LOVE this idea! It sure beats a simple mat that I would have to wash over and over and looks out of place (“Why do you have a mat in front of the door and next to it?”). This looks purposeful – even when there aren’t shoes in it! What a great idea!
Thanks Kelcie, I agree! I love how it looks even when it’s not in use!
Awesome…!!! I love the rest of the area too. Great job..!!
Thanks Tammy! The girls LOVE to hang their coats on their little hooks. 🙂
Hey I saw everyone’s post about rocks being stolen.. could you just have less layers of rock and hot glue river stone rocks to the plexi glass? It would be more time consuming, but would probably be easy to clean when needed?