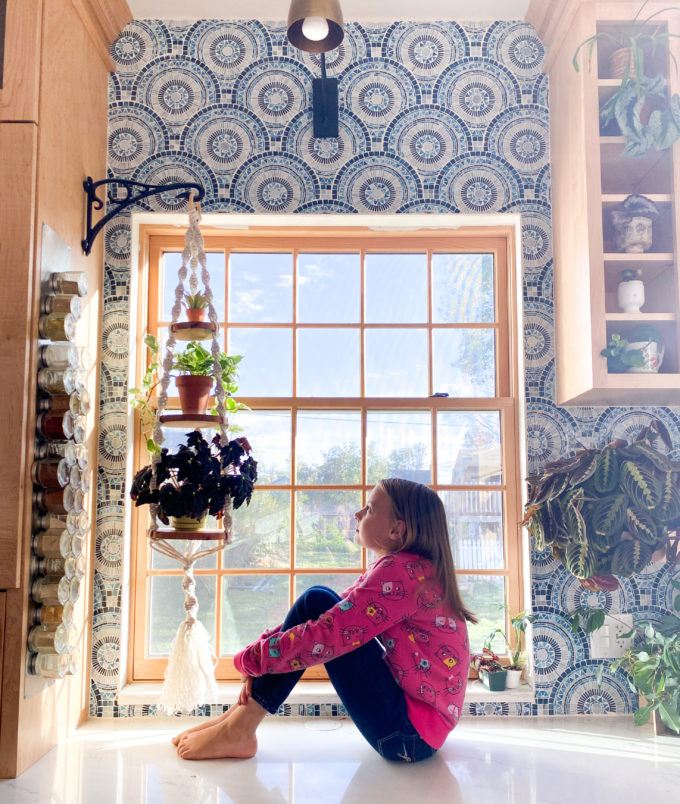
Hello, my name is Della and I’m 9 years old!
I love to crochet, but recently tried something new, and I LOVE IT! It is called macramé!! It’s easier than it looks, and it’s funner than it looks! But it takes a little bit of practice to get the feel for it.
Today I’m going to show you how to make this hanging macramé planter that’s perfect for beginners!
*This post contains affiliate links.*
You only need a couple supplies!
Supplies for 3-tier Hanging Macramé Planter
- Wooden Ring
- Macramé Rope (this is the exact one we used)
- Wooden circles (we cut our own out of 1″ boards, but how cool would it be to use wood slices with the bark on the edges?!)
STEP 1
Lay out your macramé rope so you have 6 lengths of 30 feet. Then gather them up and find the center.
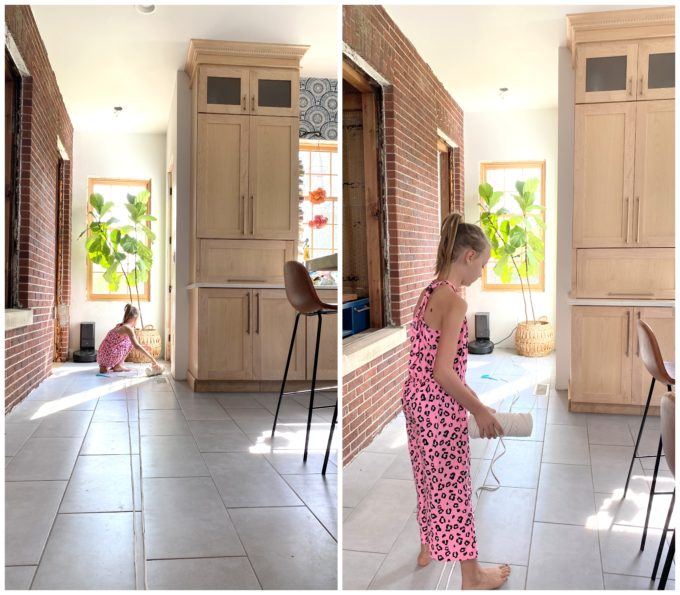

Once you’ve found the center pull through the wooden ring and make a knot.

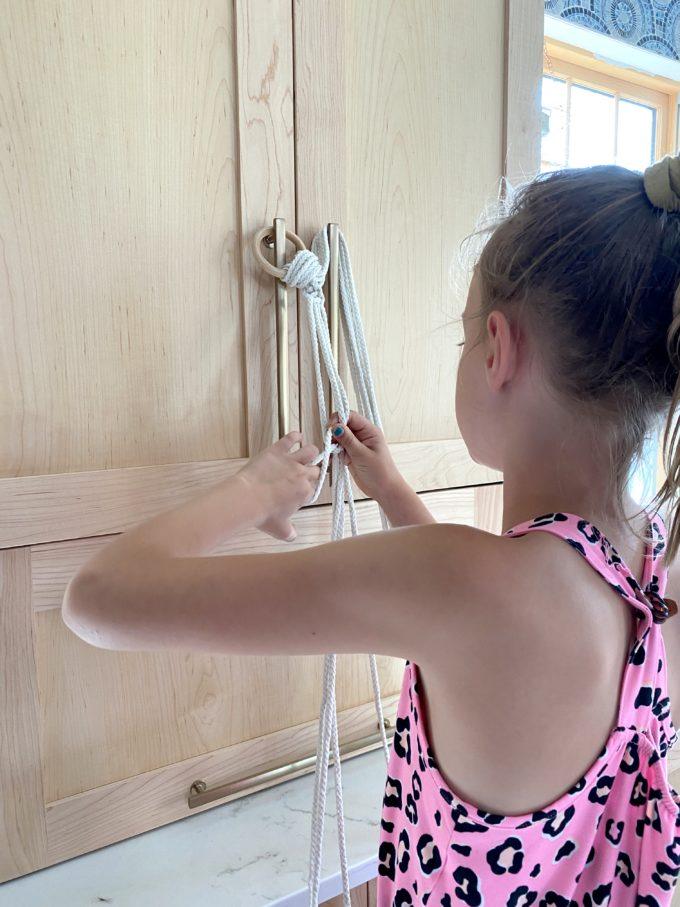
STEP 2
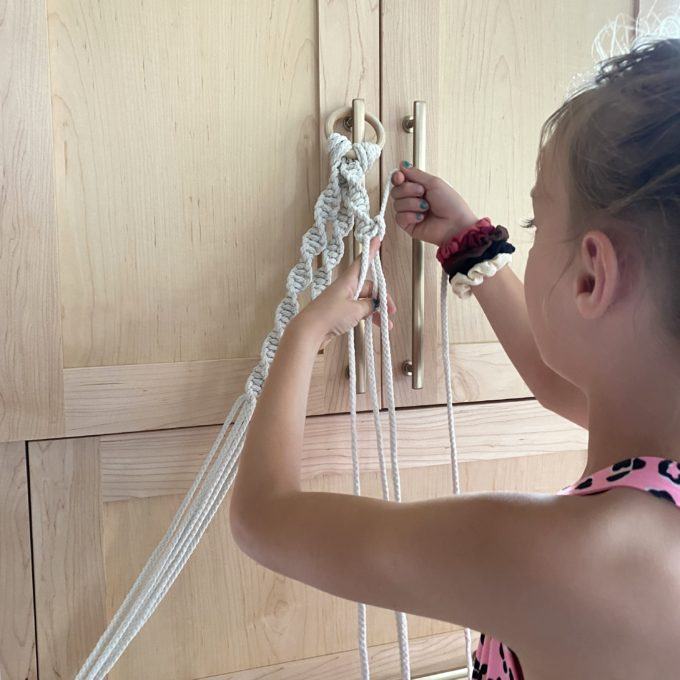
Now you should find a place to hook your ring that’s at a comfortable height. I used my kitchen cabinet.
Divide the strings into 3 sets of 4. We’re going to start working with one group of 4 to start with. (I pulled the strings I’m not using off to the side so I’m not confused)
This is the EASIEST macramé knot! We do the half square knot over and over and it makes a cool spiral!
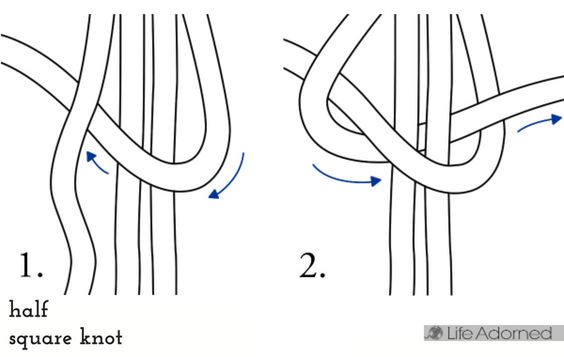
As you keep doing more and more half square knots, it will make this amazing swirl! Isn’t macramé easier than you expected it to be?

Keep doing the half square knot until it’s about 10 inches long. Then it’s time to move onto the next two sections of four. You want them also to be 10 inches.
STEP 3
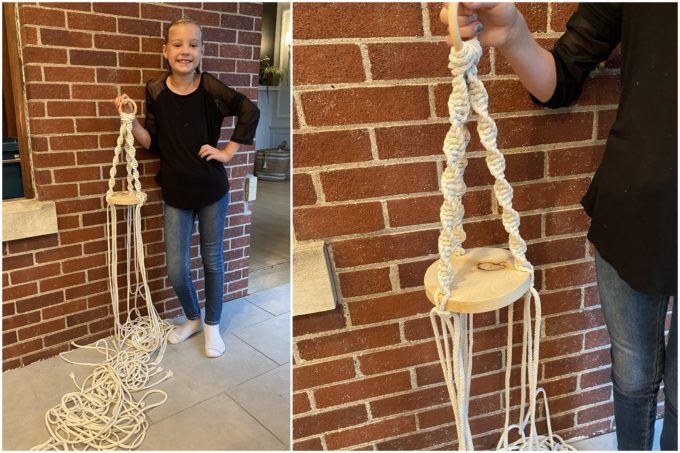
Once you have all 3 sections the same length of 10″, it’s time to add a wood circle! You can purchase wood discs on Amazon or at craft stores. But my mom just cut them for me with her scroll saw for this project. Either way works!
Our first (smallest) circle has a diameter of 5 inches. And we drilled 3 holes equally spaced. Then sand! You want to make sure your drill bit is big enough that you’ll be able to shove two macramé cords through them.

Take the center two cords from one of the spirals you have completed, and push them through one of the holes in your wooden disc. It’s ok if it’s a tight fit, as long as you can get them in.
Then pull the cord through until your wood disc is snug with the spiral portion of your macramé.

Now you want to bring the other two cords together, and those will be your center cords this time when you start to macramé again. Just get a couple half square knots on each of the 3 to hold the board in place.

Step 4
Continue to macramé each of the 3 sections in exactly the same way we have been doing it!

The length of these totally depends on your personal preference, and what type of plant you want to display here. For ours, we did a length of 10 inches on all of them.
Keep going!

STEP 5
Continue until they’re all 10 inches, then add a slightly larger wooden circle and repeat. (we used a set of nesting bowls as templates to trace our wooden circles.

STEP 6
When you’ve finally gotten down to your third tier of wood circles, it’s time to finish this thing off!
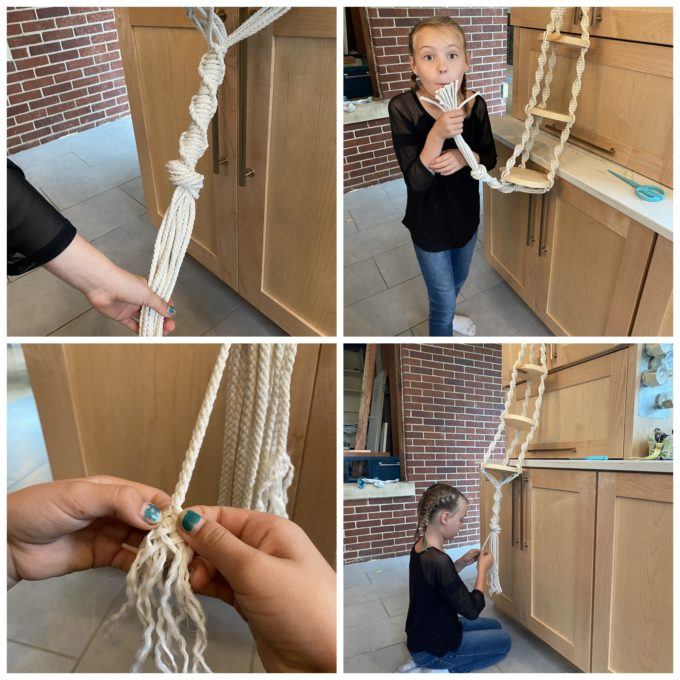
Instead of continuing the spiral half square knots, just do two so your wood circle is held in place. Then gather all the strings together, pull out the two longest strings that are let, and use those to make square knots around alllllllll the other remaining strings!

When you’re macramé-ing such a giant section, sometimes you have to use your hands to tighten the spiral and turn things to look just right as you go.

Continue this giant spiral until it’s as long as you want it to be.
STEP 7
Now it’s time to make a big knot, cut off the excess, and unravel those tails!

Guys, YOU’RE DONE! Time to load that sucker up with plants!

Using this macramé technique was so much easier than I expected, and I really love it! I’ll be opening my very own Etsy shop soon!

I hope that you’re inspired to try macramé, even if you’re a beginner. If I can do it, so can you!
Thanks for having me!
Della
P.S… be sure to check out my mom’s other plant-related tutorials!!
~~~~~~~~~~~~~~~~~~~~~~~~~
Thanks for pinning!

Related:
-

I've had this idea in the back of my mind for quite awhile... why not…
-

These DIY Planters are perfect for cascading Wave Petunias, and it will be so fun…
-

I titled this post 'How to Propagate Pothos Plants' ...but the truth is, this method…
Thank you for interesting article.
Della, great job!
Thank you for sharing this with us, Della. I love the finished product. It’s amazing.
Della, I was very impressed with your macrame tutorial! I haven’t ever done it but am excited to try now. Thanks too for doing a blog post so I’ll have your directions handy when I start. Can’t wait to try it and know exactly where I’m going to hang it! Thanks for getting me started!
Amazing job!!! Thank you Della for sharing this with all of us.
Dear Della thank you so much for sharing yourself with us. I’m in total awe that a 9 year old girl is so focused and obviously so gifted. Your technique and explanation were very clear and I think I’m ready to give it a try. Be brave and bold with your talents and keep up the awesome projects.
This is SUCH an awesome project – thanks for sharing something that is do-able for a beginner!!! The result is a fabulous piece of ART!!! great job and very impressive (for a kid OR an adult!!!)
This is an amazing tutorial!!! Great job. I think a star is born 🙂
What a lovely plant hanger,shows off your talent and your plants perfectly.May i offer one small it of feedback. As your hands appear in close-up,either ditch the nail polish,or make sure its as perfect as the work you’re showing🙂
Great job Della! Your tutorial was very clear, concise and easy to follow! Good for you! You did a much better job than I could have ever done. Thanks for sharing!
Wow!! EXCELLENT job, Della (my niece is named Della!!)!! U are a natural!! I recently taught myself to macramé as well!! I LOVE it!! I use the extra string, like the string u cut off at the end of the video, for other projects, like tying the macramé pieces together at the top or bottom of a planter! I also made my daughter & me macramé keychains!! I’ve got lots of macramé string to use so keep the projects coming!!
Great tutorial! I used to do macrame when I was (much) younger. I also like your braids – cute hair.
Beautiful!!!
Della,
Well done! I showed your blog post to my sons who are 9 and 10 years old and they were impressed, not only with your macrame skills but also with your writing skills! Writing directions is hard, way to go!
WOW! You sure are one talented girl Della, I’m really impressed! I’m 61 years old and although I’ve done tons of crafts, macrame isn’t one that I’ve ever tried, but you’ve inspired me to give it a go. I really hope that I’m as good at it as you are!
Good luck with your Etsy shop!
Judi in the UK
Sorry Della, I should have said that when I give it a try, I will of course be following YOUR tutorial, as you make it look really straight forward, so thanks for the lesson.
Judi in the UK
Great job, Della! Thanks for sharing. I am thinking I may try to make one for myself.
What a pretty plant hanger! Your pictures will really help people understand how to do this.
Della,
You did an awesome job! I love macrame and did it in the 70s which makes me really old right now. LOL A tip to help make your crafting easier when working with long strands of cording is to butterfly the cord and tie it with rubber bands. Basically you wrap the cord back and forth on your hand, wrapping around your thumb and pinky until most of the cord is gathered up and secure it with the rubber band. When you need more cord, it pretty much just pulls out of the band. You should be able to find instructions online that will show you what I mean.
Keep up the good work and I can’t wait to see your Esty shop.
Maureen
Della,
Thank you for sharing your tutorial!! I can’t wait until you open your Etsy shop, I’m looking forward to purchasing one of your creations. I have a spot ready for it. ?
Della, I love your 3 tier plant stand tutorial. Thanks so much for sharing your creativity.