• Home
  • About
  • Tutorials
  • Recipes
  • Furniture
  • Contact
    • Contact
    • Infertility
    • Disclosure
    • Privacy Policy
  • Shop
    • Facebook
    • Instagram
    • Pinterest

Reality Daydream

The Dream is Free, The Hustle Sold Separately

  • Home
  • About
  • Tutorials
  • Recipes
  • Furniture
  • Contact
    • Contact
    • Infertility
    • Disclosure
    • Privacy Policy
  • Shop

Brenda’s Hutch Modification (and stencil!)

April 23, 2012 by Bethany Sy

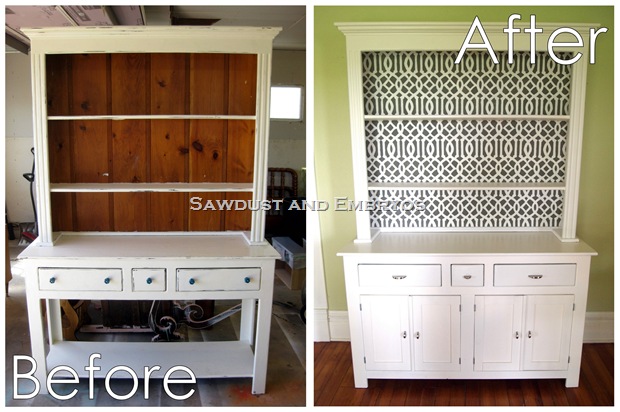
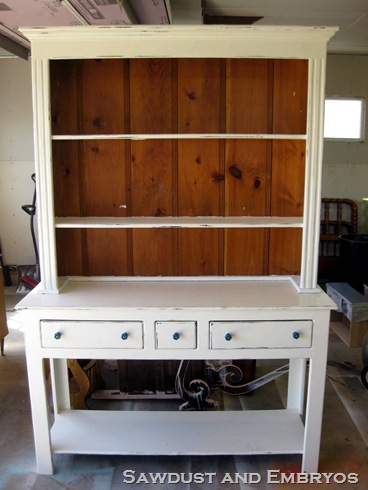
So we’re back with one final furniture project from Brenda! She had this hutch thing that she was using to display items, but she wasn’t loving the distressed finish anymore, and she really needed some storage below for china and such.

IMG_2930

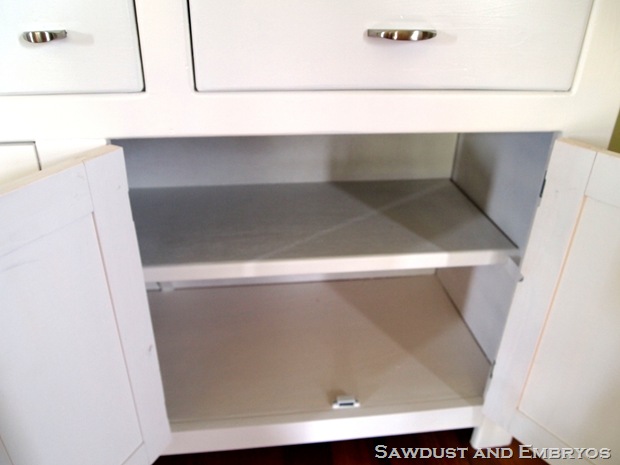
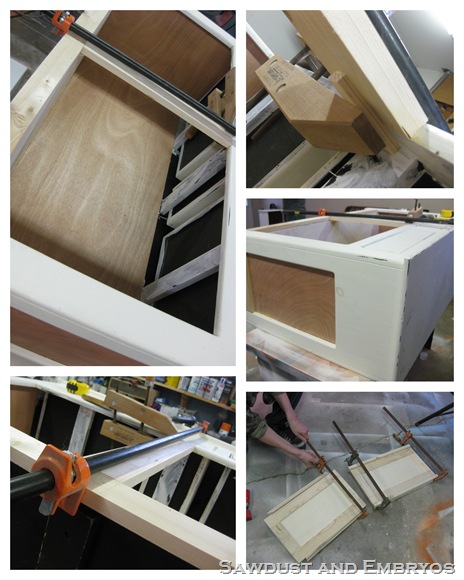
So Nick set out to enclose the open/bottom area, and put in a shelf and 4 doors along the front. Believe it or not, we get a project like this and Nick gets all excited. To me it just sounds complicated and time-consuming, but for him it’s an opportunity to use his problem solving skills.  AND HIS POWER TOOLS.

hutch

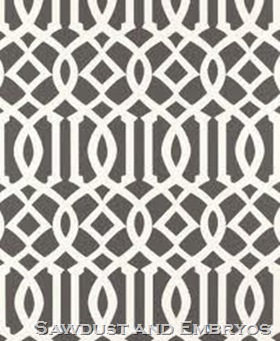
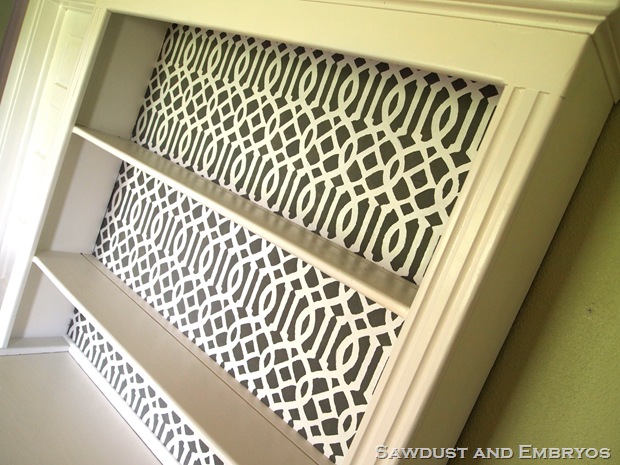
Luckily, I wasn’t without a fun project with this hutch. Brenda wanted to lose the wood beadboard, and instead have a crisp white/gray lattice design.  Like this:

images (1)

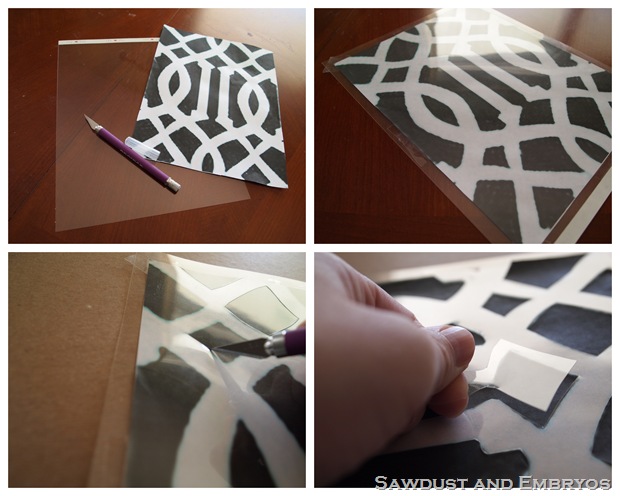
My first thought was to use the projector… but with all the detail involved, it seemed like a lot of tracing, followed by a lot of tedious painting. So I set out to create my own stencil.

***FOR A FULL TUTORIAL ON HOW TO MAKE YOUR OWN STENCIL, CLICK HERE!!!!***

hutch1

Making my own stencil took about 5 minutes. And cost less than $1. Yep, you heard me.

P4173606

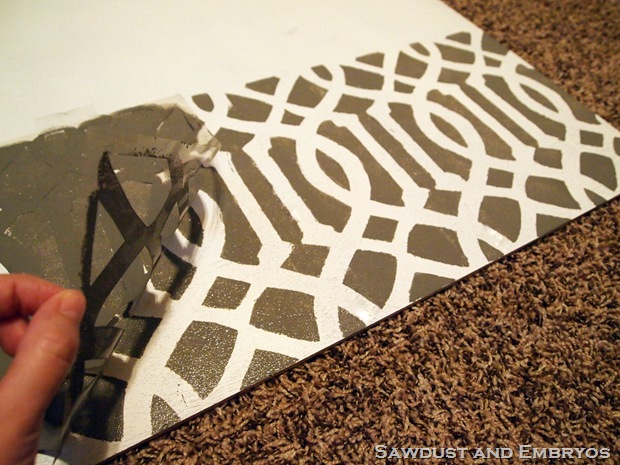
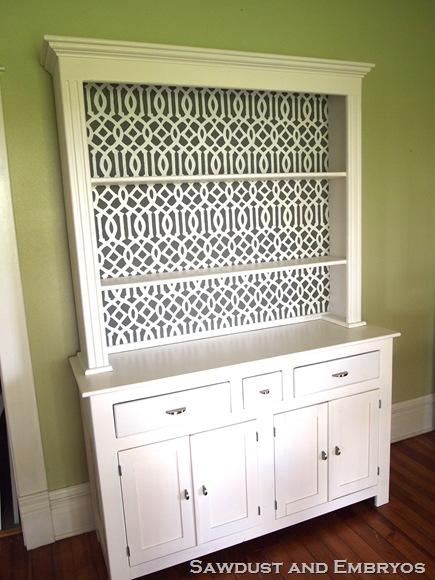
Once Nick finished all his carpentry business, we painted the whole body of the piece a crisp white…

P4203748

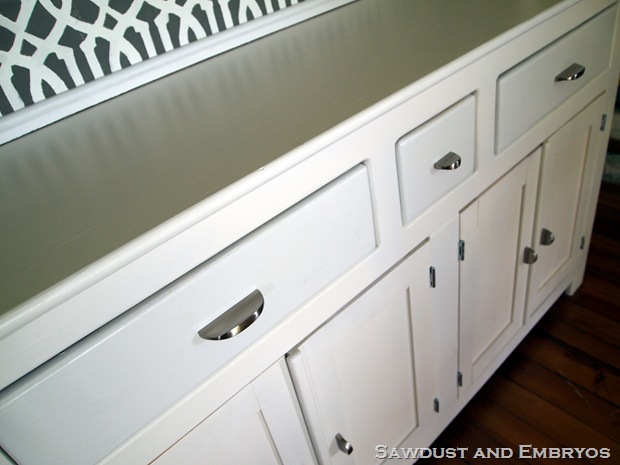
Then we put on the the lattice-stenciled backboard, and some new hardware… And VOILA!!!

P4203738

P4203741P4203745

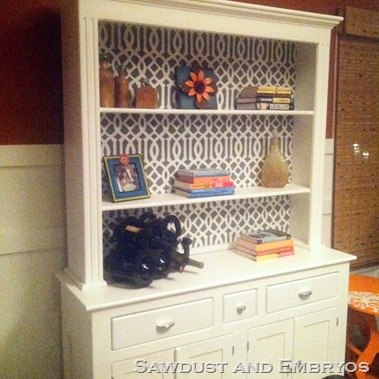
And here it is… all set up at Brenda’s house!!

photo (1)

Didn’t Nick do a great job with enclosing the bottom? It looks so sleek and awesome!
hutch2Be sure to also check out our tutorial on applying upholstery tacks or nailhead trim to furniture!


*

Related:

  • Stripping an Old Stained Desk

    We love the original wood of our library, and wanted to find a desk that…

About Bethany Sy

Nick and Bethany Sy are the creative free-spirits behind DIY/Lifestyle blog, Reality Daydream. They recently purchased a historic mansion and have been documenting the ups and downs of renovation and making this home their own... all while sharing tips and tutorials along the way! When they found themselves in the trenches of infertility, they started a journey that would prove to be their most important DIY project ever, and have 3 beautiful girls to show for it. <3

« Foolery in the Orange Chair
A perfect moment… »

Comments

  1. 13

    Beth @ Sawdust and Embryos says

    October 7, 2012 at 2:42 pm

    Hi Vicki! We just used a sheet of 1/4″ plywood cut to size! After tearing out the old beadboard, we just popped in the plywood (after it was stenciled) and stapled it in with an industrial staple gun!

    Reply
  2. 14

    Vicki says

    October 7, 2012 at 1:45 pm

    Love the stencil. Wondering what the new backboard material is? Did you just remove the old backboard and replace with the new?

    Reply
  3. 15

    Vicki says

    October 7, 2012 at 1:44 pm

    Loving this. Wondering what material the new backboard is?

    Reply
  4. 16

    Tracy Kalescky says

    August 29, 2012 at 2:15 pm

    I just found your site and am loving all the projects! I can’t wait to go out and some furniture to redo!

    Reply
  5. 17

    Bethany says

    July 18, 2012 at 4:17 pm

    We do seal our pieces to ensure durability. We either use Polyurethane (oil base) or Polycrylic (water base) depending on the piece. It’s just a clear coat that protects your masterpiece! 🙂

    Reply
  6. 18

    Alyssa says

    July 18, 2012 at 4:12 pm

    Question for you…I was reading on a nother site about a lady who put paint conditioner in with her paint and then used a sealer after she painted the white on. Do you do that or do you just prime and paint and that’s it?

    Reply
  7. 19

    Maranda says

    April 24, 2012 at 2:16 pm

    Wowza! This is amazing. I cannot wait to see this tutorial for the stencil!

    Reply
  8. 20

    Anonymous says

    April 24, 2012 at 2:11 pm

    I’m very impressed, great job. Mary in NY

    Reply
  9. 21

    Renee' says

    April 23, 2012 at 9:17 pm

    Holy smokes that is amazing! I love the piece much better after you two did your magic!

    Reply
  10. 22

    jennifer says

    April 23, 2012 at 9:01 pm

    You are amazing! This looks stunning. Love the hidden storage you added and the awesome paint job.

    Reply
  11. 23

    Anonymous says

    April 23, 2012 at 7:44 pm

    Seriously! That is amazingly beautiful. Such talent you two have such talent.

    Reply
  12. 24

    Chelsea @ Chelsea Eats Treats says

    April 23, 2012 at 7:00 pm

    Wow it looks awesome! Great teamwork!

    Reply
  13. 25

    Jess says

    April 23, 2012 at 6:59 pm

    Love It!!! You guys are awesome! Thats all have a good day.

    Reply

Leave a Reply Cancel reply

Your email address will not be published. Required fields are marked *

Recipe Rating


  • Facebook
  • Instagram
  • Pinterest
  • RSS
  • YouTube
We are Nick and Bethany! Welcome to our blog, Reality Daydream where we share our DIY adventures!
Click here for lots of art projects using only wood stain on furniture!!
Please feel free to share or pin my posts! You're welcome to use ONE of my images (no collages or pinnables) with a link back to the corresponding post. Please do not edit or crop that single image in any way. Improper use of my photos, ideas or words is a violation of copyright. Thank you!

Categories

Attention: Almost any do-it-yourself project involves risk of some sort. Your tools, materials, and skills will vary, as will the conditions at your project site. Reality Daydream has made every effort to be complete and accurate in the instructions of the plans on this website. Reality Daydream will not assume any responsibility or liability for damages or losses sustained or incurred in the course of your project or in the use of the item you create. Always follow the manufacturer’s operating instructions in the use of tools, check and follow your local building codes, and observe all commonly accepted safety precautions.


Copyright © 2025 · Modern Blogger Pro On Genesis Framework · Customizations by Sweet Theory Designs · Privacy Policy · Log in