One DIY I’ve always wanted to try is doing a photo transfer onto wood! Have you ever tried it?
I know there are several different ways to do this, but I chose the one that looked funnest, easiest, and looks the most awesome when it’s done! I love the way you can see the wood grain showing through the image when you’re it’s finished.
*This post contains affiliate links.*
Supplies for Photo Transfers to Wood
- Slab of wood (I used pine because it’s cheap and has gorgeous wood grain)
- Photo printed on basic printer paper in the size you want
- Mod Podge
- Foam brush
- Rolling Pin
Since Father’s Day is coming up, I wanted to try this photo transferring technique on something that I could give to my dad as a gift. Handmade gifts are the best, right?!
He and my mom have always loved canoeing, even since very early on in their marriage (they just celebrated 45 years being married!)
1. Choose an image to transfer to wood
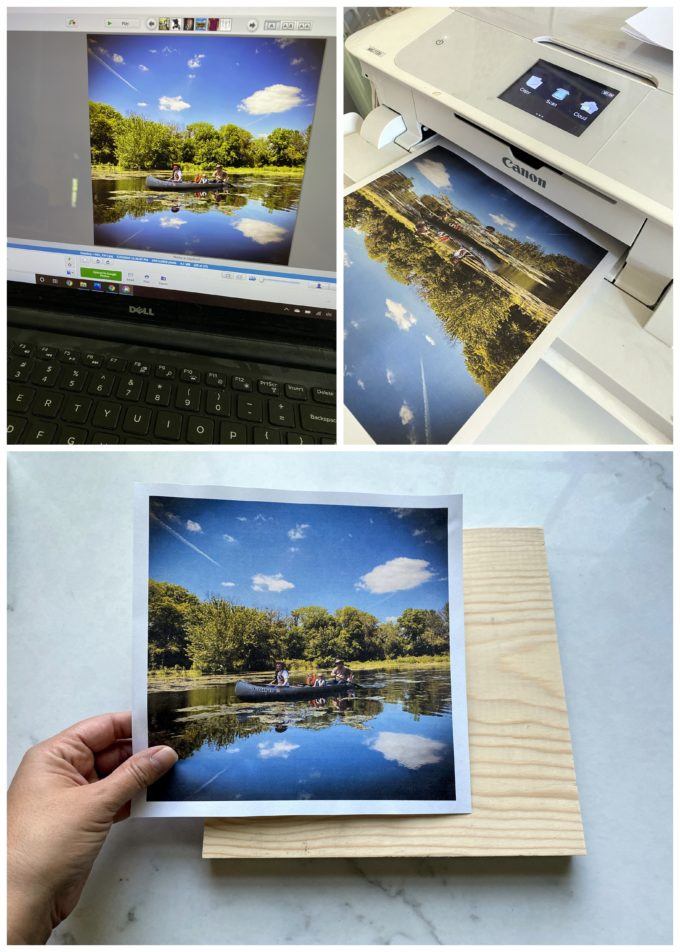
I wanted to use a pic of him and my mom canoeing at George Wythe lake a few weeks ago with one of my daughters and my niece.

2. Print out your image onto printer paper
I rummaged around our woodshop until I found a slab of pine that was about the right size, and printed my image onto a plain piece of printer paper (can be either ink jet OR laser printer!). This is important! DO NOT USE PHOTO PAPER!
Note, when you transfer the image to wood, it will be a mirror image of the original photo. If there’s text on your image, or you just really don’t want it to be mirror image for another reason, you can use an app or photo editing software to create a mirror image of the original before printing it.
3. Smother in Mod Podge
Glob some Mod Podge on the FRONT of your image, and spread it on evenly with a sponge brush. Make sure you have a nice smooth coat that covers every square inch of the paper! I laid out a sheet of wax paper to protect my surface during this step.


3. Smooth image onto wood
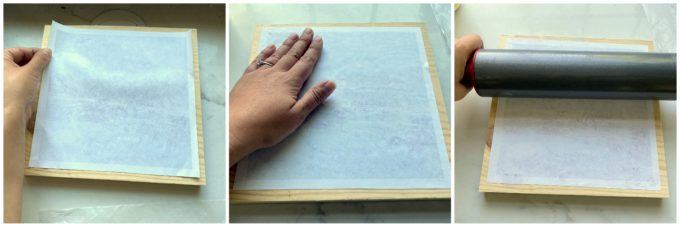
While the Mod Podge is still good and wet, go ahead and flip it over and press face-down onto the wood, smoothing from the center to the edges. It’s easy to move the image around a bit even after it’s been placed on the wood, so you can make sure it’s nice and center now. Then roll with a rolling pin to really smooth it out. I almost skipped this step, but I’m so glad I didn’t. I really made the paper flush with the wood!
4. Let it dry
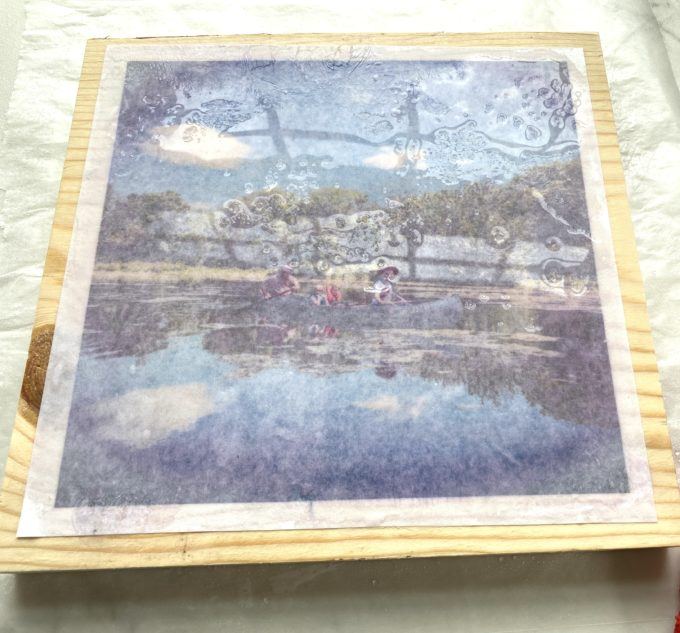
This step is the hardest part of the process. YOU MUST let it dry for 24 hours. This isn’t the time to cut corners. Set it aside, and set a time on your phone, and just PUT IT OUT OF YOUR MIND. Longest 24 hours of my life. 😉

5. Rub off paper
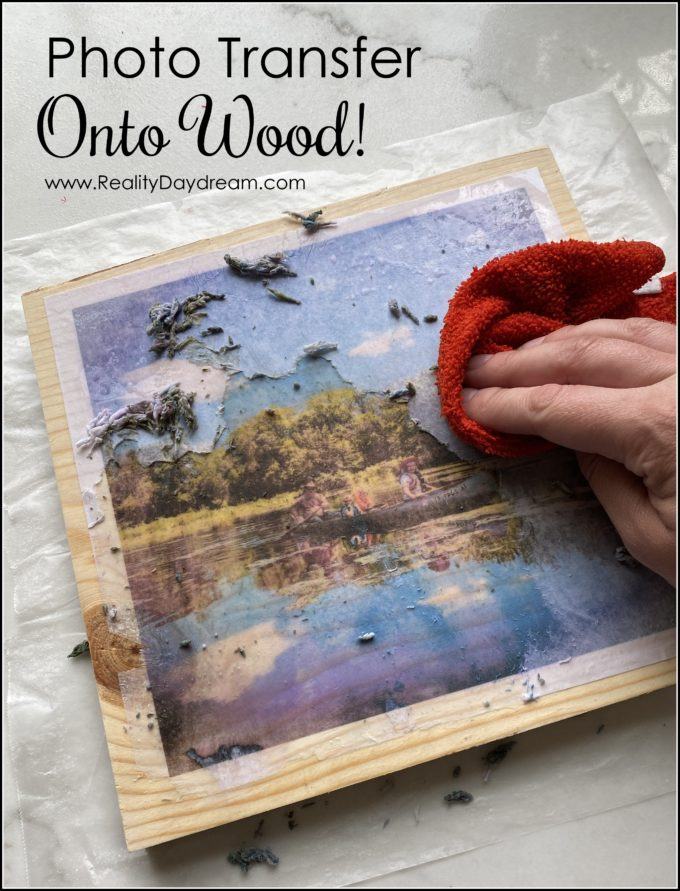
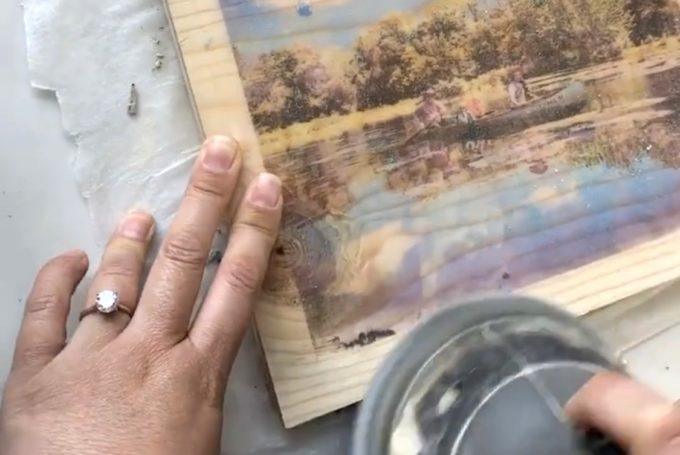
Now that the entirety of the 24 hours has passed (right?), it’s time to soak down the paper and peel/rub it off! I sprayed my paper down with a squirt bottle of water, and let it sit for a few minutes. You could also just lay a wet washcloth on it to soak instead.
With a wet washcloth (not dripping), start gently rubbing away at a corner of your image. The paper will come off, leaving the image permanently a part of the wood!


Once I felt like I had the majority of the paper off, I let it dry for a few minutes so it would be obvious where I still need to remove some paper.

Then I sprayed it down and let it soak again. When it’s wet with a little standing water, you can really see the spots that are raised and still need to be rubbed off!

6. Sand the edges (optional)
I took an orbital sander and sanded off the edges a bit to make it look more organic… like the wood and image have a smooth transition into each other.
7. Seal with Mod Podge
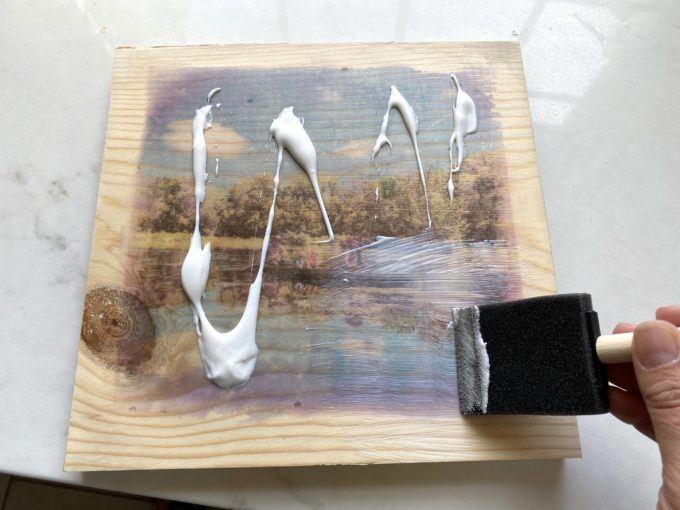
After letting the whole thing dry completely (and confirming you got all the paper off), it’s time to seal this baby! Brush on a generous layer of Mod Podge of the entire surface. It will appear white at first, but dries completely clear. AND it will make your photo appear even more vibrant and bright than when it was dry!


It’s not perfect, but I even love all the imperfections!
Nick helped me build a little frame for this guy, and I’m so incredibly happy with how this turned out! I can’t wait to give it to my Dad for Father’s day to commemorate his love for canoeing!

I was originally planning to paint the frame white or black, but I actually kind of love it being the same wood as the photo transfer! It really allows the image to be the star!
I hope you enjoyed this tutorial, and will give this technique a try for yourself! It’s such an easy DIY and has super fun results!
As usual, if you try one of our project, please tag us on social media (we’re @RealityDaydream on Instagram and Facebook)! Or email us at beth@realitydaydream.com!
~Bethany
~~~~~~~~~~~~~~~~~~~~~~~
Be sure to check out our master list of DIY Handmade Gift Ideas!

Thank you for pinning!


I’ve tried this project many many times I have inkjet printer but almost all the time if the picture doesn’t rip I have the picture be like faded out like it started out bright then faded or I have like white all over the picture that doesn’t want go away what am I doing wrong
Can this be done on a PAINTED piece of wood?
First learned this in high-school and we used painted wood.
Can I put a gloss coat over it to seal it once done and all is dry.
Help! I’ve done this twice and my image is not transferring, it just ends up a piece of paper glue to the wood. I’m printing a color image at FedEx, using the Mod Podge Photo Transfer Medium, waiting 24 hrs and leaving a wet facecloth on it to wet the paper, rubbing in stages nd only a thin layer comes off. I’m still left with paper on the wood without any grain showing through. What am I doing wrong?
Yikes, I’m not sure! I’m so sorry.
Use regular paper
You need to find out what kind of paper it is. It won’t work with photo paper.
So i tried this and the picture rubbed off completely..did i not use enough water? Did i rub too hard? Im going to try again. I really love this idea and want to pull this off. It was a major pinterest fail!!
Bummer! This actually happened to me the last time I did this project too, and I can’t figure it out. I’m so sorry this happened to you!
This did not work for me. I followed the instructions and even waited 2 days to rub off the picture and it turned out looking like faded blobs of color on wood. The only difference is I used modge podge for photo transfer. 😭
I’m so sorry… that’s so weird!
Can I do it with just normal pva glue or does it have to be mod podge
I’ve only tried it with Mod Podge, so I’m unsure.
Is it possible to reverse print the picture? Then, when the picture is transferred to the wood, it will not be the mirror image.
Yes you can totally reverse the image before transferring to wood. And if your image has any text on it whatsoever, I highly recommend doing that!
I love this and I think I am going to an old photo for my Dad for Father’s day.
Such a great project!! Thank you for sharing. Does it matter what kind of printer you have??
It can be ink jet OR laser printer!