Three things to be excited about today…
- It’s Friday (nuf said!)
- We’ve randomly chosen the winner of our DIY Headboard Giveaway! (Diane!… who ate apple cinnamon oatmeal, we’ll be in touch with you!!) Also… CANNOT believe there were 492 entries… you guys rock! We’ll most likely be doing another giveaway like this at some point, so don’t be too dismayed if your name isn’t Diane.
- Below is one of my PROUDEST pieces of furniture of all time.
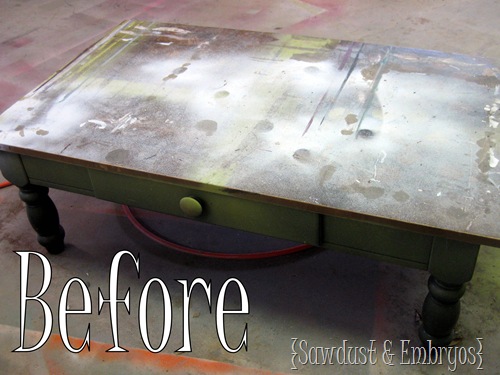
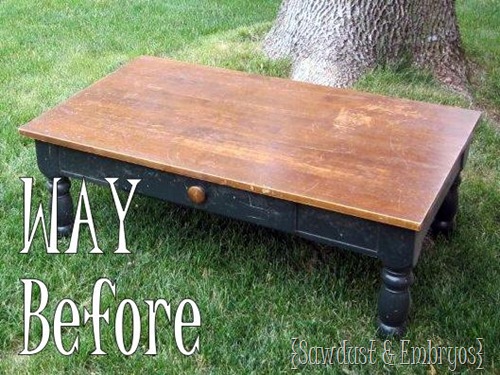
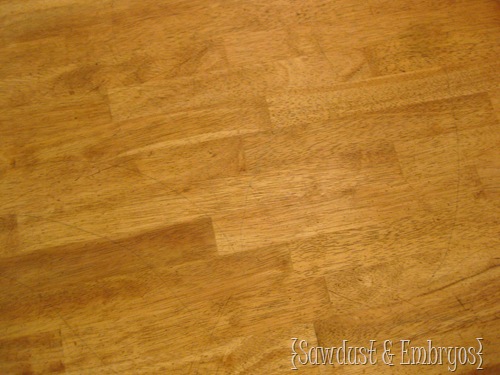
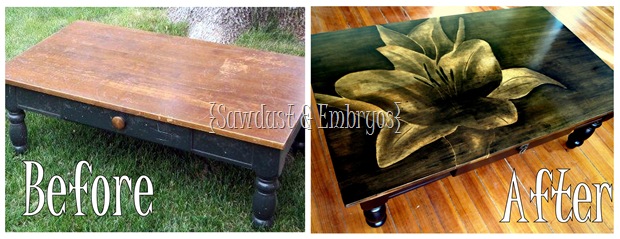
Let’s start with the before picture:
We picked this up at a coworkers garage sale. It looked a lot nicer than this at the time.
But we had painted other pieces ON TOP of it and gotten lots of goobers and nasties and overspray all over it. We didn’t care because we know we were going to have to strip the entire surface anyway.
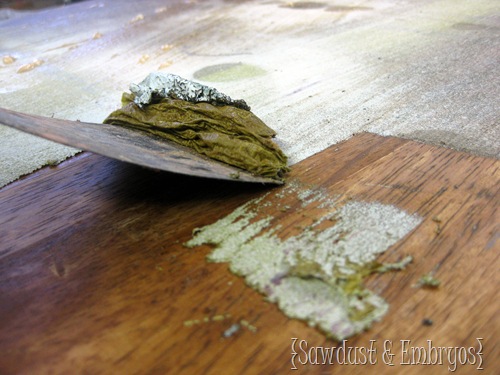
Stripping is a dirty job. Use protection. And refer to my very detailed stripping tutorial for details, tips, and tools/products I prefer.
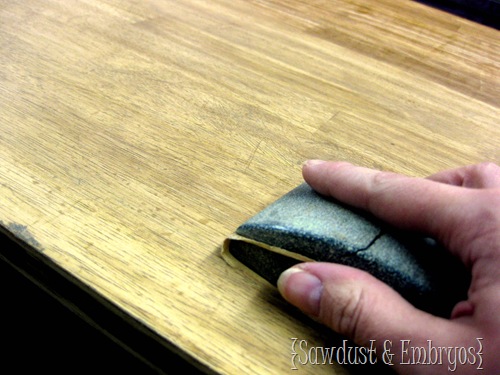
Once my top surface was free and clear of all nasties, I sanded her down with 120 grit, and then again with 220 grit. And then 7 more times with 220 grit. It needed to be SO smooth for what I was about to do with it.
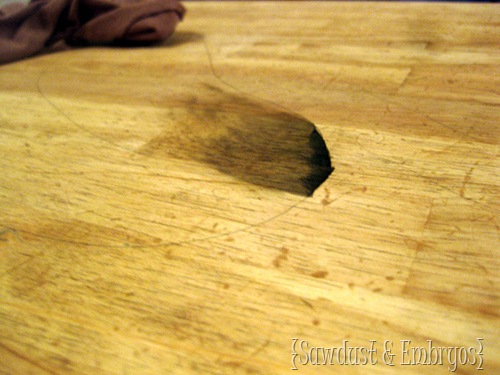
Finally I was ready for the FUN part! After wiping down the surface to get all the sawdust off, I lightly sketched out the outline of a flower. You totally can’t see it in this picture… but you get the point, right?
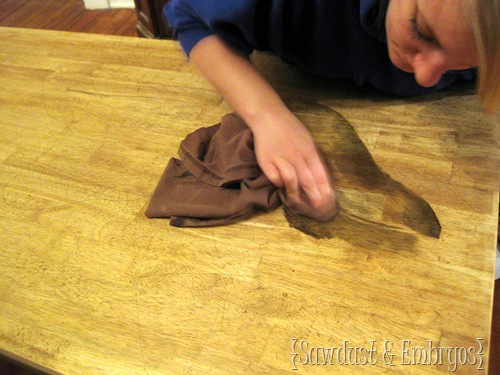
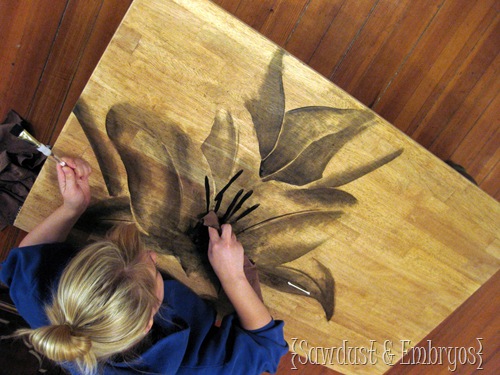
Then I whipped out my Minwax Ebony and a small paintbrush, and began staining and shading… using the same technique from our previous tutorial. (UPDATE: I almost exclusively use my finger with a cloth to apply the stain rather than a small paint brush. I find that it’s easier to control how much stain you’re applying and you’re able to get much crisper lines and smoother shading)
The key is to SCRUB SCRUB SCRUB with a dry cloth to achieve that perfectly blended shade. It’s a lot like drawing with charcoal.
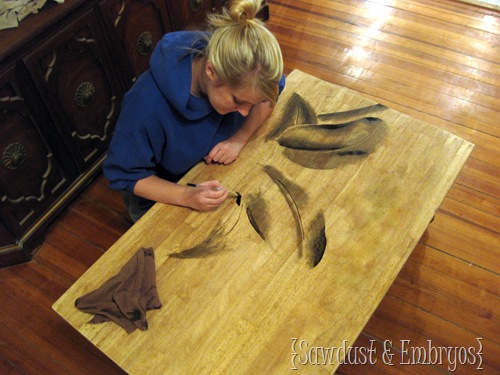
I just worked my way around the flower, occasionally stepping back to decided where I needed to add more stain to get the look I was wanting.
This is FUN, my people. It really is.
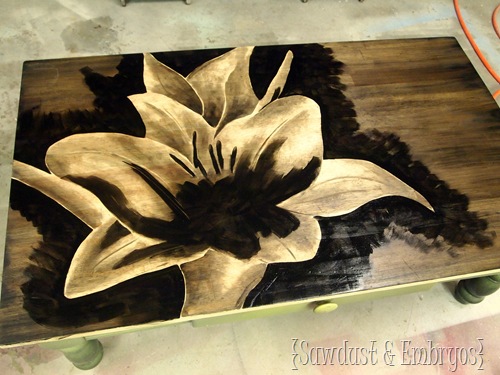
I decided to really make the flower pop by staining the rest of the table solid and dark. This next picture was taken before the surrounding stain was wiped off.
At this point, I took a step back, and decided which parts were in a ‘shadow’ and needed to be very VERY dark. The more contrast, the more striking this technique is!
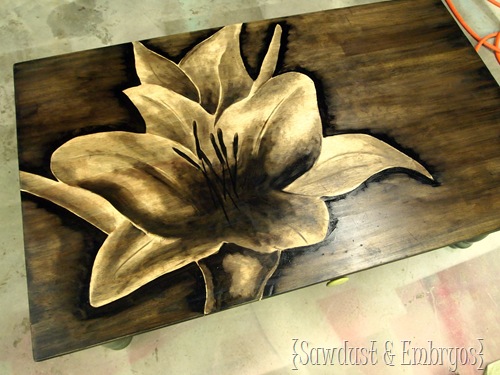
I let that sit for several minutes, and then went back and scrubbed a little off around the edges. And then waited some more. If you’re going to give this technique a try, I highly recommend referencing our more detailed tutorial from our Burnpile Buffet project.
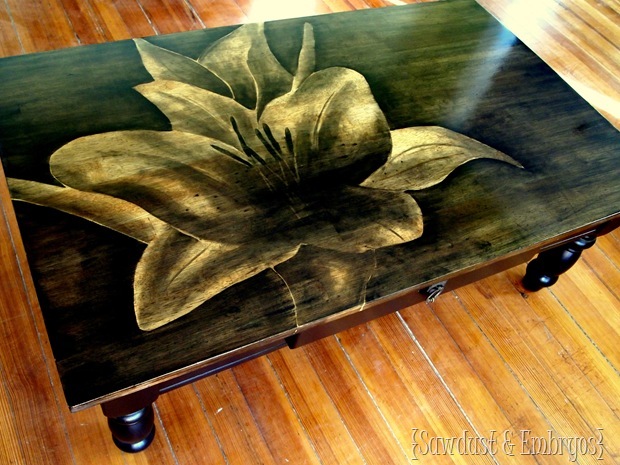
And then I was done. And I feel like a proud mama…
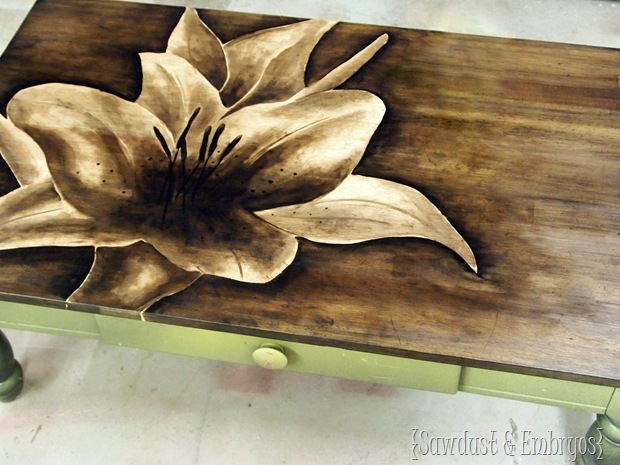
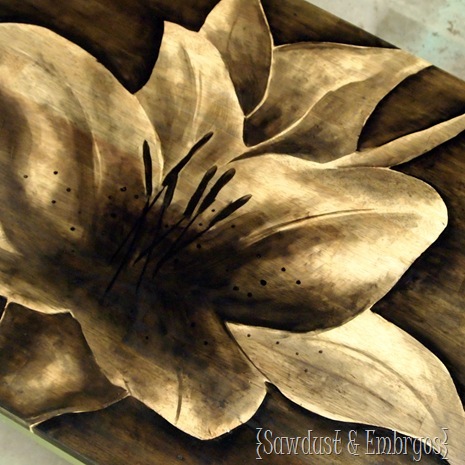
I used a Q-Tip to make those little speckle-y marks on the petals.
I primed and painted the base a glossy black, and the whole thing got several coats of this glossy poly. I’m super bummed, because these after pictures didn’t turn out as good as I wanted, because the glossy surface is so reflective and is so hard to capture on film.
And who isn’t a sucker for an incredible before/after picture!!
Have you guys been staining anything lately? Or trying your hand at something unconventional? So long as your not using your Granny’s heirloom antique curio cabinet as your guinea pig, you’ve got nothing to lose! Throw caution to the wind!



If you are photographing shiny things you need soft, heavily diffused light. I know the cottage core aesthetic is like god-rays through the window and everything is bright but you can take photos early morning or late evening and have a very warm mold.
Hi, Great tutorial. I have one critique of it though. I’ve looked at a lot of your DIY tutorials and you never leave a link to a pattern. You are a great artist and can draw your idea out, but many of us, myself included are “ duds “ when it comes to freehand drawing. Please,please, please leave some kind of pattern for those of us who can’t draw this stuff freehand. I really want to try this, but can’t because I have tried to draw it out and can’t….. BOO HOO……
I’ve thought about that Ronny, but I’m not sure how to provide patterns that could be used without an overhead projector. Have you checked out my slow ste-by-step tutorial for drawing out the lotus flower? Here’s the link: https://www.facebook.com/RealityDaydream/videos/1155719241162387/
This is beautiful! I am going to take this on as a project in August. I am not an artist, but consider myself very crafty. Any tips on shading and highlighting? Also what are the best flowers to start with. I love dahlias, would that flower work?
Hey Kristen! I’m so excited that you’re going to give it a try! My best tip is to play around with this technique on some scrap wood before you tackle something big. I have a beginner’s tutorial here>> https://realitydaydream.com/burn-pile-buffetpart-2-using-stain-to/
and that should help you get the feel for the shading. Dahlias are the PERFECT flower for this technique because there are so many deep shadows in the petals and such. Here’s an example of a dahlia I did on a dining table top! >> https://realitydaydream.com/2015/06/dahlia-stained-artwork-on-dining-table.html
When can you come to Honolulu?
Lol SURE! Are you paying for airfare?! 🙂
I am just trying your technique and I was wondering how do you keep the stain from bleeding??
Hello again! I’ve been out of the creative loop for a while, but saw that the new Baby arrived! LOVE HER NAME!!!! Anyways, after months of searching, I found the right size table (at the right price) for our B-Nook and am trying to decide between the Lotus flower again, and the lily here. Did you free sketch this one, too? Or was it from a photo? I’m wondering because if it’s a photo… I’d love to know where you found it. This is gorgeous, too!
Shelley send me an email and I’ll forward you the lily image I used! Sawdustandembryos@gmail.com
I was looking for tips on spray painting because I’m refinishing an old coffee table. Somehow I stumbled onto this site where I found the EXACT SAME COFFEE TABLE. Mine looked closer in state to the way before picture, but same green base and everything. Gave it a red mahogany stain on top and spray painted satin black on the legs. What a sturdy table.
Love this technique, will be trying on a little dresser I resuced from the curb. I actually am bummed because there were several peices of furniture on the curb last weekend that I decided to pass on. But I will not be so picky after looking over your blog. Thank YOU!!
You should try the rockler homestead dyes.
This makes me wish I could draw..even a stick figure is a problem for me!! This is absolutely, beautiful. Amazing work. I just found your site, and I’m not getting any work done I’m supposed to be!
Veryyyy inspiring and your writings made me smile too! I’m going to give your stain shading technique a go. Thanks for sharing!
It looks amazing. You’ve made it look so simple.
It looks amazing. You’ve made it look very simple but I’m not convinced.
Beautiful. What type of stain do you use? Like as in gel, penetrating etc..
I’ve always been good with wood work & staining since I was young. Seeing what you did gives me the desire to create something with these antiques that I pick up at auctions & yard sales. Something beautiful like you have done. Thank You for your artistry.
I have to echo what everyone else says, you are very talented. I really like your website. There are a lot of ‘how to do it’ sites on the web, but many of them seem to overestimate the skill level of the viewer. Some of us need a little more explanation sometimes, and I find that your site provides that. Thanks.
thank you for this idea. I borrowed it to renovate an old dressing table into a sewing table. Not quite done but the top is. spent hours practicing drawing on freezer paper and more hours actually staining the wood using a qtip. but it looks lovely (at least to me). doing the black stain on the frame while leaving the drawer fronts and side panel natural. repainting the hardware in a gloss black to go back on the drawerfronts. I would send pics but unsure how to include here.
I began a wood project from a “natural/non-toxic” perspective (before I had found your tutorial here! I stained the well sanded surface with burgandy wine, several coats until I got it where I liked it. Since I was late to this party ;o) I thought I could then make a nice black stain to do the art piece I wanted to apply to the wine canvas. After re-reading your instructions I realize I may have myself in a corner and need to start over, If I “protect the wine layer with 50:50 sealer and mineral spirits, would that protect the wine layer when I rub to control the gradient and still leave a porous enough surface to do the “painting” or should I seal the wine and can I get the same effect with black paint? Or do I sand it all down and start over, LOL!!! Was so excited to sketch out the painting today, now kind of depressed wondering what the right choice is! Any help would be so greatly appreciated! Thank you for your time and for sharing this beautiful and inspiring tutorial!!
Ann Marie, I would not seal the wine. Make sure the wine has had several days to fully dry (since it’s water based and stain is oil based) and then do your staining treatment right over it. If you try to seal the wine, the stain will have nothing to soak into. There’s a possibility that you could achieve a similar effect with black paint, but I’ve never tried it. Let me know what you decide and send pics when you’re done!
I just discovered your blog via a repost from All Things Thrifty of this project and HAD to comment; this is seriously one of the most jaw-dropping, stunning re-do’s I’ve ever seen! WOW!!!!! Like so good it makes you want to slap somebody, heh! Love, love, love.
I just wanted to say thank you SO much for the tutorials!!! I decided to try my hand at it on a desk, and I LOVE it! its so calming and simple!! I work at a really natural minded place, and asked if I could do this to the picnic tables.. They said yes and I finished both tables today! I was going to do the Lotus, and then another pretty flower I saw online, but I lost the other flower! So, I ended up doing this complicated one!! WOW! It was difficult, but I really liked the results!! I got a lot of compliments.. But I just wanted to say thank you so much for putting the tutorials up! Someday I will be able to do my own flowers! 😉
Oooooooo! YAY! Please send pics! I just HAVE to see!
sawdustandembryos@gmail.com
Thank you Beth! I don’t have a huge ventilated area and I do have small kiddos, so I was looking for a more natural way to strip this when I got another idea I think I may try first…it involves a lot of decoupage – first with contractor’s paper or brown paper bags to create a lighter wood looking pallet. Some of the dark acrylic will still show through, but it should be light enough to then decoupage the flower on top and re-darken around it. That said, I would like to print an image of your flower to cut out and use for this. Is there any way you could take a photo of the whole flower on this piece as straight down on it from overhead as possible (aerial view) and email that to me? This is assuming you’re okay with my printing and using it at all…??? Please just let me know if you’re not and I’ll figure something else out. Thanks again Beth!
Sure… Totally! I don’t mind at all! We sold this piece almost immediately, so I can’t take a picture from above. But here’s a link to a rug we used as inspiration:
http://pinterest.com/pin/226094843763307641/
Hi Beth…your work blows my mind…I am inspired! I have been slightly dissatisfied with one of my finished table projects (therefore feeling it is not actually finished after all :~), but after seeing this, I know I want to add this same flower to the center of my table…if it’s possible. I say that because there are a few challenges: The table is already really dark (I want to add a lighter flower – as close to what you’re showing here as possible), it is painted with acrylics (2 shades of green, gold & black), it is sealed (polyurethane), the paint I applied has suffered some chipping (all very small), there is one spot of damage where an exposed wood sliver got snagged/pulled/lifted (which is now a spot of naked slivers), and there are still a few fragile spots of swelling that I fear will be further damaged if I try to remove any paint using scraping or sanding.
The piece is wood, but I’m pretty sure I won’t be able to use stain; I will need to paint, right? Or could I use some sort of stripping/paint removal technique just where the flower will be, and apply stain to just that area…kind of a reverse technique from what you did here? If I do have to paint, do you have any suggestions for that? Maybe paint removal for that too, but then adding lighter paint back in to create the flower? Maybe just decoupage? If I do that, I need to ask: What kind of flower is this?
Thanks in advance…I sincerely appreciate any feedback!
This comment has been removed by the author.
This comment has been removed by the author.
This technique isn’t really a stain/paint combo. You’d really need to strip the table down to the wood before starting to stain your flower. If there are splinters and rough spots, you’ll just have to really sand things down smooth after stripping. Hope this helps! Please send pics when you’re done!! 🙂
Thank you Beth…I had a feeling you were going to say that :~. If I do decided to strip & stain, do I just sand the paint off…is that the most gentle way? Or do I use some sort of removal product first? I’ve never really stripped anything like this down before, so consider me an amateur :-). Do you have any experience with any of the other techniques I mentioned? I’m just wondering which would be the simplest way to achieve a similar or same result. Thanks again Beth!
I don’t have experience with the other techniques you mentioned. We use Zinsser Stripper, but you can use anything (CitriStrip is popular too). Just use a putty knife and sire brush after the stripper has had time to loosen the surface. After you’ve stripped it, you’ll want to sand it till it’s super smooth. Let me know if you have any other questions!
This comment has been removed by the author.
Since you’re the mad genius who invented staining as an art form, I thought I’d come to you for help before asking elsewhere…
If you wanted to stain a flower or some other artwork onto dining room table that had 2 leaves in the middle, and have it look complete whether the leaves were installed or not….what in the heck would you do?
So far the only thing I’ve been able to come up with is vines, which I really don’t care for. I’m dying to use your technique for my table, but I’m stuck for ideas. I know I could always just do multiple complimentary flowers or whatever….but it’s just not the same!
And thoughts are greatly appreciated!
(Did I mention that I’m addicted to your blog? I can’t get enough of it.)
Any thoughts, not and thoughts. Sorry for typos, I’m on my phone.
THAT is the million dollar question. I have a client right now who wants this done with her table and leaf… and I’m wracking my brain. I mean, you could have an oval-shaped flower, but when the leaf is removed, the flower wouldn’t have the center. It would just be a bunch of petals. Which isn’t necessarily a bad thing. But if you don’t usually have your leaf in anyways, it might just be best to do the design on the table WITHOUT the leaf, and when you have company… pop in the leaf and put a tablecloth across the whole thing. 🙂 Basically what I’m trying to say is I HAVE NO IDEA! But if you figure it out, let me know. And you best send pics when you’re done either way. GOOD LUCK!
Hi! Since there are two leaves, how about three flowers when both are in, two flowers when one leaf is out, and one flower when they’re both out. The flowers would need to line up perfectly and be identical in some strategic places, but I believe it could be done. The center of each flower would be centered on a seam created by the table leaves (one left, one middle, one right). The center flower might need to be more in the back/behind the two side flowers. Basically, when both leaves are removed, the two far left/right halves of the two outer flowers are pushed together, forming one flower instead of three. Then when only one leaf is removed (if the flowers are all lined up and the same, either leaf should be able to be removed), either the right half of the middle flower and the left half of the first/far left flower (whole main left side of the table) meet up to form one flower & the far right flower (main right side of table plus right leaf) remains fully intact (left leaf removed), or the left half of the middle flower and the right half of the third/far right flower (whole main right side of the table) meet up to form one flower & the far left flower (main left side of table plus left leaf) remains fully intact (right leaf removed). I’ve done a rough sketch and I think it could work…what do you think? Does this makes sense? I love coming up with solutions, so please let me know if you try this or need further explanation…good luck!
I wanted to modify my last post a bit: The two outer flowers would not be exact. Rather, they would need to be exact mirror images of each other. And then the left side of the center flower would need to exactly match the left side of the far left flower, and the right side of the center flower would need to exactly match the right side of the far right flower.
Trying to think of a solution for a table with just one leaf too…I’ll let you know if I think of anything :-)!
Sorry, that’s simple since it’s a very similar solution/same concept: Two exact mirror images flowers, the center of each centered on the two seams created by the leaf, so when the leaf is removed, the two halves come together to form just one flower.
Oh, and I know these ideas implement what are, technically, “multiple complimentary flowers”, which takes away from it to a degree, but to help with that, I would add a few extra flowers or leaves to all individual sections of the table (no overlapping into other sections)…not exact matches or mirror images at all…something to trick the eye into still seeing the natural randomness you’re probably seeking. Another way to help with this is to exact mirror image only the centers and the part of the pedals that are closest to the center of the main flowers – the parts that will be coming together/meeting in the middle when the leaves are removed…then the pedals can differ on all flowers as they get further out from the flower’s center.
Beth, my goodness, this is wwwwwwwwwwwwonderful! You have a natural talent for beauty young lady! Fantastic!
Hugs,Patti
I LOVE this table! Such a beautiful statement piece. You are extremely talented! Keep up the inspiration! 🙂
You are so sweet! Thank you for taking the time to comment!
Hi. I’m totally crushing on your staining skills. I’m an expert garbage picker and just tried your technique on a coffee table. Not nearly as lovely as yours but wanted to share it and thank you for the tutorial….but don’t know how to add a pic. Jodi
SWEET! Send us pics to our email! sawdustandembryos@gmail.com
Thank you so much for posting this and your other tutorial on this technique. <a href=”http://unpetitsquab.com/2013/03/project-land-night-stand-redo/>I decided to give it a try!</a> I’m only part way into my project, but it’s looking fantastic. Such a great idea, I will be making use of it in the future. It’s so well suited to flowers especially! I want to experiment with using it for other things at some point too.
Again, thanks for the inspiration! So awesome!
This is soo pretty! This would look perfect in my living room. I’d pay 300$ for it..if I had that kind of money to spend on 1piece of furniture ,that is. I am refinishing a few tables for my LR but I’m not talented enough to do this! Good job girl!
Beth, fantastic!! love,love,love it!! Im gonna give it a try, I cant wait ! THANKS!……… Tina @ Imagine That! Home Decor & Gifts Tinley Park, Illinois
These pieces are beautiful! I cannot draw to save my life! I have pieces of furniture that I could see this art on but I am afraid to try the shading. Will def keep looking on your site.
Spectacular!
NICE!!! I’m pretty sure my daughter has this same “before” table in her apartment at university…got it at a flea market…graduating in May…says she was going to give it away to anyone that wants it…hmmmm??? maybe not now 😀
How did you do the thin dark pieces in the center? It seems like when you went to wipe them off, they would have feathered out. How did you avoid that?
Isreal, I used a q-tip for the stamens, and let the stain sit for at least an hour. It was very tacky when I went to wipe it off… and I dabbed with a cloth instead of wiping. Minwax has a ‘stain pen’ that I’m very anxious to try next time around.
Good luck!
Fantastic art, I will definitely give this a try, just need to get the courage first. Hope to see more.
Totally amazing!!! I want to give it a try. 🙂
Jenny @ http://jennylynndesignz.blogspot.com/
Beautiful!
Another stunning transformation! I love it!! I really can’t wait to try this.
Debbie 🙂
Wow, I never thought that staining technique could be applied in refurnishing furniture. I remembered when I do some painting class and this is the first technique that I learn. I might try this one. Thanks for sharing 🙂
Subtle, yet catches the eye..very pretty!
I meant SO inspired…typo…duh !
BEAUTIFUL !…I an so inspired…..Thank you so much for sharing….
That is absolutely beautiful and so unique. I wish I had the artistic skills to do something like that:)
Maude
Everyone has pretty much summed it up but I’m still going to put my two cents in…. This is BEAUTIFUL!!!!
Amazing!! Beautiful you are very talented artist.
Wow! That table is one of the most unique and beautiful pieces I have ever seen. Great job!!
What is your back ground? is it art, you ahve to have some art in your schooling. This is beautiful. You also would have had 1 more, but i left my name out of the give away because I am not a DIYer. Mary in NY
My mom is super creative, so I imagine I get some of it from her. I studied music for 2 years, and interior design for 1 year. 🙂 I just like making things beautiful!
Wow. I agree with everyones comments. Truly amazon. Really great job.
Hey Bethany,
Sorry for repeating if you have already given this infor out… But what stripper are you guys using now a days?
We use Zinsser StripFast Gel, but it’s pretty fumey. If you want something less toxic (but less effective) you could try CitriStrip. A lot of bloggers love this stuff, but it’s not our favorite.
I would love to see a tutorial on the entire project that could be scaled down to a smaller piece such as a book shlef. That would be amazing.
You took the words right out of my mouth…incredible. I so want to try this someday on the right piece! Thanks teacher!
I like this one even more than the first one you did! You have mad skills lady 🙂 I’ve been wanting to try this out but im OH SO SCARED! You’re the only person i’ve ever seen do this, it’s very unique!
You can do it!
Breathtaking!
Gorgeous.
I love stripping, staining, painting, etc…just wish I had your ‘artistic talent’ to do something like the lily! Your piece turned out beautifully!!!
Beth,
Very impressive stain work. I haven’t done much work with stains but am always experimenting with shapes (I make sculptural furniture) and have recently started using paint to create contrast.
Chris
This is SO uniquely done and very beautifully done. Thank you for sharing step by step how it’s done.
Wow!I was a house/apt.etc. painter until my car accident in 2009 left me disabled.I have never seen a stain technigue like that done.What a beautiful piece.Since I don’t work now I have just started to get into woodworking in my garage so maybe I will try it if my arthritis don’t bother me too much.So keep up the good work and may God bless you like he has me.
So beautiful, I’m thinking about trying this stain technique on a small end table first for practice, thanks for posting these pictures, you are so talented. Thank you for taking the time to post all your tutorials I am learning so much from you and of course hubby too.
This is amazing! ! Absolutely beautiful!!! You should feel proud. …and I can’t wait to see more like this!
This is amazing! ! Absolutely beautiful!!! You should feel proud. …and I can’t wait to see more like this!
Wow! What a beautiful art piece. I have a feeling this is going to be the enxt big thing in DIY….
-Suzanne
http://www.smallchangesbigimprovements.com
*sings in high pitched voice* AH-Mazing!!!
Looking at all the pieces and project that you have done since the beginning, I’m continually amazed at the talent. But this piece as well as the top of the dresser you did showcase the amazing artistic talent you possess. This technique is something I definitely want to try. Thank you for sharing and inspiring us all.
Just. Truly. Stunning!!!
I haven’t been able to do any staining due to the recent weather, and having no ‘shop’ to work in. Been dabbling in some mod-podging on furniture (in my kitchen) though!! Trying to keep the cat’s fur away from it while it dries…another challenge! Someday I will be giving this staining technique a try….someday!
Beautiful! You have outdone yourself! I have done a few table s using your burnpile stain as inspiration. However, I don’t think I will be able to even come close to attempting this! You can see all of my tables at my facebook page Junkin Revival
Just amazing!! Love this!!
Wow. Incredible.
You should feel like a proud mama because that piece is absolutely gorgeous.
Wow! That is amazing!
Holy Smokes girl! You out did yourself this time! Just gorgeous! Way worth the dirty hands!
Very nice Beth! Just beautiful!
Beautiful!
absolutly gorgous
So pretty! I love the stain technique, sadly I don’t have an artistic bone in my body so I guess I’ll just admire from afar!
You truly are an artist!
Hi! I think I am your giveaway winner! I emailed you already!!!! Can I say just how TALENTED you are! This looks so phenomenal! I might need to take a whirl at garage sailing and trying one of these staining techniques! Looking forward to more fantastic furniture!
Yeah, I could never begin to do anything so amazing. That rocks.
This is stunning. Thank you so much for sharing this. I think it may be my favorite too!!
wow. . .just wow!
This is an amazing piece! I found your site after seeing the Burnpile Buffet posted on a site I follow. Your artwork with stain is absolutely amazing! One of these days I will have to give it a try. I’m pretty sure your co-worker would gladly buy the table back from you now 🙂 Keep up the great and creative work!
Amazing! Love the design. I have just picked out mine for my next table. Beautiful job!
Sandy, Full Moon & Buck Naked
WOW!! That is absolutely beautiful. We have some of that same ebony stain…I think I may be inspired enough to give it a try.
Thank you for sharing your art with us.
Beautiful! You are very talented!
All I have to say is Oh..Em..Gee… WOW!