Hey friends!
I recently shuffled some things around in my studio, and it really got my creative juices flowing! Don’t you love it when that happens? I ended up with this cute sitting area in the corner, which I love. But it felt like it was missing something.
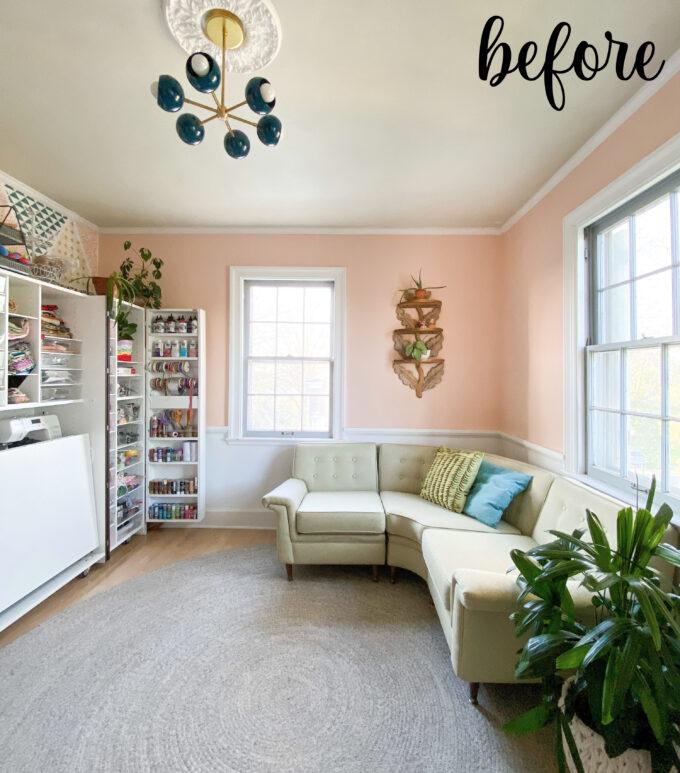
Couch – vintage / Craft Cabinet – DreamBox / Wooden Leaf Shelf – Tutorial / Light Fixture – Sazerac Stitches / Plant – Lady Palm / Wall color – Sherwin Williams Peach Blossom
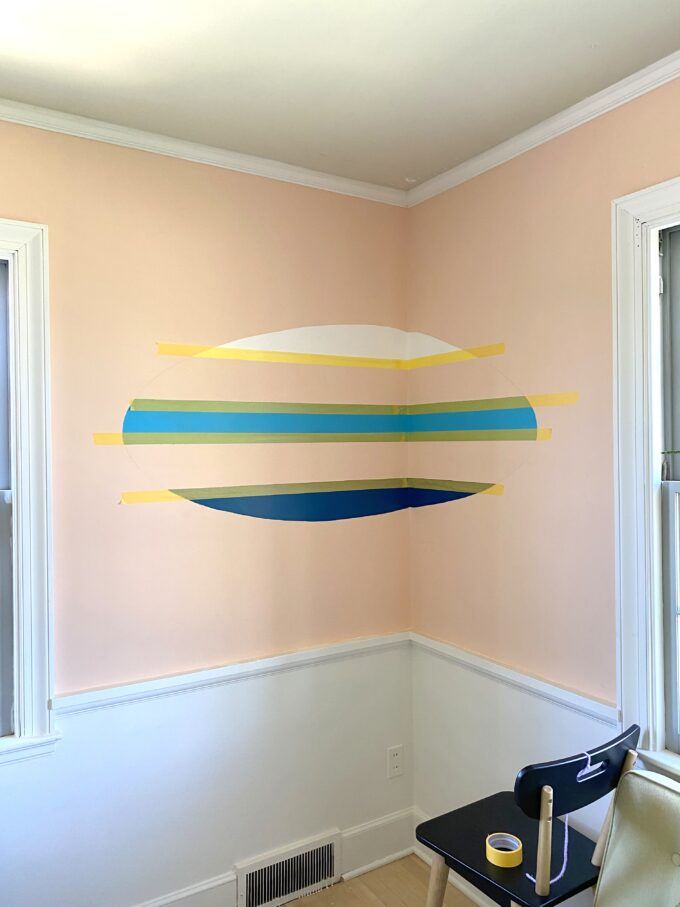
After some pondering, I decided a fun mural would be just the ticket!! But since the corner isn’t centered between the windows, I thought…why not embrace the asymmetry of it, and do an oval that wraps around the corner?!
I used an overhead projector (my Cinemood!) to project an oval onto the wall and trace it with a pencil. Can you see it? 😉

*This post is sponsored by FrogTape! Thank you for supporting the fabulous brands that make Reality Daydream possible! This post contains affiliate links.*
Is Ombre still a thing? Because I love a gradient, monochromatic situation. So stripes it is! I wanted about 5 evenly spaced horizontal stripes. So I measured the height of my oval, and then divided by 5. (My brain was reeeeal close to exploding)

Then measure out the spacing on the mural, and use a laser level to help you get things perfectly straight and level!
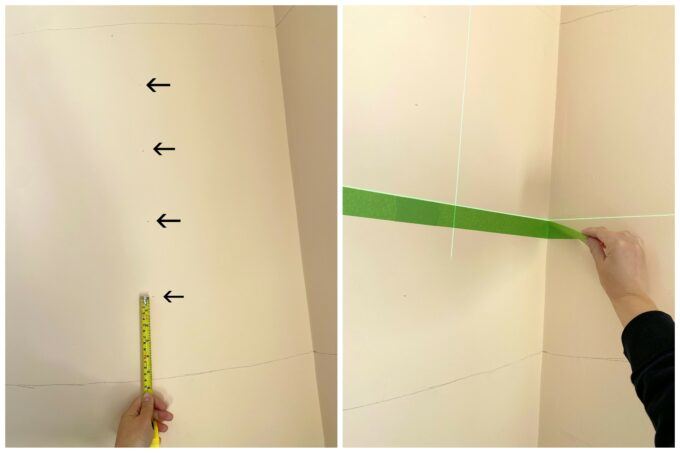
Since there won’t be any spaces between any of my stripes, I can’t paint stripes next to each other at first. So I’m doing top, bottom, and middle. Do you see how I tape off the outside of those stripes?

While there’s no getting around having to hand-paint the curves of the oval, I’m SO GLAD not to have to worry about those straight lines. FrogTape gives the most perfect crisp lines every single time!
I did my bottom stripe the darkest (SW Blue Nile).
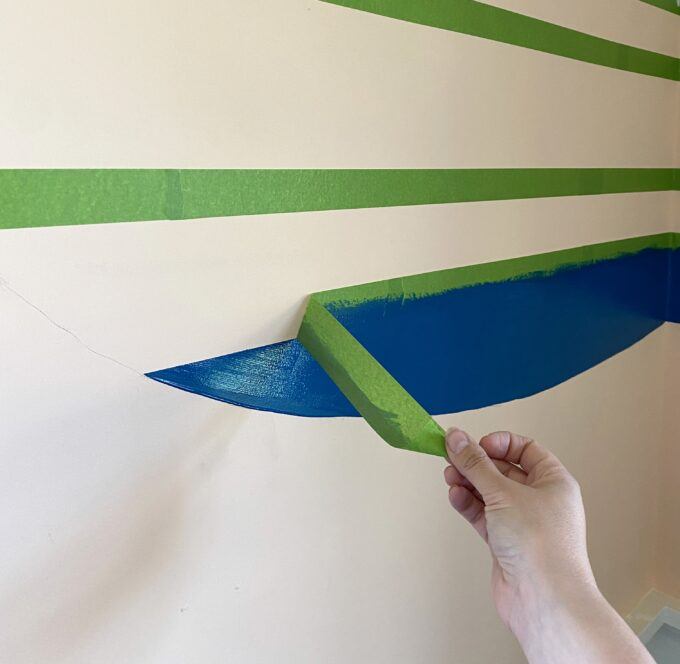
The very top stripe got painted white, and the middle was a mix of the two. I just mixed the white and dark teal until I got a nice medium shade.
Here’s where we’re at so far! It took two coats for each stripe.

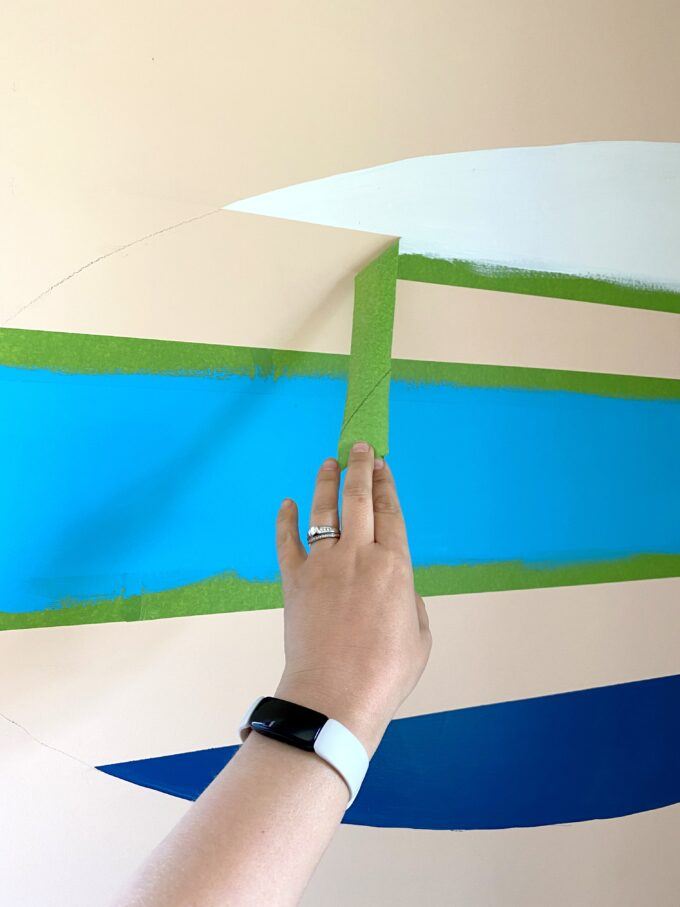
I pointed a fan towards this wall to help these 3 stripes dry faster. We have to put tape right on top of that fresh paint, so we want to make sure it’s good and dry!
It does help to use Frog Tape’s Delicate Surface tape. It’s specifically for surfaces where you’re worried the paint might peel off when the tape is removed. And this is definitely one of those situations!
Tap off those final two stripes, and let’s get back to painting!
It’s all just pouring and mixing at this point. Keep mixing until you find just the right shades! I highly recommend holding the color up to the wall before deciding it’s right.

I can’t tell you how satisfying it was to pull off the final tape and see this gorgeous gradient mural before my eyes!

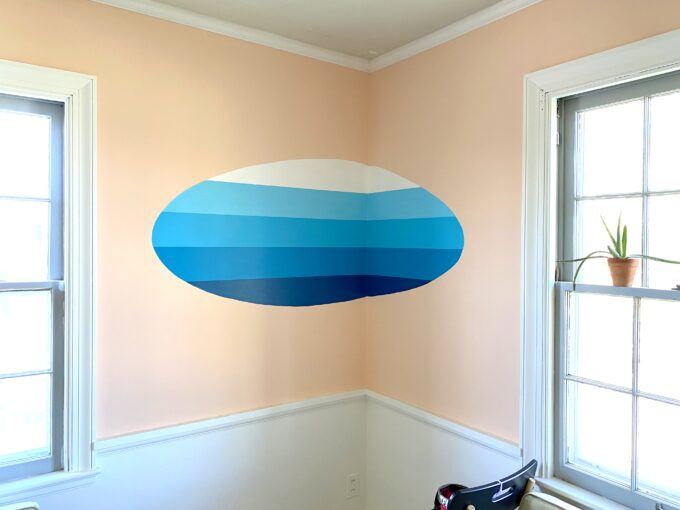
I had a couple floating shelves laying around that we built for the twins nursery almost a decade ago, and decided to paint them to coordinate with the stripes for an unexpected element to this mural!

I am OBSESSED.

I hope this project inspires you to get out some FrogTape and throw some paint around! And as always, please tag me in your projects on Instagram. We’re @RealityDaydream!!
~Bethany
~~~~~~~~~~~~~~~~~
Thanks for pinning!

Related:
-

Making a cutting board almost seems like a right of passage into the world of…
It’s crazy…each gradient of color almost looks like it has a gradient itself – darker at the top (next to the lighter color) and lighter at the bottom (next to the darker color). What a fantastic optical illusion. Is it like that in real life, or just came across that way in photography?