• Home
  • About
  • Tutorials
  • Recipes
  • Furniture
  • Contact
    • Contact
    • Infertility
    • Disclosure
    • Privacy Policy
  • Shop
    • Facebook
    • Instagram
    • Pinterest

Reality Daydream

The Dream is Free, The Hustle Sold Separately

  • Home
  • About
  • Tutorials
  • Recipes
  • Furniture
  • Contact
    • Contact
    • Infertility
    • Disclosure
    • Privacy Policy
  • Shop

Spontaneous Crafting ~ Fabric Scrap Organization Station (And Giveaway WINNER!)

March 22, 2013 by Bethany Sy

Today is the big day we announce the winner of our HUGE power tool giveaway! We were floored with the response we got on this one… over 700 entries? CRAZY! May I have a drumroll please? Thanks to random.org doing our dirty work, our randomly selected winner is:

#97 ~ KristyB

And for those of you that didn’t win, do not dismay! RYOBI’s not going anywhere and we have some more power tool giveaway’s in the works! …so STICK AROUND darn it!

~~~~~~~~~~~~~~~~~~~~~~~~~~~~~~~~~~~~~~~~~~~~~~~~

Moving along!

It’s no secret that I hate paper clutter. We created this to organize receipts, and this for displaying Christmas cards, wedding invites, birthday cards, photos of nieces and nephews, etc. And then, obviously, THE GARBAGE is for junk mail. But sometimes, there is still paper clutter that doesn’t have a home…. random business cards, invites that I need to RSVP to, receipts that I’m saving for returns, ETC ETC ETC!

I love what YHL did when they put corkboard on the inside of their kitchen cabinet, and I picked up some cork squares the other day to finally make this happen. I wasn’t planning on making it pretty or bothering to blog about it… but then I realized that it could be made to be cute. And why not? WHY NOT… I ask you?

Cabinet Door Craft {Sawdust and Embryos}

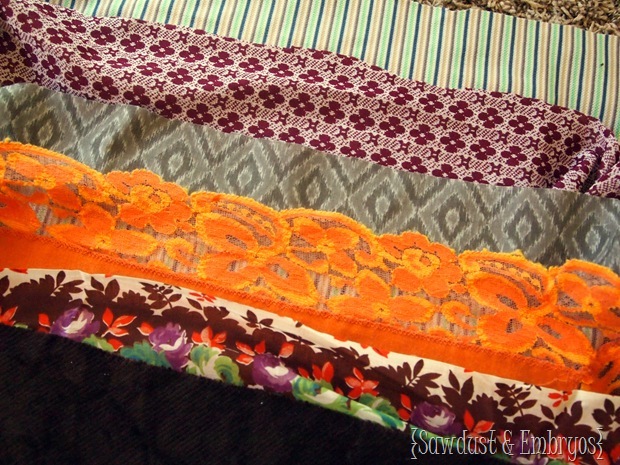
I gathered some random fabric scraps, and laid them out in an order that I liked.

Cabinet Door Craft by Sawdust and Embryos

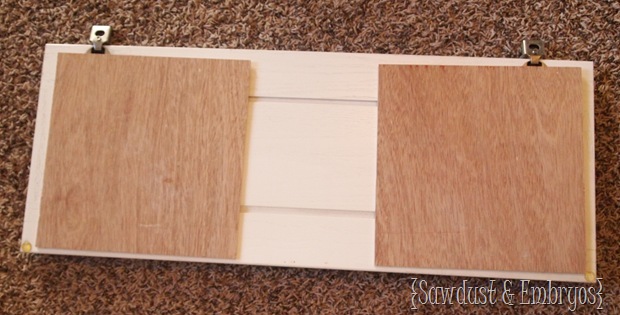
I snatched up two wood squares that were leftover from our upholstered headboard and they happened to be a PERFECT FIT on my cabinet door! You could also use corrugated cardboard for this too!

Creating an organization station on the inside of your cabinet door! {Sawdust and Embryos}

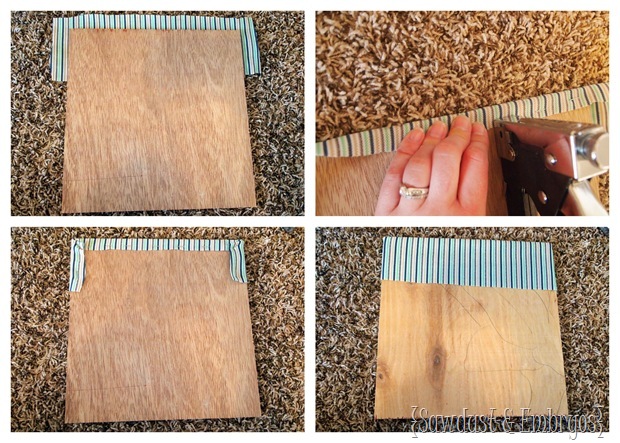
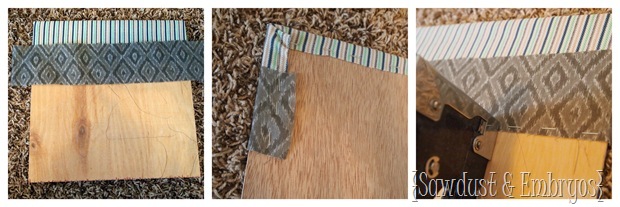
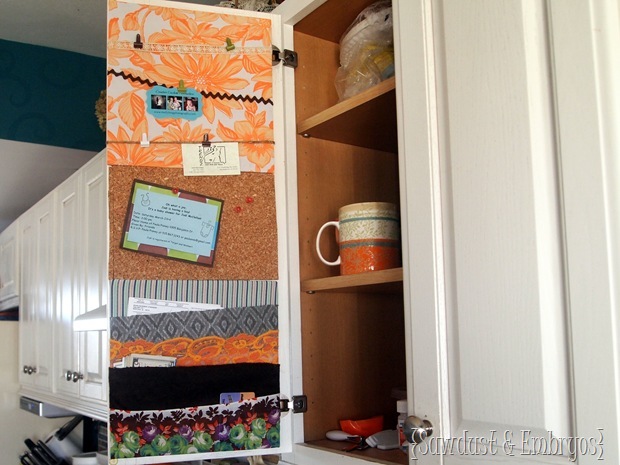
Next I cut the first fabric into a strip and wrapped it around the top of the board and stapled it on the back like so:

Organize your paper mess on the inside of a cabinet door! {Sawdust and Embryos}

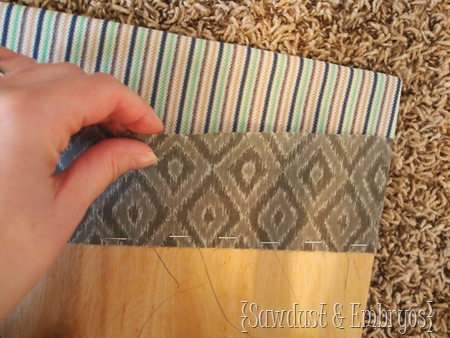
I did the same with the next strip, except I only had to staple the two edges on the back… then on the front I stapled it all the way across along the bottom of the fabric strip.

Creating an organization station on the inside of your cabinet door! {Sawdust & Embryos}

See how it makes a little pocket?

P3211726

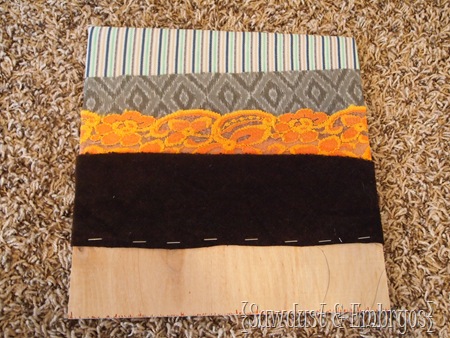
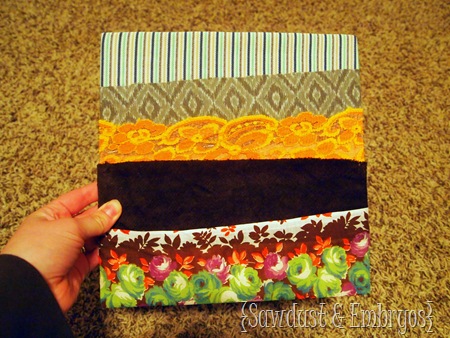
I continued to do this all the way down, using up my various strips of fabric, and overlapping the previous strip by an inch or so.

Cabinet Door Organization {Sawdust and Embryos}

And the last strip got wrapped around the bottom just like the very top one did. Sorry about the lighing in these photos my friends. There was no natural light available.

Pocket organization using fabric! {Sawdust and Embryos}

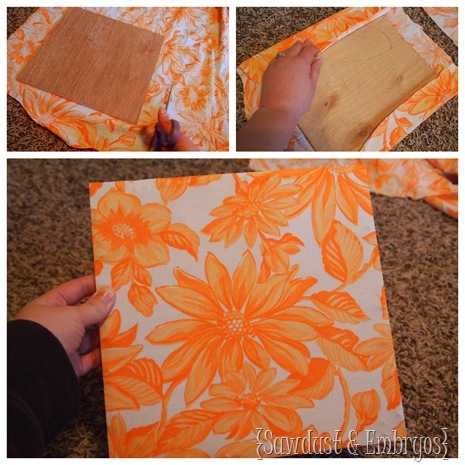
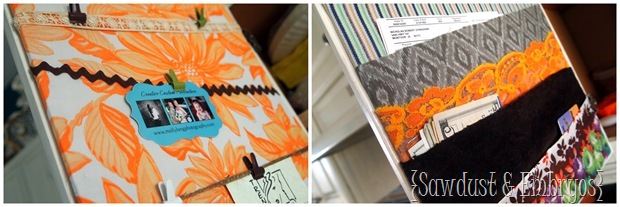
I wanted to do something a little bit different on my second square of wood. I picked one of my fave fabrics (that I scored at a thrift store!) and cut it just large enough that I could wrap all the sides around the piece of wood.

Cabinet Door Organization {Sawdust & Embryos}

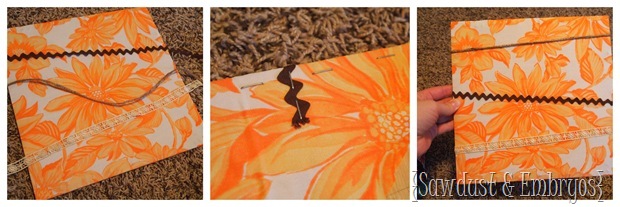
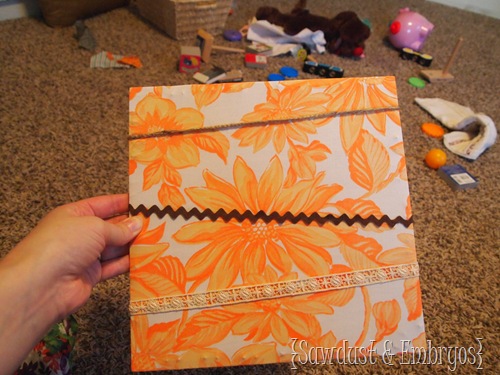
Then I took some twine, rick rack and lace, laid them out how I wanted them, and stapled the corners around the back side. For the twine, I tied the edges in knots so the staple would hold it on the back.

cabinet door craft3

For you crazies that get some kind of sick pleasure out of seeing other people’s messy house… this one’s for you!

P3211743

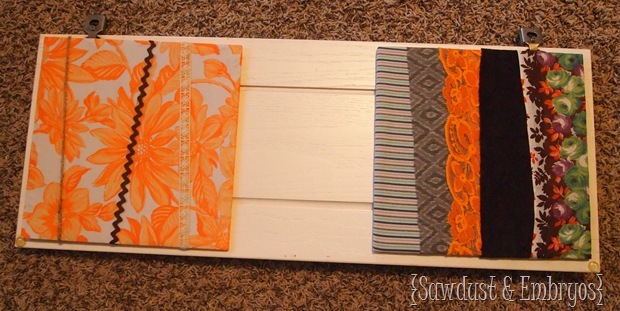
SO! I’m finally ready to mount these suckers onto the cabinet! Had Nick been home, he would have found some brilliant way to attach them to the cabinet that would have been both secure and invisible. But he wasn’t home. And I NAILED them on!

Organization station on the inside of your kitchen cabinet door {Sawdust and Embryos}

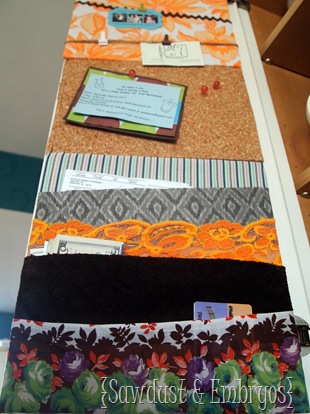
See that blank space between the squares? I cut my corkboard to fit in there all snug-like… (ala Young House Love), and used the adhesive squares that came with the corkboard to stick it on there.
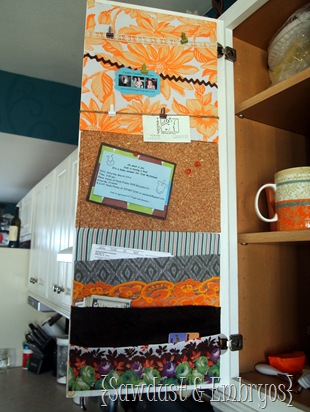
Cabinet door organization using fabric scraps {Sawdust and Embryos} Organization station on the inside of kitchen cabinet door using fabric scraps! {Sawdust & Embryos}

Nick opened the cabinet to make coffee this morning, and said… ‘oh wow! How functional!’ And that was his only thought on the matter. But I like it because it’s pretty too.

Cabinet Door Organization (using fabric scraps!) SAWDUST AND EMBRYOS

You could do this in a frame as well… just ditch the glass and use the backing of the frame to wrap your fabric around!

One step closer to feeling a little more organized! Me-loves-it.

Cabinet Door Organization (Using fabric scraps!) by Sawdust and Embryos

Fabric Scrap Craft ~ organize your paper clutter! {Sawdust and Embryos}

Hope you have a spectacular weekend! Bethany {Sawdust and Embryos}

Related:

  • Plaster-Hardened Fabric Planters

    I've had this idea in the back of my mind for quite awhile... why not…

  • DIY fabric-wrapped bulletin boards
    DIY Fabric-Covered Bulletin Tutorial

    My kids are getting to the age where they want to tape pictures, cards, notes...…

About Bethany Sy

Nick and Bethany Sy are the creative free-spirits behind DIY/Lifestyle blog, Reality Daydream. They recently purchased a historic mansion and have been documenting the ups and downs of renovation and making this home their own... all while sharing tips and tutorials along the way! When they found themselves in the trenches of infertility, they started a journey that would prove to be their most important DIY project ever, and have 3 beautiful girls to show for it. <3

« New Accessories
The Evolution of Our Blog Title and Header »

Comments

  1. 12

    Chrissy says

    September 18, 2014 at 1:44 pm

    I like the idea of the picture frames minus the glass, I have sooo many of those it just makes sense.

    Reply
  2. 13

    Anonymous says

    March 23, 2013 at 9:06 pm

    Congrats to #97 KristiB!!!!

    Awesome job on the cupboard!!!
    Super functional!!!!

    ~danadashoop~

    Reply
  3. 14

    Paul says

    March 23, 2013 at 4:11 pm

    You never cease to amaze me with your talents, Beth. I noticed the money stuck in one of the pockets. Very cute and handy when you need a few bucks. However, as the kids get older, it may disappear. You’ll have to get Nick a jar like you did for me. DAD’S MONEY(help yourself). 🙂

    Reply
  4. 15

    Nicole Goodwin says

    March 22, 2013 at 7:43 pm

    LOVE IT! It look so cute! Seriously would have asked if you got that at Staples or something.

    Reply
    • 16

      Nicole Goodwin says

      March 22, 2013 at 7:44 pm

      Also I never really paid attention to those clothespins before. I should make one of those! Our receipts are in a small bag before I do our budget for the month. Your idea is way better. We could hang it above the desk in our room!!!

      Reply
  5. 17

    Anonymous says

    March 22, 2013 at 7:22 pm

    Love it, now where are the girls? ha. Mary in NY

    Reply
    • 18

      Beth @ Sawdust and Embryos says

      March 22, 2013 at 8:51 pm

      Haha! Mary the girls were sleeping last night while I was crafting. Which explains why I had no natural light. 🙂

      Reply
  6. 19

    shawn says

    March 22, 2013 at 6:29 pm

    That is such a great idea, I think I will have to check into doing that on one of my cupboard doors. Love it!!!

    Reply
  7. 20

    Kenz @ Interiors by Kenz says

    March 22, 2013 at 5:42 pm

    This turned out fabulous. I LOVE The pops of color. And it’s so functional. Win win win. Make me one?? K thanks!

    Reply
    • 21

      Beth @ Sawdust and Embryos says

      March 22, 2013 at 6:03 pm

      Kenz! I’ll make you one if you make me one of your sweet cork boards! 🙂

      Reply
    • 22

      Kenz @ Interiors by Kenz says

      March 22, 2013 at 7:11 pm

      K deal!!

      Reply
  8. 23

    Alexus Parker says

    March 22, 2013 at 5:42 pm

    cute – what a fabulous idea! could work in the bathroom too…. hmmm you got me thinking! darn it.

    so sad I didn’t win the compound miter saw 🙁

    Reply

Trackbacks

  1. 14 Ingenious Ways To Organize Your Kitchen says:
    June 19, 2015 at 7:40 am

    […] Fabric Organization Station – Need a command center? Somewhere to store takeout menus? Or perhaps you just need somewhere to store post that’s not on the counter? This quick and easy tutorial will show you how you can use the inside of any cabinet door to keep the clutter off of your work tops! […]

    Reply

Leave a Reply Cancel reply

Your email address will not be published. Required fields are marked *

Recipe Rating


  • Facebook
  • Instagram
  • Pinterest
  • RSS
  • YouTube
We are Nick and Bethany! Welcome to our blog, Reality Daydream where we share our DIY adventures!
Click here for lots of art projects using only wood stain on furniture!!
Please feel free to share or pin my posts! You're welcome to use ONE of my images (no collages or pinnables) with a link back to the corresponding post. Please do not edit or crop that single image in any way. Improper use of my photos, ideas or words is a violation of copyright. Thank you!

Categories

Attention: Almost any do-it-yourself project involves risk of some sort. Your tools, materials, and skills will vary, as will the conditions at your project site. Reality Daydream has made every effort to be complete and accurate in the instructions of the plans on this website. Reality Daydream will not assume any responsibility or liability for damages or losses sustained or incurred in the course of your project or in the use of the item you create. Always follow the manufacturer’s operating instructions in the use of tools, check and follow your local building codes, and observe all commonly accepted safety precautions.


Copyright © 2025 · Modern Blogger Pro On Genesis Framework · Customizations by Sweet Theory Designs · Privacy Policy · Log in