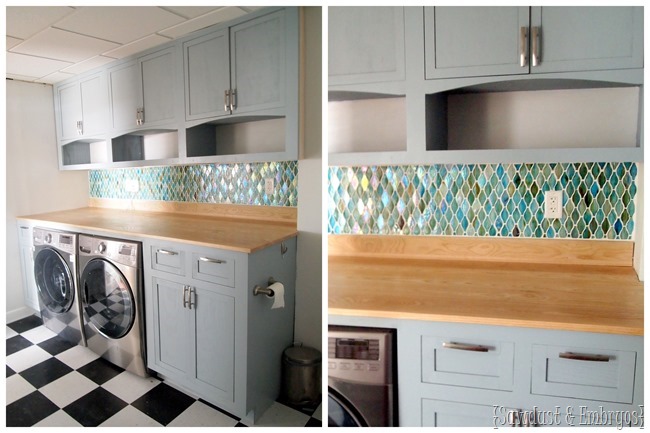
As promised, we’re back with the tile installation in the ‘Luxury Laundry Suite’. I call it that because it’s so obnoxiously awesome. So awesome in fact… Nick and I pulled some chairs in and drank our coffee in there this morning.
That’s actually a lie. But we seriously considered it.
({click here for a recap of this whole room transformation}}
As you know, we have strong opinions about backsplashes. We still LOVE our Mason Jar Mosaic Backsplash in the upstairs bathroom, but we’re definitely known for our mannnny backsplashes that we’ve painted to look like tile. So we had a big decision to make!
Then I remembered that quite awhile ago, a company called Glass Tile Oasis had contacted us about partnering up and providing some tile. At the time we didn’t have any tile projects in the works… or even in the distant future. So that email got archived. But now that this dreamy laundry room / bathroom is coming together… perhaps this is the perfect time for some dreamy legit tile? Soooo many option.
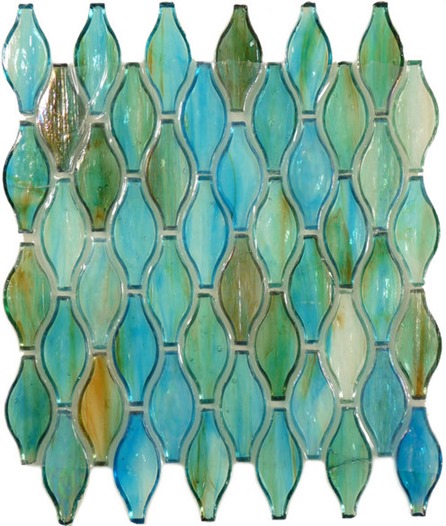
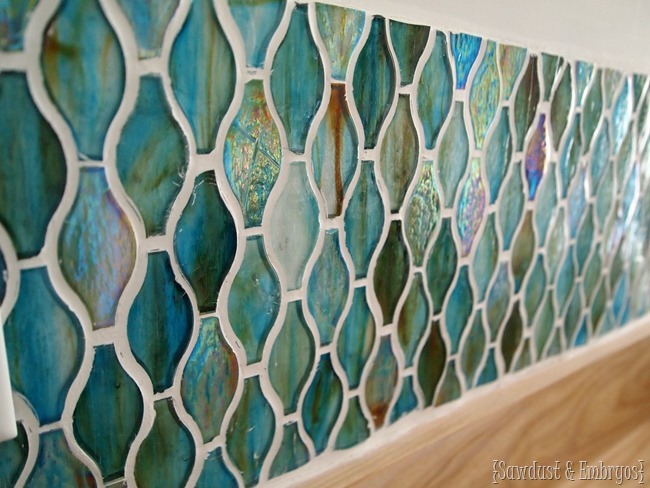
The options were overwhelming… but that’s a good problem to have, right? My online shopping spree came up with this. SO pretty.
Because the surface area(s) that we needed to tile was so large, they were only able to provide a portion of the tile, but we’ll take what we can get! And we’re so thankful for their generosity!
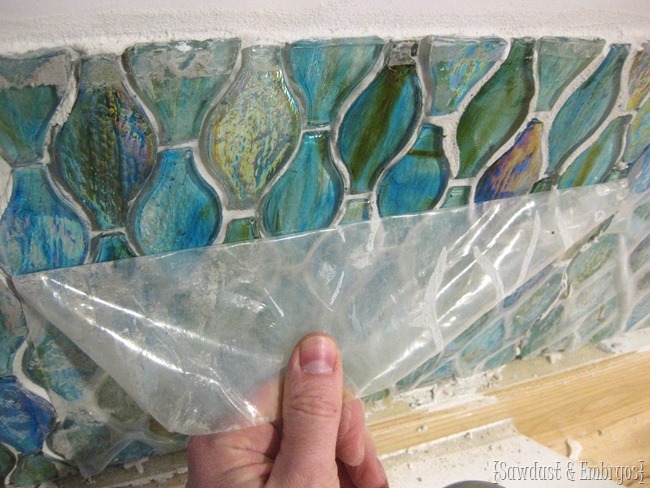
This tile comes with a plastic film on one side instead of the traditional ‘mesh’ backing. We were confused at first, and actually started installing it wrong… so learn from us and read the instructions first! Here are the CORRECT steps.
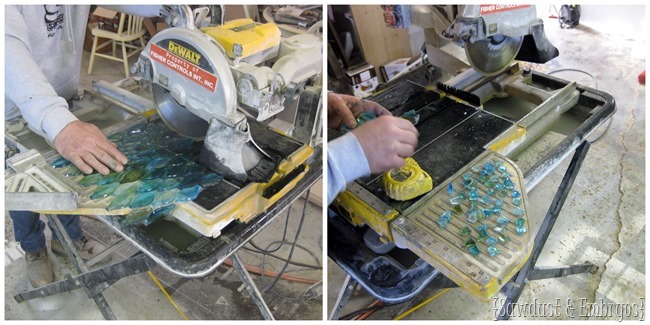
1) Measure each sheet of tile according to the spot it needs to go, and cut with a wet saw. Be sure to save extra pieces for filling in on edges.
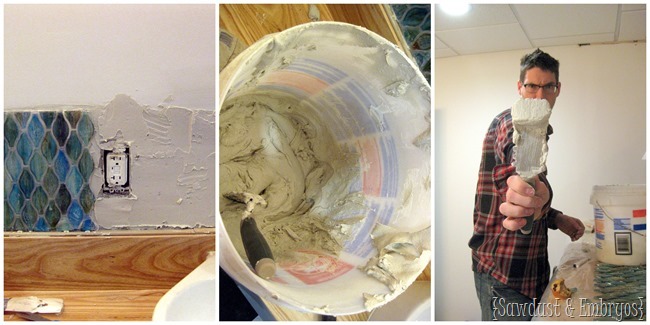
2) Apply your (WHITE) thinset / morter with a 1/4” notched trowel on only the area that you’re ready to put sheet of tile on. The notched trowel gives the thinset some ‘tooth’ for the tile to grab onto, but because glass tiles are see-through, you want to smooth out the notches with the smooth side so the notches are underneath and not visible. Make sense?
3) Press tile onto thinset with the plastic facing you. Use tile spacers along the bottom so that you’ll have a grout line along the bottom. Then fill in any blank spaces (from cutting) with your spare pieces of glass tile. For these small pieces, we buttered on some additional thinset to help it really stay.
4) Place a board flush against the tile you just applied, and top with a mallet to make sure all tiles are even with each other.
5) Allow to dry 24-72 hours and pull plastic coating off! This part is FUN because it peels right off and exposes your gorgeous tile! You can really picture it now!
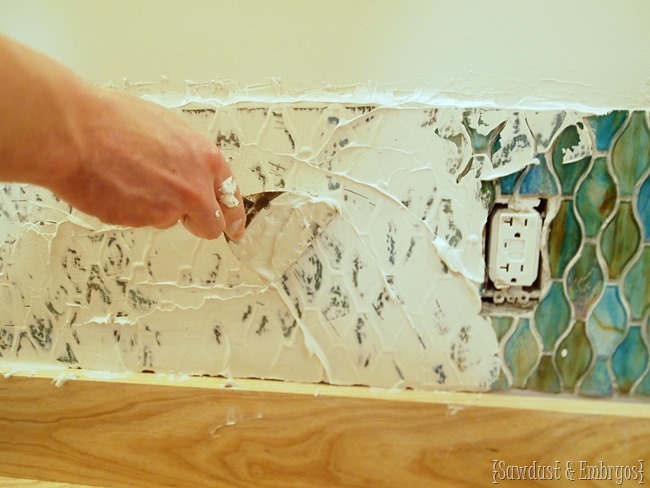
6) Next up is grouting! Mix your grout according to manufacture instructions. We used unsanded grout. Wipe grout onto tile with a trowel, being sure to goop the grout deep into all the grooves. It will look messy and tragic, but just persist.
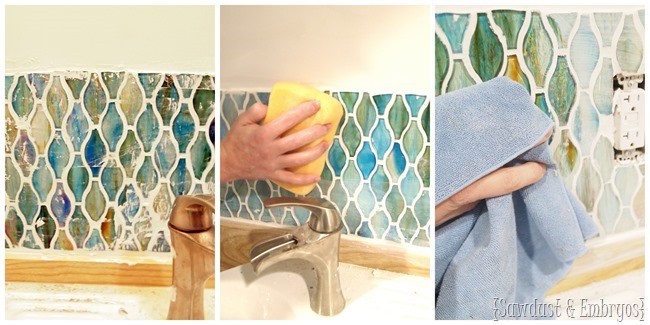
7) Use rubber float to squish the grout into the grooves and wipe off excess like a squeegee. Wait 30-60 mins and wipe down with sponge. Then after another 60 minutes, wipe down with terrycloth. Once dry, a film will appear on the tiles… you can just buff this off with a lint-free cloth.
You’ll have to excuse my photography. I really struggle with rooms that don’t have windows or any natural light whatsoever.
I still need to get some baskets for all that open shelving, figure out some wall art, and build a little something to hold the ironing board and some hangers. And Nick is planning to install under cabinet lighting above the washer and dryer, a super modern light fixture above the vanity, as well as installing a giant mirror… but for now?
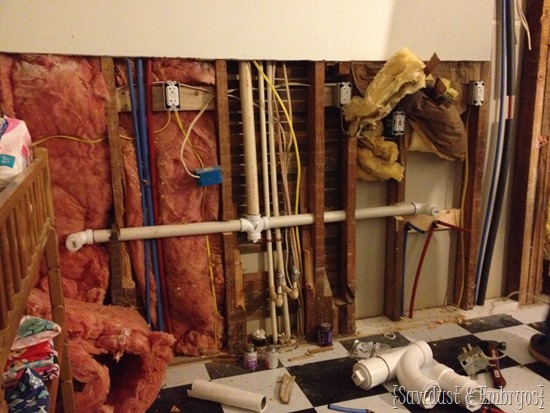
IT FEELS SO FINISHED. Especially considering it looked like this not long ago:
It makes me feel itchy just looking at it.
This has been the longest and most tedious transformation in the history of our blog, but I can say now that it has been so worth it! And although Nick did the vast majority of the work, it meant that I was a single mother on many days… with the added struggle of keeping the littles out of his way. That counts for something, right? RIGHT!
Special thanks to Glass Tile Oasis for partnering with us on this project and providing a portion of the tile. We feel that their product is quality, selection is HUGE, and customer service was awesome! It’s amazing companies like these that make it possible for us to add some extra flair to our projects that we wouldn’t otherwise be able to afford on our own.
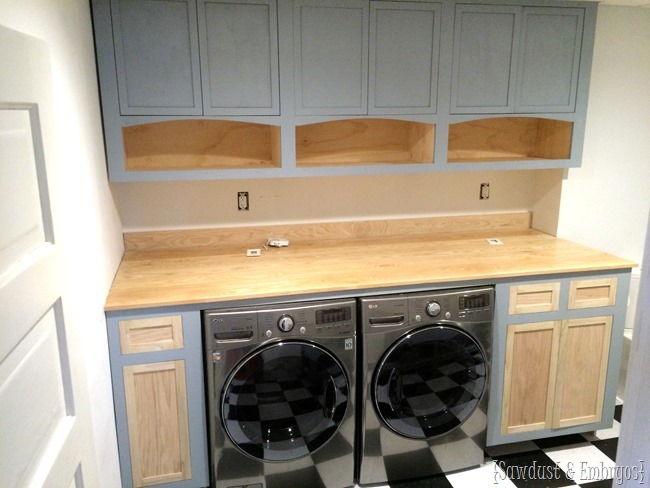




I am using this tile in my kitchen, but was really struggling with what color the cabinets should be. Could you please tell me the paint color of these cabinets?
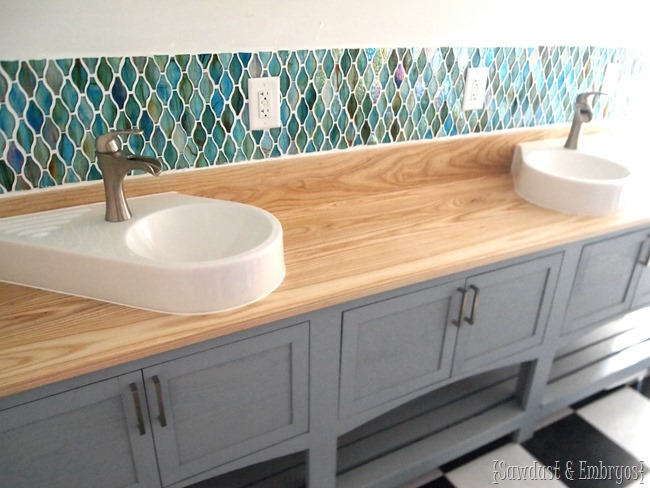
I love those sinks in your bathroom picture! May I ask where you found them?
Rhonda, we got them from National Builder Supply! I’ll include the link below. If you’re ordering two like we did, make sure you get the left and right version so they mirror each other. Does that make sense?
https://www.supply.com/duravit-architec-wall-mount-porcelain-bathroom-sink-0764650000-white-alpin/p264899
Absolutely LOVE this tile. Never seen anything like it. Looks like dragon’s skin. Turned out beautiful, congrats.
It is beautiful! I really like the tile. Bold choice and it looks fantastic. It’s also nice to know that not every project gets done 1-2-3 (says the girl whose bathroom still needs another coat of paint almost 1 year after the lights were put up). I also love the tile industry is moving to a clear rather than a brown paper over the tiles- so you can at least sort of see how great it is going to look.
I am curious- did you take the cabinets down to do the tiling? Or was it just how the pictures look?
I Kat! We didn’t take the cabinets down to install the tile. The backsplash over the vanity doesn’t have cabinets so maybe that’s what you were seeing? The laundry side already had the cabinets installed, but it wasn’t a big deal to install the tile between the counters and cabinets. Hope this helps!
STUNNING! It makes me think of mermaids 🙂 That tile is so so pretty. Y’all did an amazing job designing and executing your plan. This is one of the best laundry rooms I’ve yet to see.
Hi Guys! First off, Nick’s carpentry is downright GORGEOUS and your choice in tile (and everything else!) is soooo beautiful. Y’all are welcome at my DIY house ANYTIME!! Second, since you mentioned that you haven’t completed the laundry room with all it’s accesories I thought I’d chime in with a recommendation. I probably would not have done this at my house if it weren’t already in place when we bought the house, but I now can’t live without my built in ironing board. It houses the iron, a starch can, a water spray bottle and a not quite full size ironing board. The board folds up into the wall and has a door on it so you can’t see any of it and I’ve always wanted to install a mirror on the inside (or outside?) of the door. Considering all the work you’ve already done, installing/making one of these would be a quickie, you would not regret it!! Good luck, Cheers!
That’s an excellent idea! Unfortunately the only wall space we have for something like this is where we have our hamper/sorter thing. Still trying to figure out the logistics of the ironing board because it has to go somewhere! 😉
Beautiful room. That backsplash is amazing!!
Gorgeous! (And turquoise – weren’t you on a turquoise/teal strike? I love it either way!)
You got me on the turquoise thing 😉 …but I couldn’t say no to this tile!
Very nice – but then we have come to expect that from you guys!
Soooo pretty!
Love the way it sparkles when the light hits it. Another great project. 🙂
Thanks Ali! I was a little worried about the iridescent look, but it looks so great now that it’s up!
Breathtaking tile! LOVE it!
The laundry room is turning out just beautiful. Who would ever think of calling a laundry room beautiful? I have really enjoyed this project as well as the kitchen project. Your ideas are very well thought out and so perfect for your space. I think I have a great idea; in the summer when it is warm, I think you should host a baby shower/open house/meet and greet/wine and cheese party. It would be a great way to see all your beautiful projects in person as well as meet our darling family. I’ll bring the wine!!!
I know right? It’s like a dazzling gorgeous room in the middle of our FARMHOUSE… haha! I do like the open house idea, but my paranoid side would fear the creapers. But if YOU are ever driving through, you send me an email and you can come over for some coffee and a tour. 😉
Ha – you are funny but you are right. I will, however, verify that I am not one of those! Since time, when I am on the road myself, I will do that. I really want to meet your beautiful family and see your amazing home!
Holy smokes, it’s beautiful!!!
-andi
Well this laundry room is fit for royalty! Ordering a caramel flan latte with whipped cream please!! Who doesn’t love that amazing back splash tile! So when do you guys get your HGTV reno show? Nick is the man for sure and yes indeed he could not have accomplished his magic with your help and that goes for more than just the laundry room! Vikki in VA
Haha! I love your coffee order!
I love the backsplash!
Looks great guys!!!! When I have a house I’d like a handy Manny hubby to help DIY some stuff!!!
I did get pretty lucky. He has so many skills! And believe it or not, I didn’t know he was handy when we got married. 🙂
love love love love! love the reflection of the floor tiles in the washer/dryer windows, love the woodwork, the paint on the cupboard fronts, the lighting, the space, the storage…. love it all… EXCELLENT JOB!!!
Oh Dana, I could kiss you. You’ve been Nick’s second biggest cheerleader. 🙂
(In my best leg kick) GOOOOOOOO NICK!!! RAH RAH *shaking pom poms)
Love it all. Those tiles are to die for! Coffee surely but I would make it wine.
AMEN. Can we wait till this baby comes out! Then CHEERS!
That is GORGEOUS tile! You’ve done amazing work.
This is some of the most beautiful tiles I’ve ever seen! YUP! I’d have coffee in there for sure. You did a marvelous job.
This is positively the most beautiful laundry room!! Well done, you two should be proud. I want to have coffee in there it’s so pretty 😉