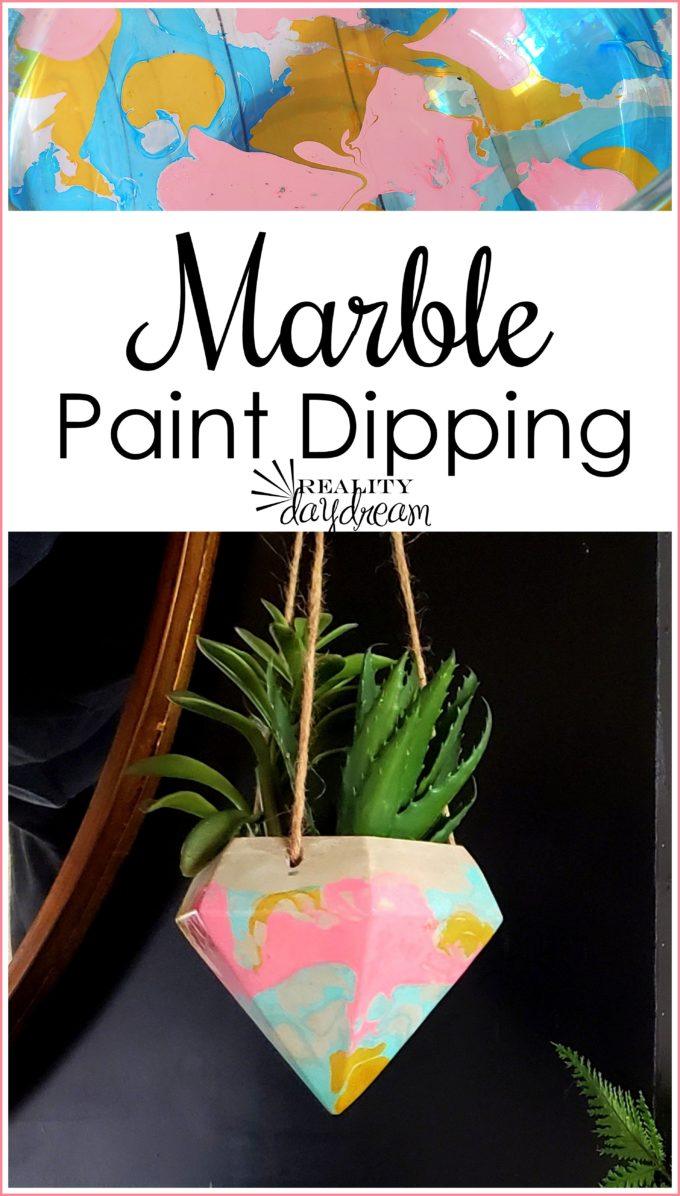
Marble Hydro Dipping is such a fun way to add swirly paint to just about any object. It’s SO MUCH FUN, and we’re sharing all the tips and products!
I’m not gonna lie, sometimes it feels so good to put renovation off to the side for a moment, and do something really fun and new! You know I love to play around with different types of paints, mediums, and techniques, so this marble hydro dipping project is right up my alley!
*This post is sponsored by Darice. Thank you for supporting the fabulous brands that make Reality Daydream possible!*
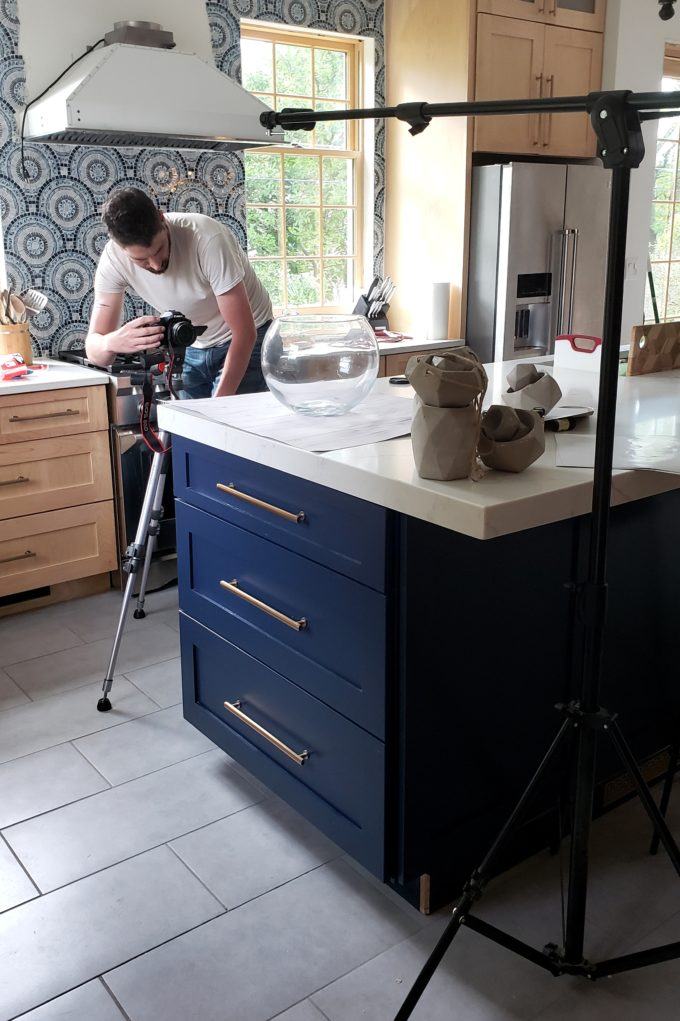
We decided to make a video of this process to demonstrate it easier! But mostly because videos are just FUN, right?
Nick loves setting up for filming, and he loves the editing part too. So that’s a WIN all around!
We found ourselves a big ol’ vessel to do this project in. You could use a 5-gallon bucket, or anything you have around the house. But I don’t recommend using a bowl that you’ll want to use for food again. We used this enormous round fishbowl.

Supplies for Marble Hydro Dipping
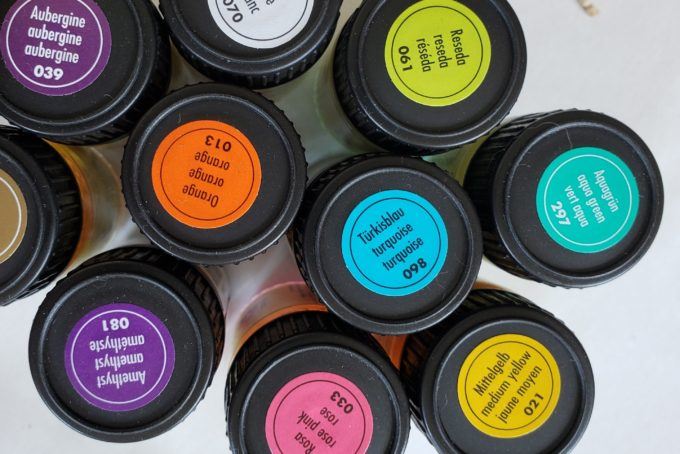
- Marabu Marble Paints
- Large vessel for holding water
- Rubber gloves
- Skewers or toothpicks
- Items to dip (we used these cement planters)
For our subjects, we decided to use come cement planters and vases from Darice. But you could use almost anything… from paper to glass!
Start out by choosing a handful of colors of Marabu Marble Paints. We stayed around 3-4 for each dip, but you could do more or less. Shake each bottle vigorously, then choose your first color and drip several drips around the surface of the water.
Continue doing this with your remaining colors, and then swirl the colors around with a skewer or toothpick.
Then dip your item!!!

The marble effect is different and unique every time! And I’m HERE FOR IT.

On this one we chose not to swirl the paint around too much, because we wanted to try larger blocks of color. The fun of this project is that you can try different techniques and do your own thing!
Here’s another one we did with more colors and swirls in the marble hydro dipping technique. And look at those colors!!!

We had WAY too much fun with this marble hydro dipping project, and now we’re eyeing everything in our house, thinking “can we marble paint that?”


I spied this terra cotta pot on my kitchen shelf, and Marble Paint Dipped it right then and there! With the plant still in the pot! 😉

We loved partnering with Darice for this project. Be sure to go check out their wide selection of crafty art supplies!
And as always, if you try this marble hydro dipping project, tag us on Insta! We’re @RealityDaydream. And be sure to check out our other tutorials here!
~Bethany
~~~~~~~~~~~~~~~~~~~~
Thank you for pinning!
Related:
-

I've had this idea in the back of my mind for quite awhile... why not…
-

We love the original wood of our library, and wanted to find a desk that…
-

This is a sponsored post written by me on behalf of Masonite Doors. All opinions…
Love this!!!
Do you have to seal this paint so it lasts longer?
That was fun to watch! I may have to give it a try.
Can you dip the whole put or piece that your are coloring in the solution and then fish it out so it gets colored all the way to the top? I like the way they look but I don’t like it that the pattern doesn’t continue to the top. I was just wondering.
Yes you can dip the whole thing in! Just make sure you’re wearing gloves 😉
I have used dollar store nail polish and the effect is the same….and cheaper!
Me too! But I think you can get more “dips” with the paint than the nail polish.