Good Morning my peoples, Nick here with a ‘electrifying’ new tutorial (pun intended)! And don’t fret, Beth had me put the Frugal Dutchman away for this post.
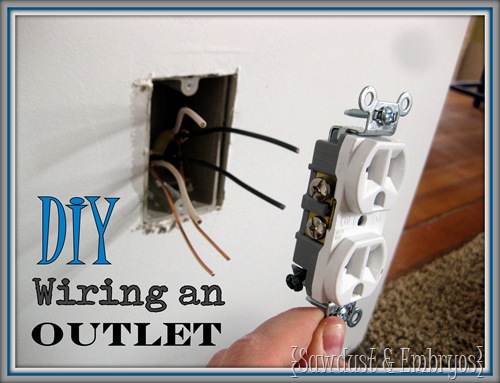
Way back when we were designing the arches we had decided that we wanted a couple outlets on the center column (one for the dining area, one for the living area). So today I want to show you how I wired these outlets.
This tutorial might also come in handy for those of you that have the off-white dirty-looking outlets from the 70’s and are wanting to upgrade. If you have crisp white trim like we do, you’ll be glad you switched out your outlets to be white as well!
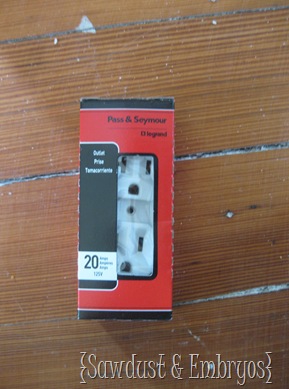
When purchasing a outlet, you need to make sure that it is sized (amp capabilities) correctly. Failing to do this correctly can cause an electrical fire. The easiest way to do this would be to check the amperage rating on the breaker, the outlet needs to equal to the breaker capabilities… this outlet is rated at 20 Amps.
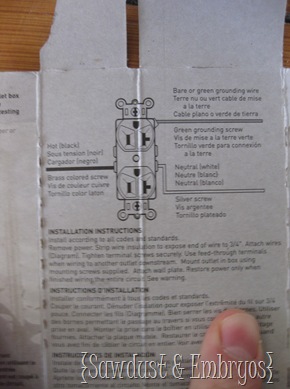
The outlet I choose was a Pass & Seymour 20 amp standard outlet. I like the quality of Pass & Seymour, plus as an added bonus they have wiring instructions on the inside of the box!
Ok, lets get it started, lets get it started in here… Black Eyed Peas, What?
Safety Alert! …make sure there is no power! Click here for further instructions.
Also, it is always good to check your local codes to determine if you need a permit. And see if there are any special requirements.
OK! Let’s get to business:
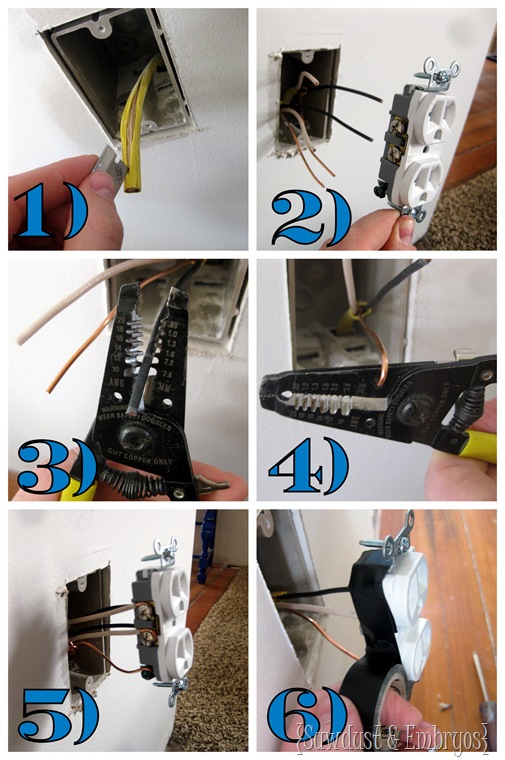
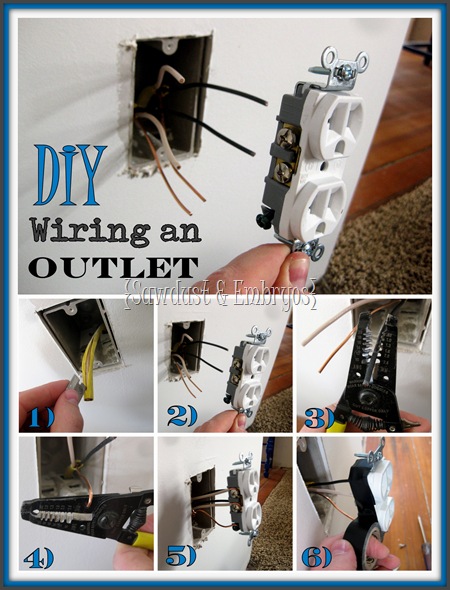
Follow these instructions and you’ll have yourself a wired outlet in no time! It took me about 15 minutes to wire each outlet. Note: some pictures have 3 wires while the other has 6, This is because the outlet with 6 is supplying the power to the other outlet. Wiring will be the same for both.
1) Cut wire insulation back about 4”.
2) Spread wires out to correct position. White (neutral) goes on the side allocated for the larger prong. Black (Hot) goes on the smaller prong side or white to silver screws, black to gold screws. Ground (bare wire) to green.
3) Strip wires, about an inch.
4) Bend loops in wire clockwise.
5) Install wires: Hook the loops around the screws and tighten. Remember clockwise… you want the screws to pull the wire into the center if you go counter-clockwise it’ll want to push you wires out.
6) Wrap electrical tape around outlet. This will work as an addition insulator helping you to not get shocked if you ever have to remove an outlet cover for painting.
You might ask why is there only one ground?
I used a wire nut to combine the two, plus a 6 in lead to be wired to the outlet.
Now that you have your outlet wired and screwed into the outlet box, install the faceplate. Turn on the power and plug something in. If it trips the breaker you know you did something wrong, but as long as you followed these instructions you should be good to go.
If you would like to see another good tutorial on wiring an outlet click here and read Young House Love’s rendition. Your welcome John; us blogging brother’s gotta stick together!
I’ll be happy to answer any questions you might have in the comment section!
P.S… If you would like to wire a light fixture Click Here!


![Install a new light fixure... EASY!_thumb[14] Install a new light fixure... EASY!_thumb[14]](http://lh4.ggpht.com/-xcN81mnKGfE/USZYrujTL5I/AAAAAAAACdw/5EHNrJNaWQg/Install%252520a%252520new%252520light%252520fixure...%252520EASY%252521_thumb%25255B14%25255D%25255B7%25255D.jpg?imgmax=800)


Great post thanks for sharing!
Nick Great Post. Thanks for sharing.
Great instructions and well explained. I don’t know much about electrical but while doing these kind of stuff always remember about your safety. This what I have learned. Always wear rubber gloves that will prevent you from the shock and It is also advised to never run extension cords under rugs. And if you are hiring an electrician than go for the certified and experienced one like Mactec electrical.
Holy cow I know nothing electrical and your instructions even made sense to me! So jealous though 🙁 I live in a city apartment and can’t change jack crap without getting a $300 fine, even if its an improvement. Grrr. Sometimes I wonder if its worth it though 😉
I love your house! You guys do such a wonderful job and I learn so much!
Dana Alley
http://www.thirtyoneladies.com