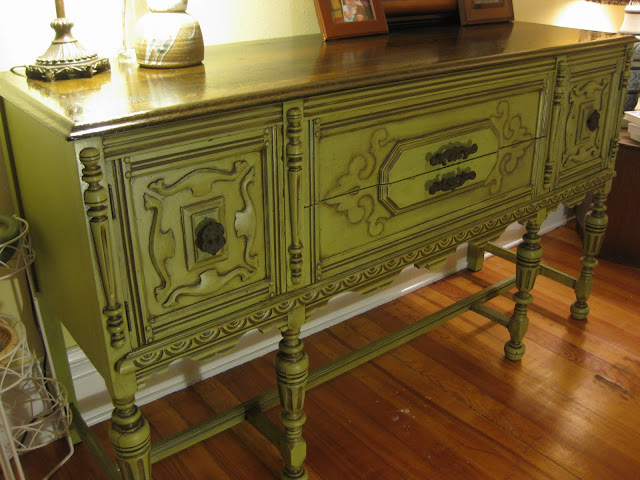
Ooo Ooo OOO! I’ve been so excited to share this one for a long time! This buffet’s awesomeness is twofold.
a) we refinished it ourselves.
b) it was free
That’s right. FREE.
I’ll tell you the story in a moment, but I just can’t resist the affects of a before and after shot. So here they are kids!
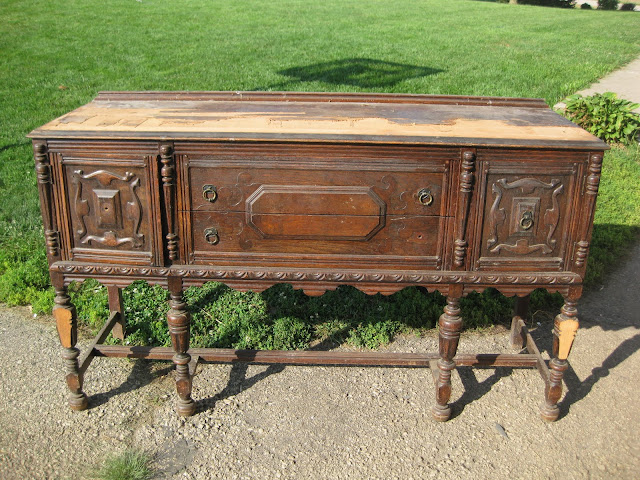

We went to pick up this run-down little vanity that we had found on craigslist. And as the man ushered us through his house to show us the vanity… we passed by THE BUFFET. And I thought to myself… awesome. I wish we could take that instead of the vanity. I mentioned to the man (because I have a big mouth),
Me: “I wish you had this buffet for sale on craigslist.”
Him: “actually it IS on craigslist.”
Me: “Seriously?!?!?! well I didn’t see it on there.”
Him: “it’s listed under the free section.”
Husband performs CPR.
So we cleaned her up, gave her a little love… you know the story. And can I say that there something incredibly validating and gratifying for me to bring an item from bane to blessing. It’s my fave.
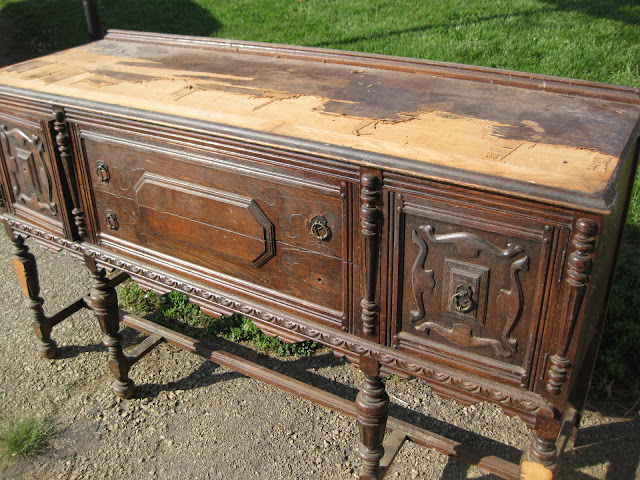
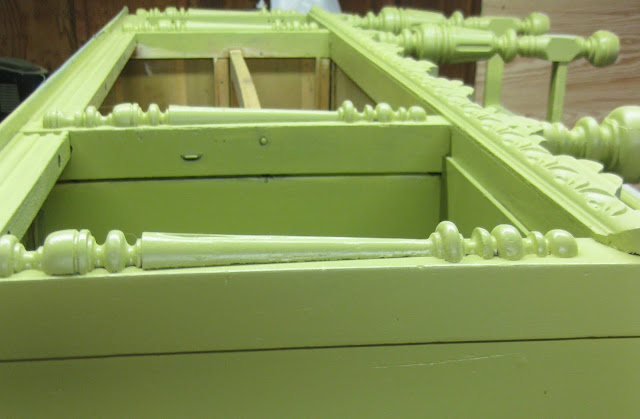
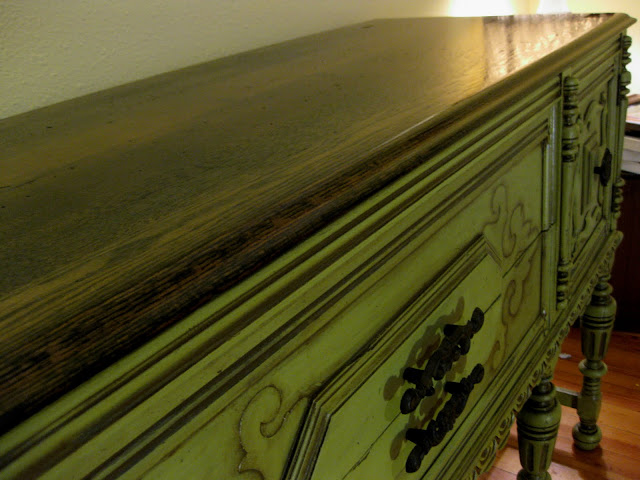
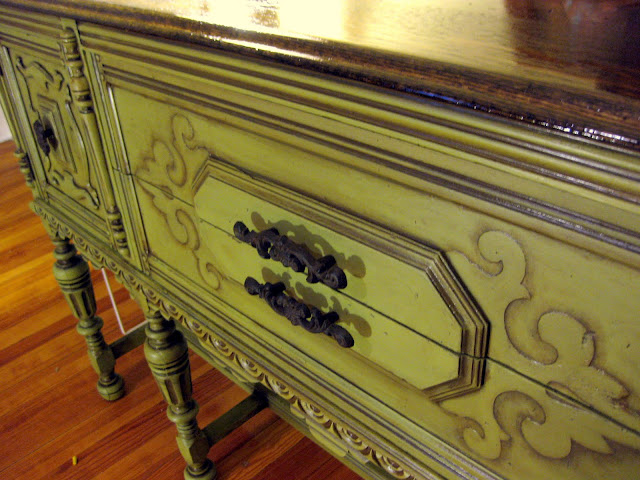
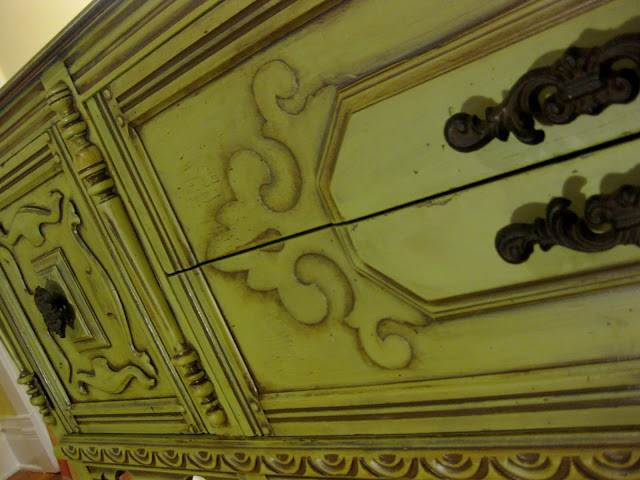
The top surface had some SERIOUS chipping veneer issues. But the wood beneath was in good shape and had a beautiful wood grain, so we went at it with a putty knife and chipped away at it till it was gone! All you need is a little elbow grease!


We refinished… but not without a little wine.
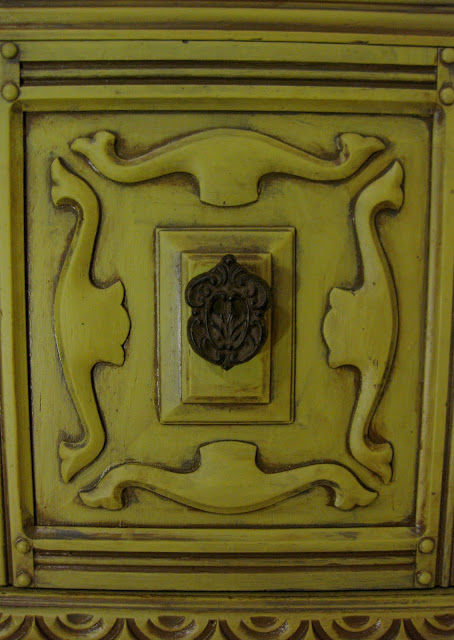
Found us some sweet new hardware at Hobby Lobby (my other lover). Wood puttied up the old holes, and drilled our own:

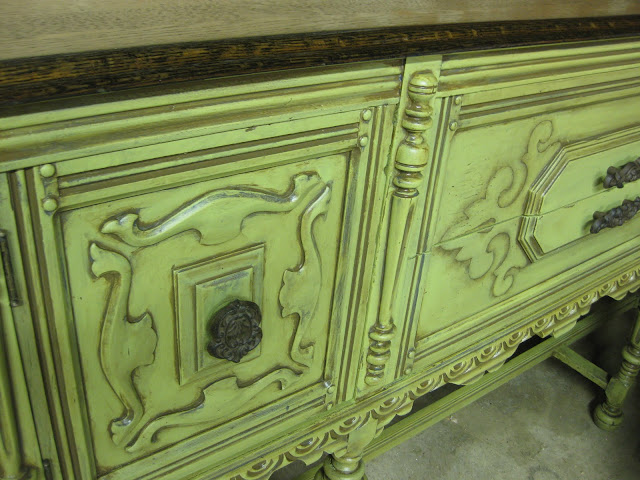
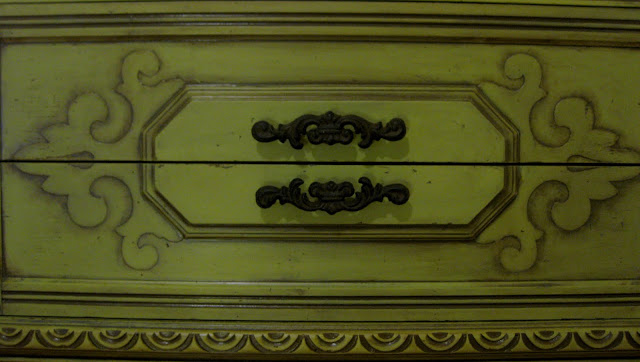
Slapped on some paint.
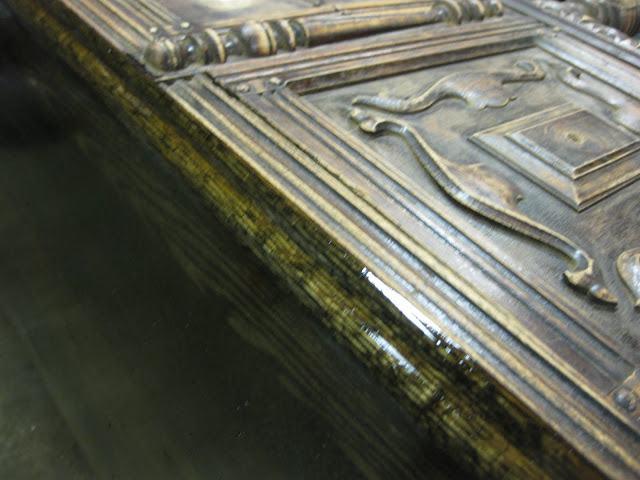
Being the amateurs that we are, we glazed using our blackish/grayish glaze, without thinking that… the top surface is stained dark brown, and the hardware is also in the brown family. After glazing, I was extremely disappointed in the outcome. Doesn’t it look a little cartoonish? And BLUE? Hate it.
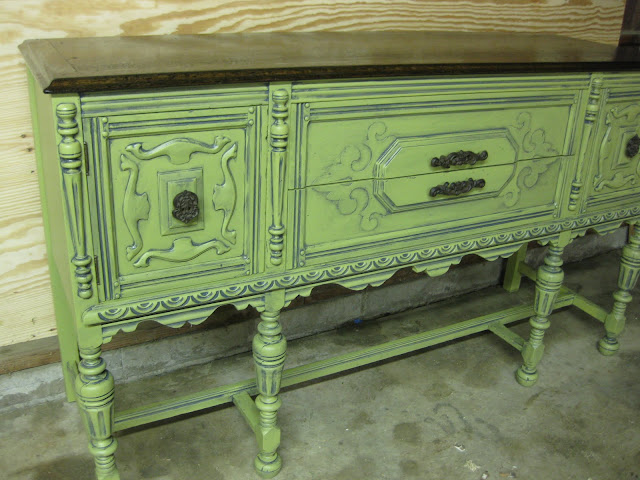
After a trip to town, we reglazed with brown, and I actually love the two-toned glaze we’ve got going on. Much better. Can you tell the difference? I can.


Related:
-

If you follow us on the 'gram, you know I've been stripping the finish off…
-

We love the original wood of our library, and wanted to find a desk that…
Hey Bethany! Thank you for the post. I am working on a similar buffet project, though with much less chipping in the veneer. I am wondering how you would determine if you were going to remove it all? I know yours was pretty damaged on the top, but I’m trying to figure out if I should remove the veneer on mine and I have NO IDEA! Any tips are greatly appreciated. The top of mine doesnt look too bad but there are damages on the edge so I am so torn on weather to fill the veneer with wood filler or to completely remove it. Thank you for reading!!
Hey Lauren, if it’s just some chipping on corners and such, I would DEFINITELY just fill it with wood putty. But if the veneer is bubbling in any places, or severely damaged, I’d remove all of it. Does that answer your question?
Hi, I was wondering on the before picture the top looks like the back had a elevated trim. Just wondering how you got the whole top level? Thanks!
My wife has the exact same buffet, with a matching dining room table and armoire, passed down from her grandmother. My question is off topic, but any idea of the origins of the buffet you restored? We would like to find out more about it, if possible.
Oh wow that’s amazing! It’s so fun to have a full collection, and even better when it’s a family heirloom! Unfortunately I don’t know anything about the history of it though. You could take a photo to an antique store and see if they can shed any light.
Awesome piece and you two did a great job.
I’m new to antiquing old furniture pieces. Do you always paint/ antique the underside? Even if it doesn’t need it? I have a small Drexel table in very good condition. The top and drawer need a lot of help.
Any advice is so welcome. Thanks.
Thanks.
No you definitely DON’T have to paint! Especially if the wood is in good shape!
How did you repair the front of the two outside legs? The whole front is missing in the photos–did he have the pieces? Looks fantastic–so jealous that it isn’t in my house!
Hi Lisa! The fronts of the legs had broken off, but fortunately the previous owners kept the pieces, and we just glued/clamped them into place for an easy repair!
Thank goodness! It turned out fabulous. Makes me want to go and hunt for one like it!
Happy Friday!
You’ve been caught having done a fabulous furniture piece and I featured this today. I hope you stop by and check out your feature.
Have a wonderful creative week!
Robin @ Redo It Yourself Inspirations
A friend of mine bought an old table and it had vaneer on it, I doodle in diy stuff all the time so we refinished it and it turned out great but it has been 3 weeks and every time she sits something in the center , it leaves a ring like the clear hasn’t dried, any advice on what to do?
Wondering if this would work with an old dinner table
I have acquired? The table top has an fairly large area
where the veneer has cracked and lifted ( possible water damage)
Pieces of veneer are missing.
I’m wondering if I remove the top layer, and stain and polyurethane
it, will it be food safe? Any input is appreciated 🙂
Thanks in advance.
In theory, that should totally work! The wood underneath probably isn’t as pretty or quality (because that’s why they put a veneer on to begin with. But if you remove the veneer, sand it smooth, stain and poly, it should still be gorgeous! And totally safe for eating on after you poly it!
Hi! I love the way this buffet came out. I just got a piece of furniture that I want to have the same look. I have chalk paint for the bottom but I want to stain the top. This is my first time and I’m just not sure if there is veneer on top or if I need to strip the finish that is already there first or should I just sand it then stain it. I don’t want to mess it up so it’s been sitting in my dining room and I just stare at it bc I don’t where to start. Lol advice?
Kim, is the top currently painted? If so you’ll definitely need to strip, then stain. If it’s already stained and varnished and you’re just wanting to make the stain a darker shade, you’ll have to sand through the poly to get down to the raw wood before adding stain. But be careful when you’re sanding, because if it is indeed a wood veneer below, sometimes they can be thinner than you think. And if you wand through the veneer to the surface below, you’ve got a problem you can’t fix. Good luck! Send pics when you’re done!
Hello Bethany, I ran across this buffet and love it! You did such a wonderful job! I had a couple questions if you have time, what stain brand/color did you use for the top and did you seal with polyacrylic or polyurethane? If so, what brand of poly did you use and did you brush or wipe or spray the poly on and how many coats? Thanks so much for the help and tutorial!
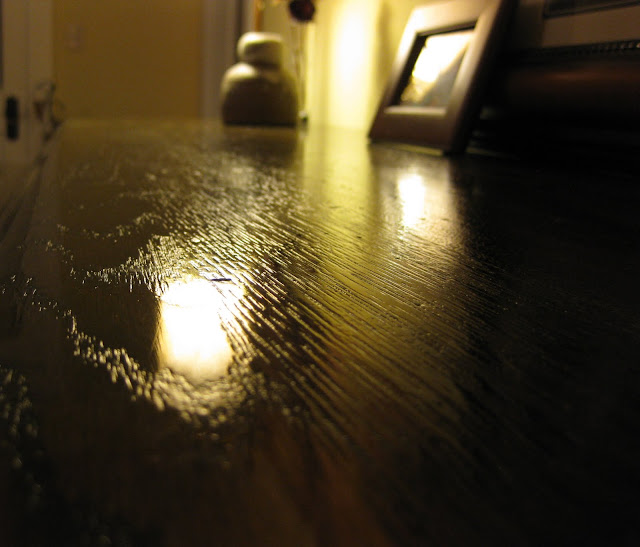
Hi Sheri! We used Minwax Ebony stain, and their glossy Polyurethane. We did several coats of poly using a brush. Hope this helps! Good luck!
I know you did this piece years ago, but I just found your blog. Love, love, love it! I must have been meant to find you today! I have an antique buffet I bought at an auction years ago and still haven’t done anything with it. I have talked the past 2 wks about donating it to a thrift store. Unfortunately, our weather has been horrible and I didn’t want to have them come out to pick it up. Now that I saw this, I’m going to try this technique! Thanks so much!
I’m glad you found some inspiration and are going to go for it! Please send us pictures when you’re done!
What color green paint is this and brand…do you have a fovored brand and what finish is paint. I see some recommend semi gloss or satin. And even flat.few times. If glazing what do you think worlds best? Thanks! Beautiful pieces!
This is Krylon spray paint in ‘avacado’. Flat paint is nice for a solid color piece, but it you’re planning to glaze, I would use satin. Hope this helps! Send pics when you’re done!!
Hi Beth! One day after picking up a pizza, I drove down a road I never drive down and guess what, a buffet similar to this was sitting at the curb for free! The people were cleaning out a little old house downtown in preparation to flip it. I hit the jackpot that day! It is in really bad shape but seeing your buffet makes me think I can still save it…even though my husband is doubtful…got to prove him wrong. 😉 Thanks for sharing!
Have a great week,
Amy
http://www.homesweetthriftyhome.com
Sweet! Don’t you love it when that happens? Be sure to send pics when you’re done with it!!
I absolutely love this. I’ve got pieces with the veneer chipped off in places! THANK YOU FOR SHARING!
I absolutely love how this piece turned out and what a deal! One question, how did you fix the two end legs. they look like the design was shaved off in the before shots but they look great in the after and you can’t tell anything was missing.I just found you on Pinterst!!!
On many antique pieces, the fronts of the decorative legs are missing… luckily, the broken off pieces were in the drawer and we just needed to glue them on!
Can we talk about that peeling veneer? I am working on a similar project, and all that chiseling is making me feel stabby. Do you have any tips other than elbow grease?
Liz, we just used a putty knife and went to town on it! Once you get the bulk of it off, you can sand the rest with some really rough sand paper. Good luck!
This is a late comment, but it’s really beautiful.
this is my DREAM piece! It is just absolutely gorgeous!!!
I love, love, love this buffet. I went to the flea market today and bought some old end table to try out my skills on. You’ve inspired me to try and see if I can do this.
Great job, I have almost the same buffet, I’m going to do similar to yours…don’t have any glazing experience, but I’m going to try.
I just garbage picked a similiar buffett. I love how yours turned out. Did you glaze right over the green pain? Also did you sand down the whole piece then prime it first? Jpropps@oh.rr.com Thanks
Wooooow. Maybe there is hope for the gaudy yellow dining room set in Grandma Klinge’s basement.
Gorgeous, I just saw this on CL and I am actually in Ames. You guys have done an amazing job on this piece and the others as well. I am going to have to follow you to see what else you two restore!
Megan
Stop by for a visit my blog is 1funkywoman.blogspot.com
Whoa, what a transformation! Just found your blog through Better After. Love it!
The buffet looks absolutely wonderful Bethany. You guys did a really great job. Love ya and thinking about ya a lot
I want that buffet too!
Actually, you should send the guy that GAVE it to you a picture of the refinished buffet… 🙂
I still owe you a picture of the necklace, I did not forget, it is just that I am still living in a hotel room… things are all over, including the camera!
Again, LOVE the buffet, good work!
Thank you Bethany! I am hoping to have this beast of a chair finished by next Monday and have it posted. She’s not even painted and I’m already having your sentiment about not wanting to sell her, haha! Good luck with you!
juliana, we’ve been having great luck selling our furniture for the most part. you should go for it!
WOW!! I LOVE IT!!
This has to be the best one yet. But I think I said that about the last one! Awesome. And your photography is great too!
Hi! I was wondering if you’ve been having much luck with resaling the pieces you are refinishing? I live in Dallas, TX and just bought a few pieces to do that with but I wanted to see how much luck you are having up there?
Great pieces! I love it! Good eye!
Oh my goodness! I wish the hubs and I had THAT kind of luck. What a beautiful piece. You guys did an amazing job. Okay, gotta go – I am heading over to craigslist now 🙂
xoxo,
Brandi Nell
BrandiNell.blogspot.com