• Home
  • About
  • Tutorials
  • Recipes
  • Furniture
  • Contact
    • Contact
    • Infertility
    • Disclosure
    • Privacy Policy
  • Shop
    • Facebook
    • Instagram
    • Pinterest

Reality Daydream

The Dream is Free, The Hustle Sold Separately

  • Home
  • About
  • Tutorials
  • Recipes
  • Furniture
  • Contact
    • Contact
    • Infertility
    • Disclosure
    • Privacy Policy
  • Shop

Downstairs Bathroom: Part 2

December 1, 2009 by Bethany Sy

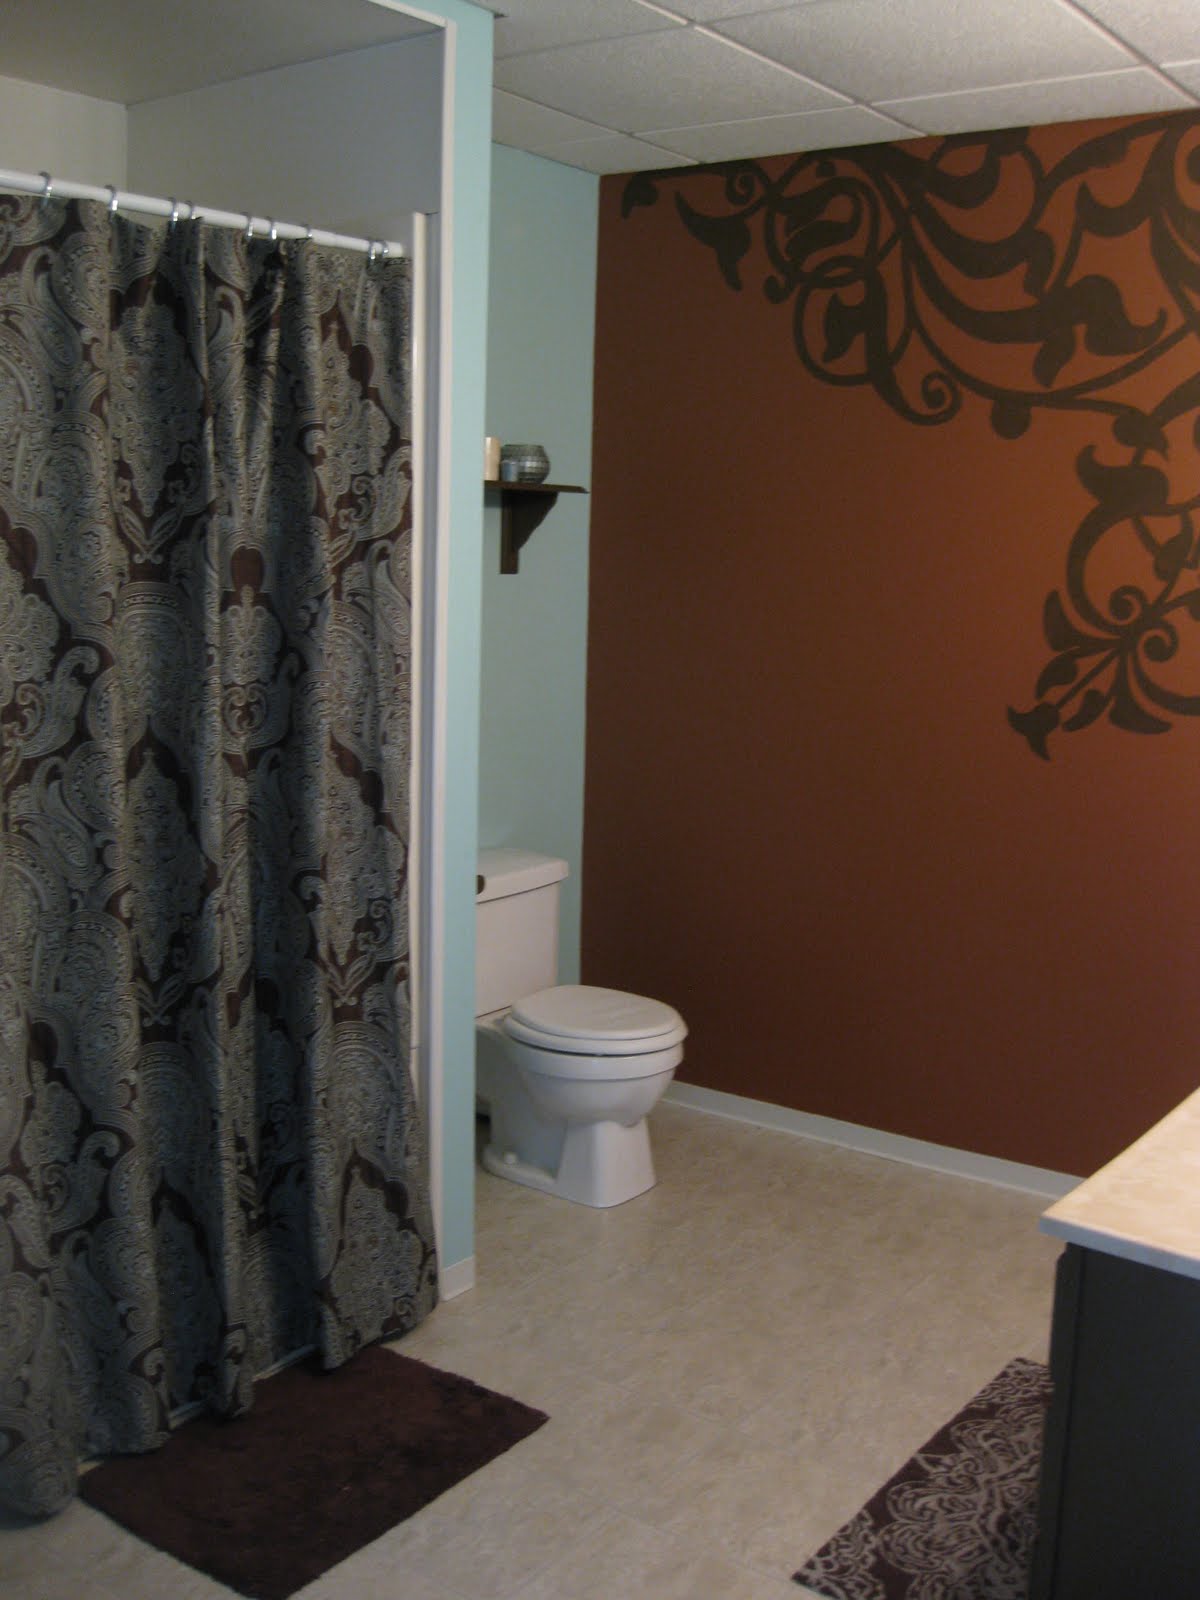
Alright kids… I can sense the anticipation for the outcome of the downstairs bathroom, and so I shall withhold from you no longer. I know it’s not anything too extraordinary, but it is FAR superior to it’s previous state of existence.

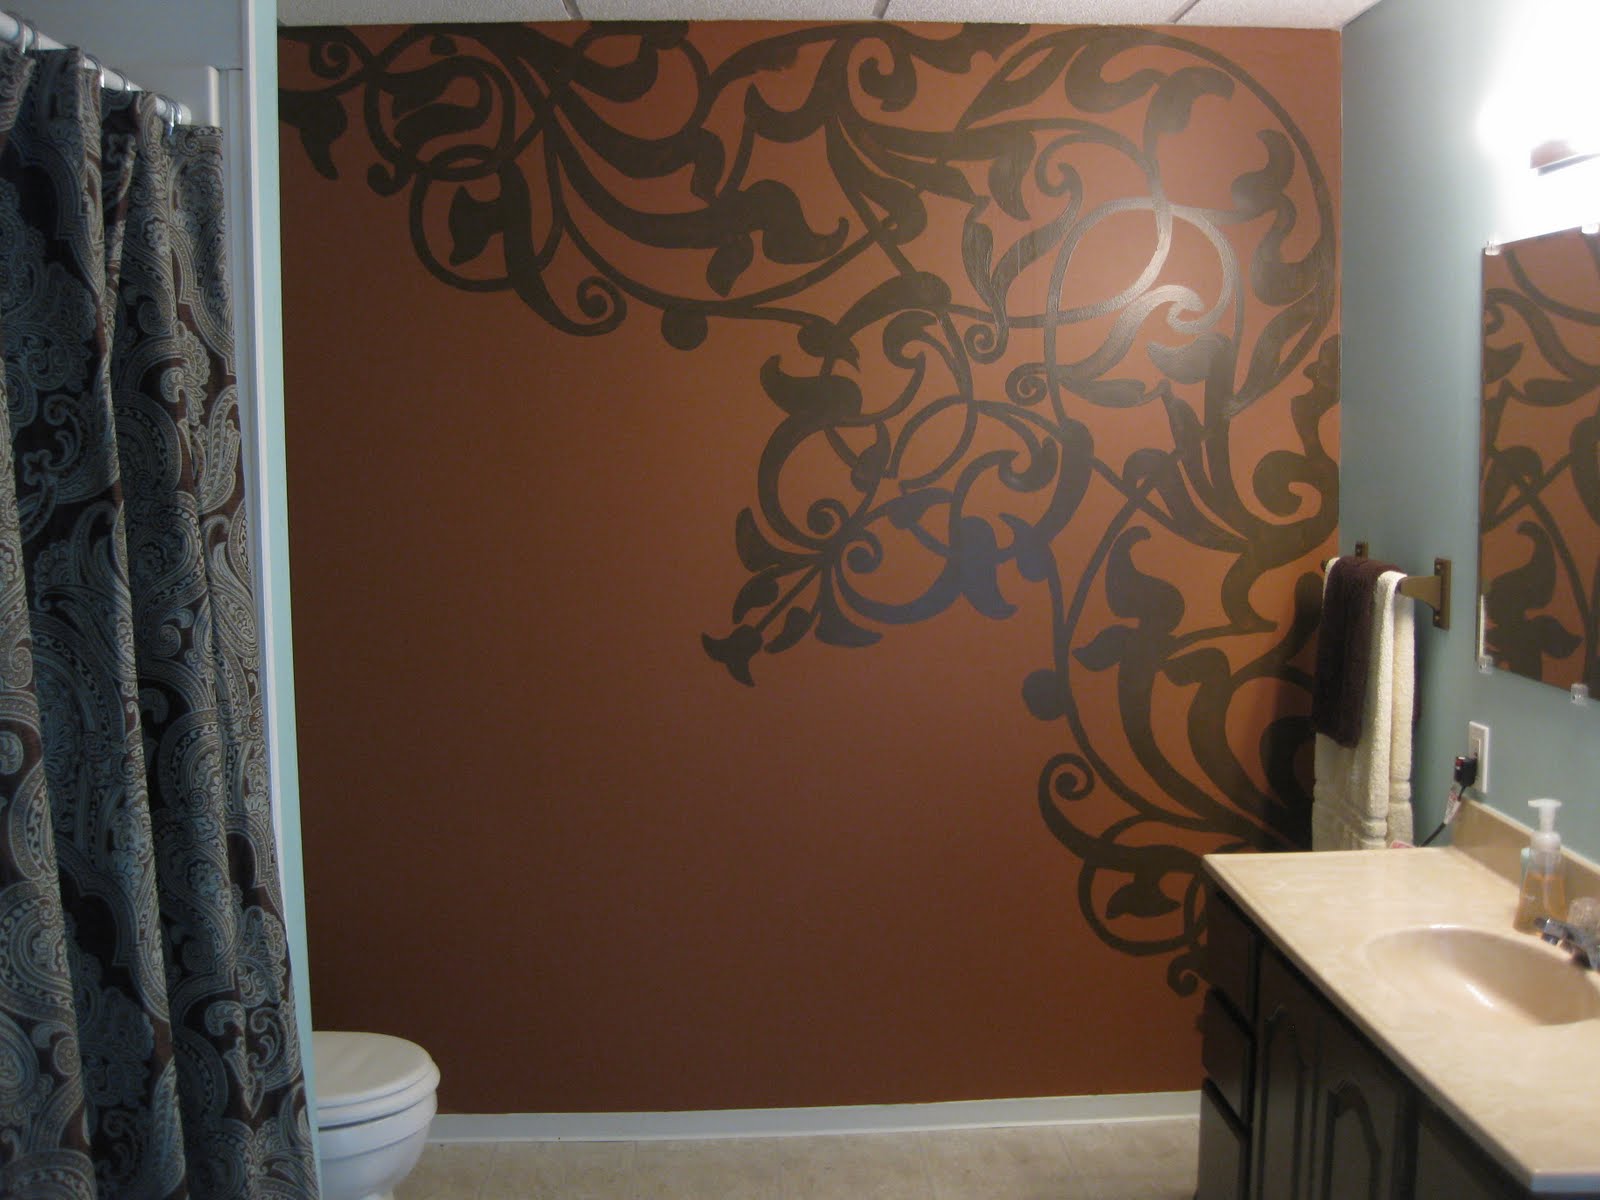
I realize that the burnt orange is a little obnoxious, but you have to consider the fact that I’m a little obnoxious, and it is my house after all. And, don’t quote me on this, but I think it might be one of the things that my smokin hot husband actually likes about me. Crazy boy.

I photocopied a design (that is actually on the cover of my Bible) onto a transparency, and projected it onto the wall, traced with a pencil, and painted! It was super easy! I thought this room could use a little visual interest. And, since my home is a relatively permanent fixture in my future, I need to continue to elicit my creative side so I don’t go CRAZY from all the harmonious stability. Creativity is my outlet.

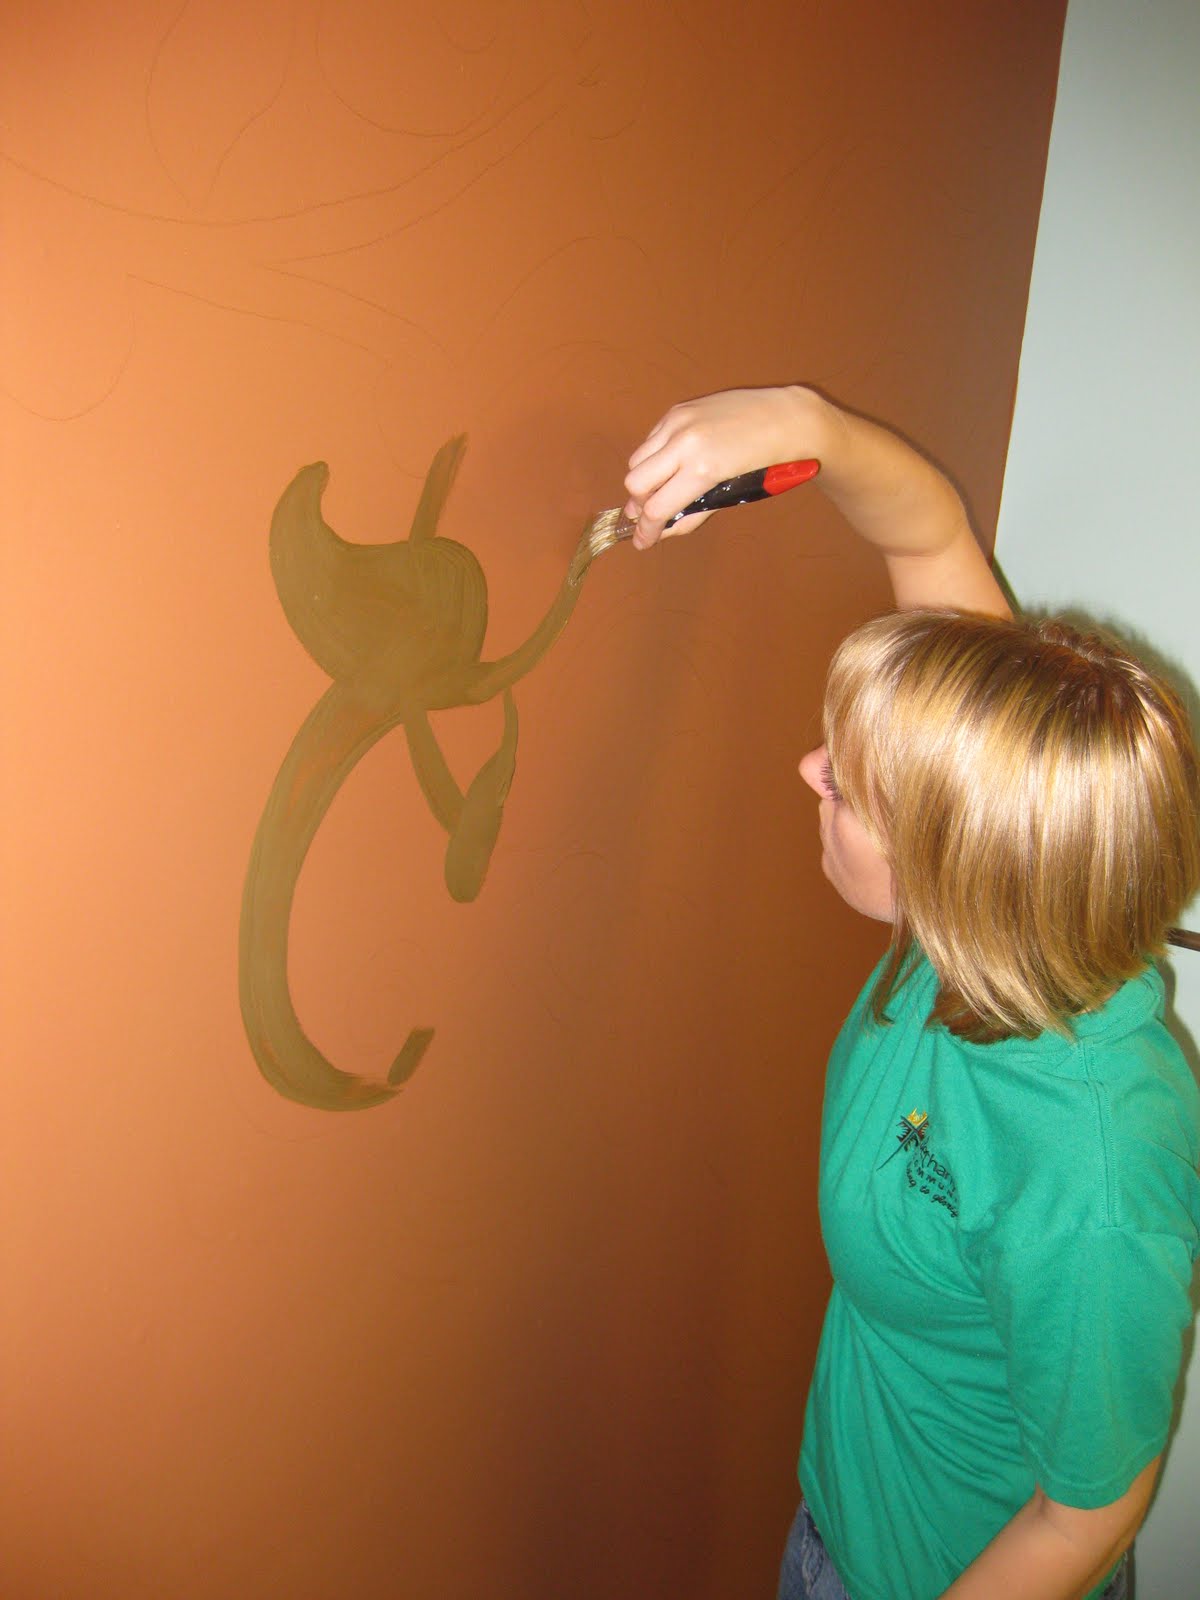
UPDATE! We’ve had TONS of requests for the image that I used to project my design onto a wall, so I’m just going to give it to ya right here! Please note this is not my own work. It’s actually the design on the front of my Bible. I just scanned it, sized it, and printed it onto a transparency. So that’s why the image is pretty globby. It’ll still work though! It did for me!
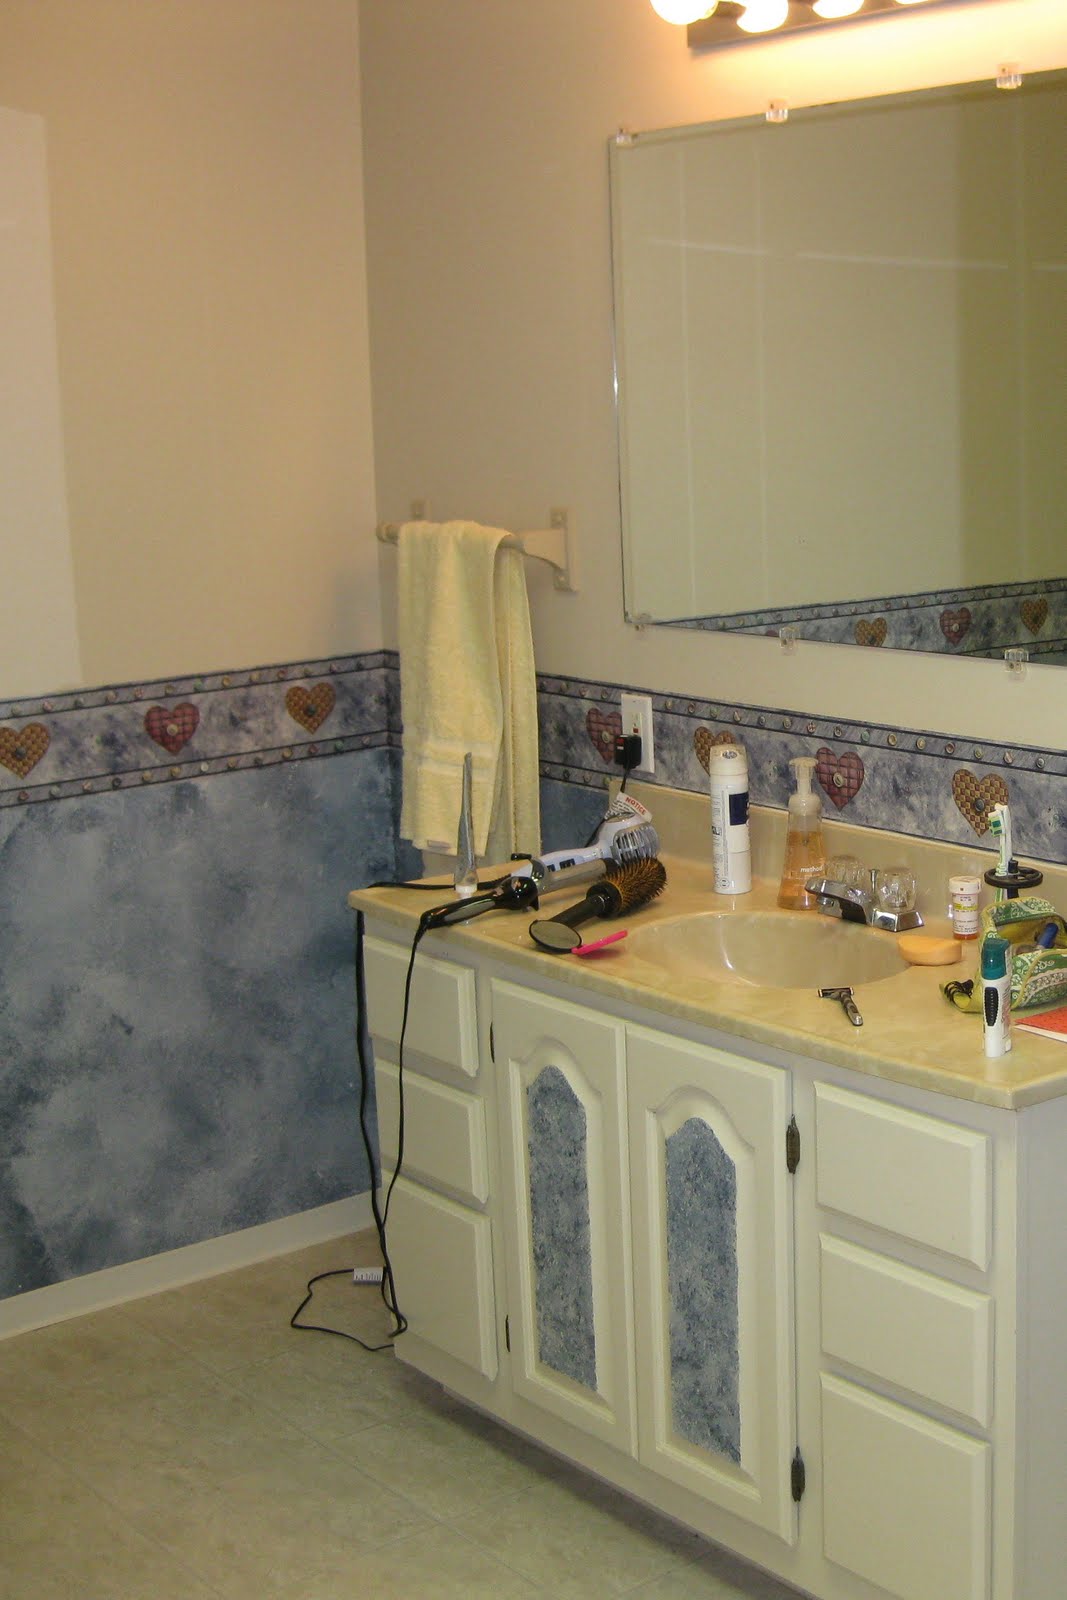
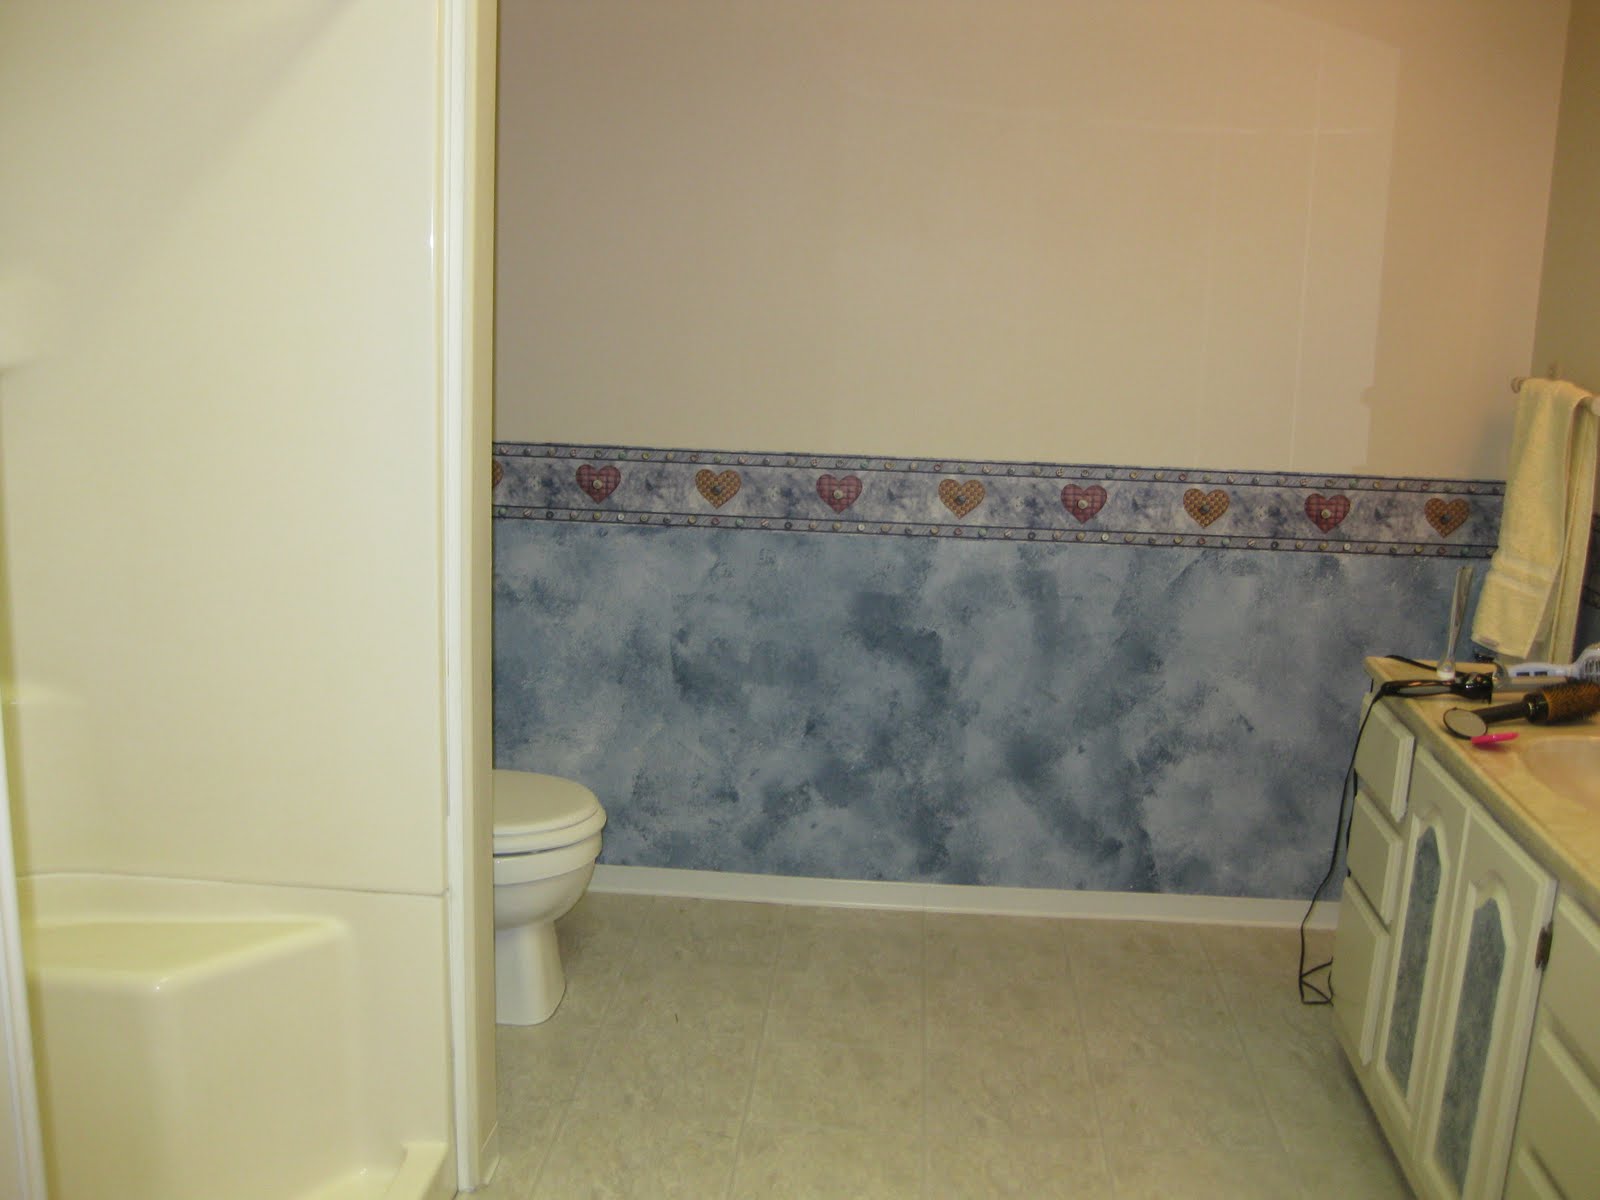
BEFORE:

AFTER:


Related:

  • Master Bathroom Update

    If you've been following along on the 'gram or Youtube, you know we've been turning…

  • Master Bathroom Reveal

    WHAT A JOURNEY! What a labor of love! What a pain in the booty! I…

  • Stripey Ombre Mural with Shelves

    Hey friends! I recently shuffled some things around in my studio, and it really got…

About Bethany Sy

Nick and Bethany Sy are the creative free-spirits behind DIY/Lifestyle blog, Reality Daydream. They recently purchased a historic mansion and have been documenting the ups and downs of renovation and making this home their own... all while sharing tips and tutorials along the way! When they found themselves in the trenches of infertility, they started a journey that would prove to be their most important DIY project ever, and have 3 beautiful girls to show for it. <3

« Downstairs Bathroom: Part 1
In Memory of Grandpa Klinge »

Comments

  1. 28

    Nancy A says

    July 29, 2015 at 9:33 am

    This is terrific! You should be very proud of your creativity. Well done!

    Reply
    • 29

      Beth @ Sawdust and Embryos says

      August 3, 2015 at 5:03 pm

      You’re so sweet Nancy! Thanks for commenting 🙂

      Reply
  2. 30

    Michelle at Faith, Trust & Pixie Dust says

    January 21, 2014 at 12:34 am

    This looks wonderful & I love the burnt orange color! Thanks so much for the inspiration!

    Warmly, Michelle

    Reply
  3. 31

    Sunnie says

    November 14, 2013 at 6:25 pm

    I am so inspired by your work!! We are currently redoing our kitchen after some water damage. You 2 have an amazing chemistry to accomplish such beauty in your home. Thank you for your wonderful ideas, I will be using many of them in the near future.
    Warm regards,
    Sunnie
    PS Have either of you had any experience with crown molding for cupboards? Corner cupboard is giving us an awful time with the angles…can you help? Thanx..Sunnie

    Reply
    • 32

      Bethany @ Sawdust and Embryos says

      November 14, 2013 at 6:37 pm

      Thanks Sunnie! You’re so sweet! We do have a basic crown moulding tutorial that does cover inside and outside joints. I don’t know if this will be helpful for your cabinets, but it seems like it should be the same concept at least. 🙂
      https://realitydaydream.com/2013/03/living-room-crown-molding-reveal-and.html

      Reply
  4. 33

    Anonymous says

    July 19, 2013 at 4:26 am

    another pattern request please! aveith20@gmail.com

    Reply
    • 34

      Beth @ Sawdust and Embryos says

      July 19, 2013 at 1:14 pm

      We’ve had enough requests that I added the image to this post so anyone can get their hands on it! Don’t know why it took me so long. If you have problems, let me know. Good luck! And send pics when you’re done!!!

      Reply
  5. 35

    Shannon Gordon says

    March 27, 2013 at 5:16 pm

    Is there any way I could also get a pattern for the swirls as well? It is completely perfect for any room in the house…I have great plans with it already! tks! 😉
    lilliana1@comcast.net

    Reply
    • 36

      Beth @ Sawdust and Embryos says

      March 27, 2013 at 8:24 pm

      I’ll email you!

      Reply
  6. 37

    Bethany says

    May 31, 2012 at 1:34 am

    Jen, send me an email so I know where to send you the image attachment!

    Reply
  7. 38

    Jen says

    May 30, 2012 at 9:16 pm

    Can you give me a link to the image you used for the swirls? Love it!

    Reply
  8. 39

    Erica Gott, aka Erratica says

    May 8, 2012 at 3:21 am

    Not obnoxious at all. The ‘before’ was obnoxious. This is perfect, and the design is the perfect size for the room. Yum!

    Reply
  9. 40

    Lesha says

    March 4, 2012 at 5:53 am

    Oh my gosh! I live you. The design you did inspred me and the way you wrote made me laugh. Obnoxious and creative- perfect.

    Reply
  10. 41

    Lesha says

    March 4, 2012 at 5:51 am

    This comment has been removed by the author.

    Reply
  11. 42

    Anonymous says

    January 19, 2012 at 7:05 pm

    did you freehand the design? it is really beautiful and stunning! How did you do the design?

    Reply
    • 43

      Bethany says

      January 19, 2012 at 7:09 pm

      i photocopied the design onto a transparency and projected the image onto the wall. then i just traced it with a pencil and painted it brown!

      Reply
  12. 44

    Renée says

    August 18, 2011 at 4:38 am

    I want to become your BFF so I can convince you to do this at my house!!!! Absolutely gorgeous!!

    Reply
  13. 45

    Paige says

    December 9, 2010 at 11:20 pm

    Wow!!

    Reply
  14. 46

    MMB Creations says

    December 8, 2010 at 8:08 pm

    I LOVE the mural. I grew up with burnt orange and the Texas Longhorns, so that is great and big is wonderful. I did something similar in my entry hall and loved it.

    Reply
  15. 47

    Stacy says

    December 8, 2010 at 7:17 pm

    So beautiful!!!

    Reply
  16. 48

    laurel m says

    December 8, 2010 at 5:24 pm

    Awesome! I love how the mirror makes the burnt orange a work of art on a blue wall. Seriously gorgeous!

    Reply
  17. 49

    Tru@TRU TALES FEATS says

    December 8, 2010 at 4:49 pm

    Amazing! Did you do it freehand or did you trace the pattern on the wall first? Me, I’d have to trace.

    Reply
  18. 50

    Sharon@thisthriftyhouse says

    December 8, 2010 at 3:50 pm

    As always you amaze me!! This looks fabulous!! I wish I had 1/10th of your artistic abilities!!! Awesome!

    Reply
  19. 51

    rebecca @ older and wisor says

    December 8, 2010 at 3:32 pm

    Obnoxious? Heck no! More like OUTSTANDING. But then I’ve never been one to be accused of being soft-spoken either 😉 If you tell me this was free-hand I hate you. Seriously. But it still rocks.

    (linking over from Better After)

    Reply
  20. 52

    Jenni says

    December 8, 2010 at 3:23 pm

    That looks amazing! I was kinda hoping you used a stencil cause I was going to steal the idea for my boring bathroom!

    Reply
  21. 53

    Natalie Joy says

    December 29, 2009 at 2:33 pm

    I agree the “before” was hideous! The “after” is incredible. Some may not like burnt orange, but it totally works. And the mural is so not too big!
    I have been lurking around reading your blog off and on… and I love it! It has been fun to see all that you have done with your house. I also like the first bathroom redo!

    Reply
  22. 54

    leah says

    December 3, 2009 at 2:14 pm

    brilliant!

    Reply
  23. 55

    Angie says

    December 3, 2009 at 4:48 am

    AMAZING…. and a little obnoxious makes life interesting.

    Reply

Trackbacks

  1. A mirror? In a BATHROOM? - Sawdust and Embryos says:
    April 21, 2015 at 6:31 am

    […] know that pic isn’t altogether hideous. I actually loved that mural I painted for a period of time. But it was just dark and icky-feeling. And that burnt orange made my eyeballs […]

    Reply

Leave a Reply Cancel reply

Your email address will not be published. Required fields are marked *

Recipe Rating


  • Facebook
  • Instagram
  • Pinterest
  • RSS
  • YouTube
We are Nick and Bethany! Welcome to our blog, Reality Daydream where we share our DIY adventures!
Click here for lots of art projects using only wood stain on furniture!!
Please feel free to share or pin my posts! You're welcome to use ONE of my images (no collages or pinnables) with a link back to the corresponding post. Please do not edit or crop that single image in any way. Improper use of my photos, ideas or words is a violation of copyright. Thank you!

Categories

Attention: Almost any do-it-yourself project involves risk of some sort. Your tools, materials, and skills will vary, as will the conditions at your project site. Reality Daydream has made every effort to be complete and accurate in the instructions of the plans on this website. Reality Daydream will not assume any responsibility or liability for damages or losses sustained or incurred in the course of your project or in the use of the item you create. Always follow the manufacturer’s operating instructions in the use of tools, check and follow your local building codes, and observe all commonly accepted safety precautions.


Copyright © 2025 · Modern Blogger Pro On Genesis Framework · Customizations by Sweet Theory Designs · Privacy Policy · Log in