• Home
  • About
  • Tutorials
  • Recipes
  • Furniture
  • Contact
    • Contact
    • Infertility
    • Disclosure
    • Privacy Policy
  • Shop
    • Facebook
    • Instagram
    • Pinterest

Reality Daydream

The Dream is Free, The Hustle Sold Separately

  • Home
  • About
  • Tutorials
  • Recipes
  • Furniture
  • Contact
    • Contact
    • Infertility
    • Disclosure
    • Privacy Policy
  • Shop

Acid Etching Picture Frame Glass!

May 19, 2017 by Bethany Sy

Wedding season is upon us! And I love the idea of making something super personalized as a gift for the happy couple. My previous go-to gift was one of these handmade bracket-shaped signs with their last name and year ‘established’. But this year, I decided to try something completely different! Although it’s still something to hang on the wall. Hehe!
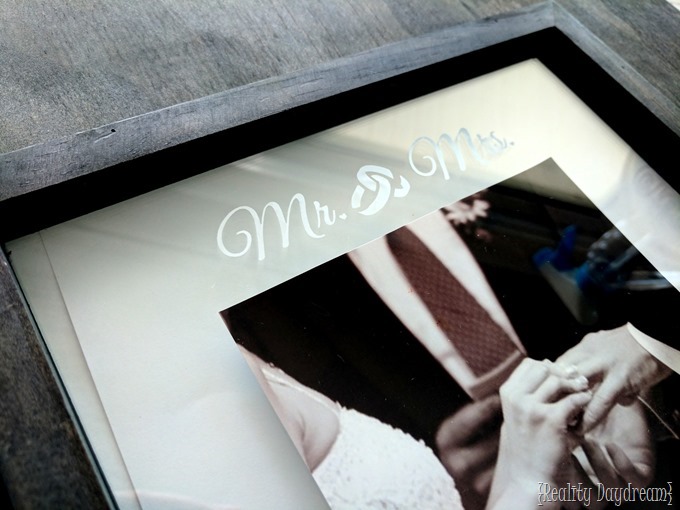
Acid Etched detail on a picture frame is such a gorgeous and subtle way to personalize the perfect wedding gift! {Reality Daydream}

*This post is sponsored my Armour Etching Products. Thank you for supporting the amazing brands that make Reality Daydream possible!*

If you look close, you’ll see that the glass on these frames is ETCHED using acid etching cream! This is such an easy and fun process, even the most novice DIYer could pull this off with flying colors. Let’s do this!

Supplies for Acid Etched Wedding Frame

  • Armour Etching Cream
  • Over ‘n’ Over Stencils (we chose the Wedding themed ones here and here!)
  • Small paint brush
  • Rubber Gloves
  • Masking tape
  • Picture frame(s) of your choice
  •  

    I snagged a couple picture frames at Hob Lob for this project.
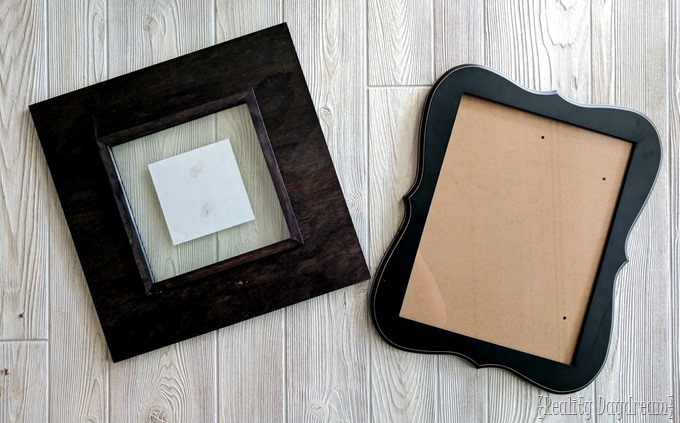
    Picture frames for acid etching wedding gift ideas! {Reality Daydream}

    I decided to etch on both frames, but for this tutorial, I’m going to etch the frame on the left because I love how it’s a ‘floating frame’ and you can see the wall behind the pic! I printed out a 5×5 pic from Nick and my wedding to go between the two pieces of glass. (Our amazing wedding photographer is Hannah Goering!) And I decided to etch on the space above the picture. But YOU could do it anywhere around the perimeter, or even over the picture!

    armour etch project

    Next I gathered my supplies and poured over which etching stencil to use. So many gorgeous options!
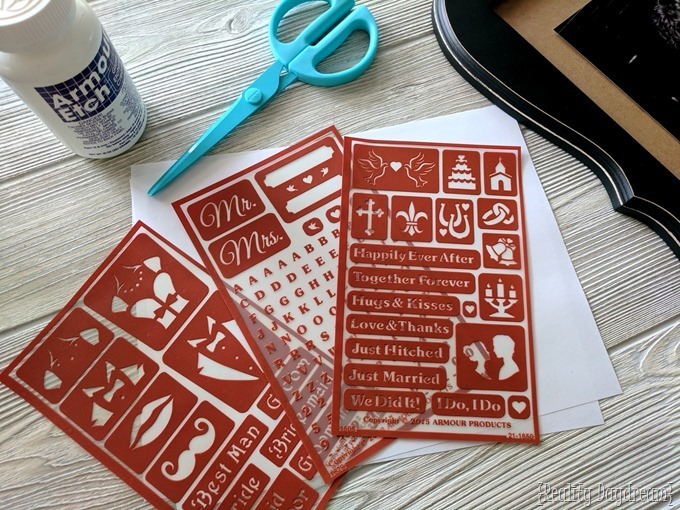
    Supplies for Acid Etching Wedding Picture frames as the perfect wedding gift idea! {Reality Daydream}

    I ended up choosing the ‘Mr. & Mrs. stencil with the intertwined rings between them as the ‘and’ sign. It’s important to make sure you put them on straight and centered, but don’t panic because you can totally take them off and re-place them as many times as you need before you go at it with etching cream. They’re REUSABLE STENCILS! Once you get them just perfect, put masking tape all around the perimeter of the stencils to help protect the glass around it from accidentally getting etched.

    armour etch project-001

    Time for the fun part! Slap on some gloves to protect your hands, and dip your paint brush into the Armour Etching Cream and start globbing it over your design. You want it to be a thick enough coat that the design is completely covered.
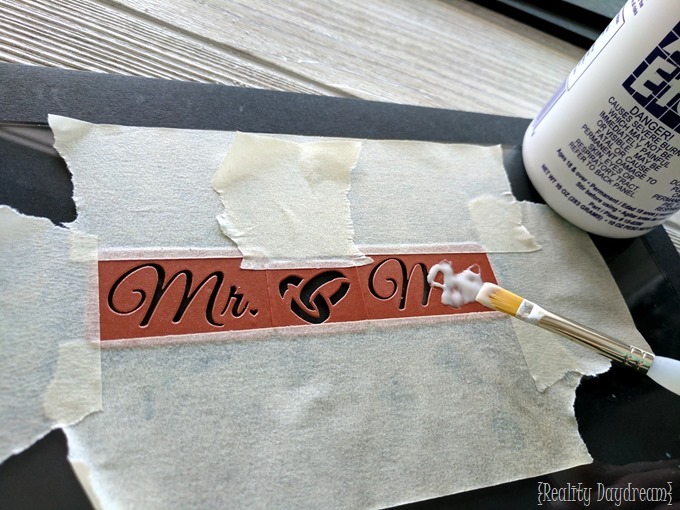
    Use ascid etching paste to make gorgeous personalized wedding gifts! {Reality Daydream}

    Once the whole design is covered, let it sit for one to two minutes while the acid eats away at your glass! Then wash it off in the sink, being careful not to get any of the paste on your skin.

    Acid etching the glass on a picture frame for a personalized wedding gift idea! {Reality Daydream}

    When it seems like you’ve gotten all the paste off, peel off your masking tape and stencils, and rinse off any remaining residue. You won’t be able to see the etching very well at first. It really pops once it’s completely dry!

    armour etch project-003

    After it’s dry, clean your glass and pop it in the frame! If this isn’t instant gratification, then I don’t know what is!

    Acid etch the glass on a picture frame to make a gorgeous personalized wedding gift! {Reality Daydream}

    That’s PERMANENT folks! Can’t be scratched or washed off… ever. No expensive engraving or messy sand-blasting. And it makes for such a beautiful and subtle touch.
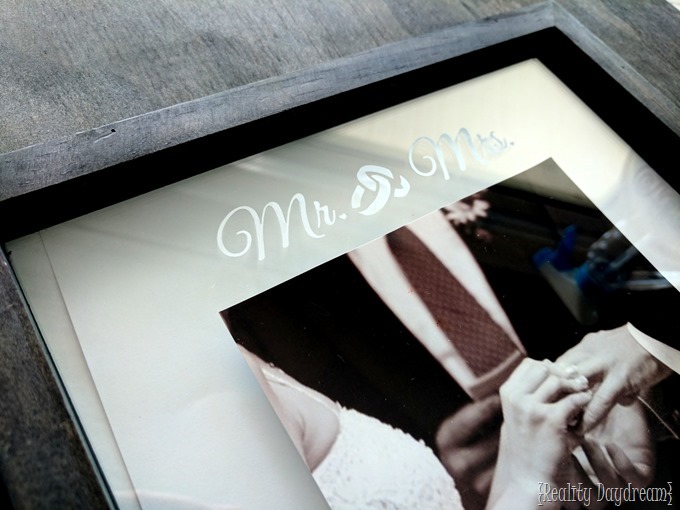
    Acid Etched detail on a picture frame is such a gorgeous and subtle way to personalize the perfect wedding gift! {Reality Daydream}

    Man, it is SO HARD to photograph etched glass… or even just glass in general, because of the reflection. In fact, this next pic you can’t really even see the etching because of the direction of the sunlight, but I wanted to show how awesome these look in a collage on with a gallery wall!

    Wedding photo collage or gallery wall using personalized frames by etching the glass! {Reality Daydream}

    It’s fun to play around with different colors of backgrounds and frame mats to see what really makes the etching POP. I found that the lighting and angles is really what makes the biggest difference though.
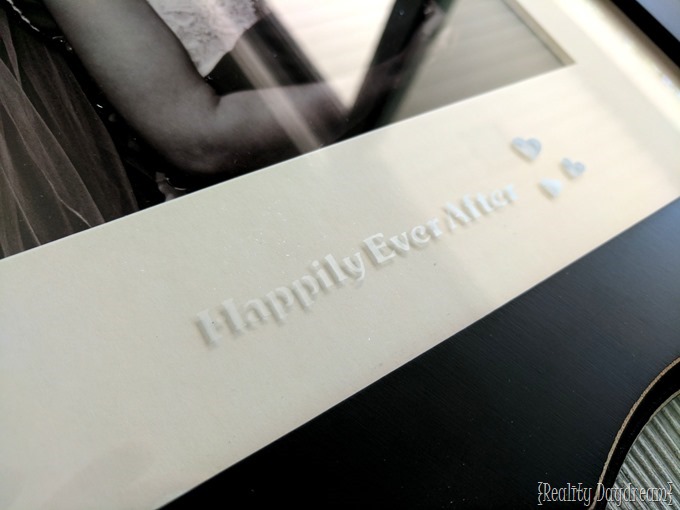
    Etching on the glass of wedding frames for a personalized DIY wedding gift idea! {Reality Daydream}

    Etch anything you want onto the glass of a pixture from with this tutorial! {Reality Daydream}

    So elegant, subtle, and PERSONALIZED! And you can use this technique on any glass that doesn’t have a coating on it, including wine glasses, mirrors, some Pyrex, windows… I even did the dome of a cake stand as a wedding gift once upon a time! You can even etch onto a wine bottle if you’re giving it as a gift. HOW FUN?!

    What is the first thing you’re going to etch?! Do I have your creative wheels spinning? I hope so! Be sure to share your projects with my by tagging me on social media! I’m @RealityDaydream on Facebook and Instagram. And go check out all the inspiring ideas and products by Armour Etch!

    ~Bethany

    ~~~~~~~~~~~~~~~~~~~~~~~~~~~

    Thanks for pinning!

    Acid etch on the glass of a picture frame as the PERFECT wedding gift idea! {Reality Daydream}

    Related:

    • distanced picture of window being repaired with a tree in the foreground
      Federal House Window Frame Restoration

      Hey buddies! Nick here! It's been almost 4 years since we purchased this home. And…

    About Bethany Sy

    Nick and Bethany Sy are the creative free-spirits behind DIY/Lifestyle blog, Reality Daydream. They recently purchased a historic mansion and have been documenting the ups and downs of renovation and making this home their own... all while sharing tips and tutorials along the way! When they found themselves in the trenches of infertility, they started a journey that would prove to be their most important DIY project ever, and have 3 beautiful girls to show for it. <3

    « Tutorial for Boho Style Hanging Planters
    Free-Standing Strawberry Garden w/ Hanging Planters »

    Comments

    1. 1

      Susan Long says

      May 19, 2017 at 7:22 pm

      I love this idea – when I think of how many gifts and making something personal and quick !!! I love the cake dome idea. Thanks !! Brilliant!

      Reply

    Leave a Reply Cancel reply

    Your email address will not be published. Required fields are marked *

    Recipe Rating


    • Facebook
    • Instagram
    • Pinterest
    • RSS
    • YouTube
    We are Nick and Bethany! Welcome to our blog, Reality Daydream where we share our DIY adventures!
    Click here for lots of art projects using only wood stain on furniture!!
    Please feel free to share or pin my posts! You're welcome to use ONE of my images (no collages or pinnables) with a link back to the corresponding post. Please do not edit or crop that single image in any way. Improper use of my photos, ideas or words is a violation of copyright. Thank you!

    Categories

    Attention: Almost any do-it-yourself project involves risk of some sort. Your tools, materials, and skills will vary, as will the conditions at your project site. Reality Daydream has made every effort to be complete and accurate in the instructions of the plans on this website. Reality Daydream will not assume any responsibility or liability for damages or losses sustained or incurred in the course of your project or in the use of the item you create. Always follow the manufacturer’s operating instructions in the use of tools, check and follow your local building codes, and observe all commonly accepted safety precautions.


    Copyright © 2025 · Modern Blogger Pro On Genesis Framework · Customizations by Sweet Theory Designs · Privacy Policy · Log in