• Home
  • About
  • Tutorials
  • Recipes
  • Furniture
  • Contact
    • Contact
    • Infertility
    • Disclosure
    • Privacy Policy
  • Shop
    • Facebook
    • Instagram
    • Pinterest

Reality Daydream

The Dream is Free, The Hustle Sold Separately

  • Home
  • About
  • Tutorials
  • Recipes
  • Furniture
  • Contact
    • Contact
    • Infertility
    • Disclosure
    • Privacy Policy
  • Shop

Adding stone to the breakfast bar!

October 31, 2014 by Bethany Sy

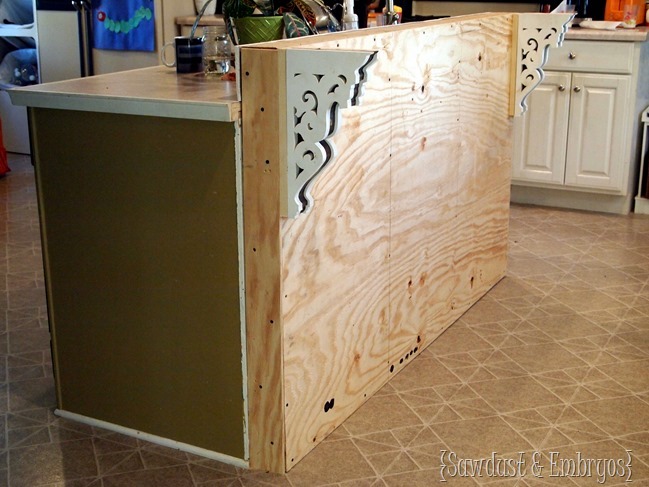
Are you ready for the next step in my Breakfast Bar build? So far, I showed you how I sawed off part of the island and framed a wall, then made my own corbels!

Adding a breakfast bar to an existing kitchen island!

A lot of you have been asking me what color I’m going to paint the actual island. I’m guessing there are a handful of people that are worried that I was going to leave it as plywood since I recently wrote this post. But… YOU’RE ALL WRONG! I actually first considered beadboard to add some texture. But that’s a little trendy for me, and I don’t really care for the ‘country’ vibe it gives off. It just ain’t me.

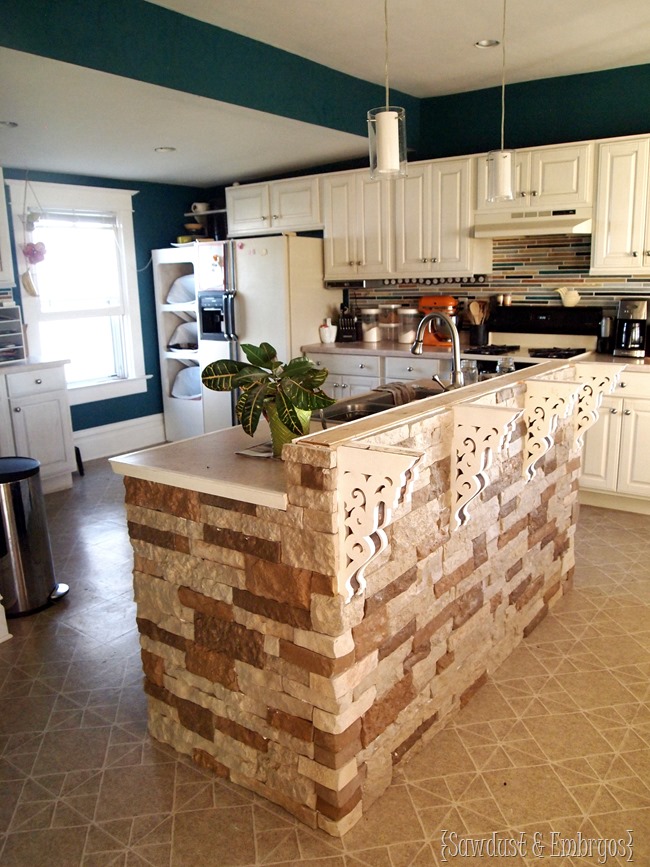
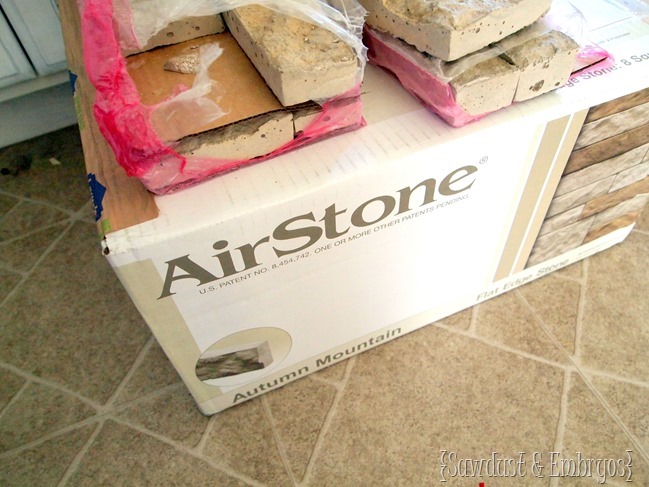
So! Ever since I saw this awesome stone accent wall (by my friend Ann Marie @ Twice Lovely), I’ve been secretly looking for a place to use this product in my own home. And after standing back and looking at my plywood with decorative corbels, it hit me like a ton of bricks AirStone.

LOVE AirStone!

This stuff looks and feels exactly like natural stone… but it’s 75% lighter. And 100% easier to install.

Adding AirStone to breakfast bar

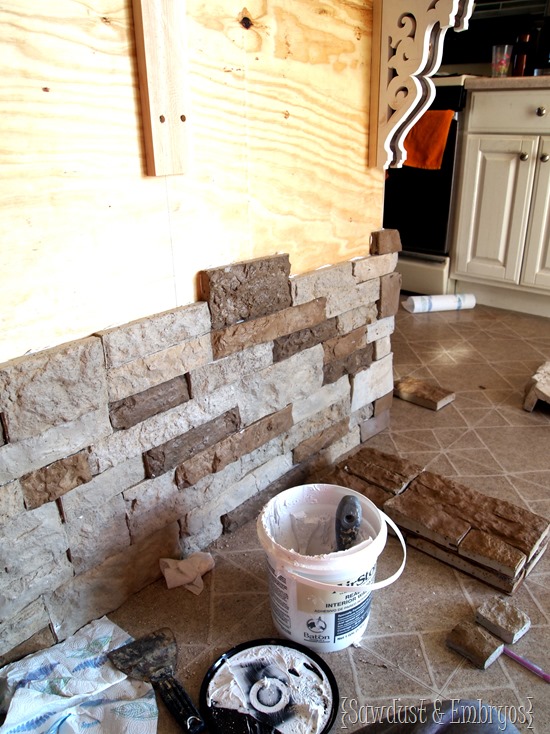
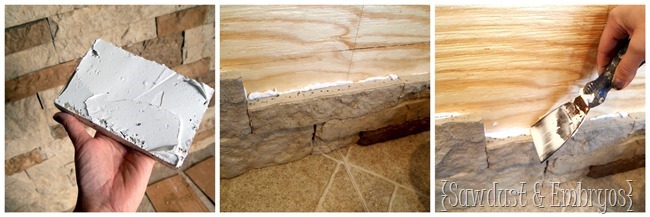
This stone is made out of recycled material, and is poured into molds that are cast from actual rock. We just used the pre-mixed bucket o’adhesive, slapped a layer on the back of each ‘stone’ with a putty knife, and pressed into place.

How to add AirStone

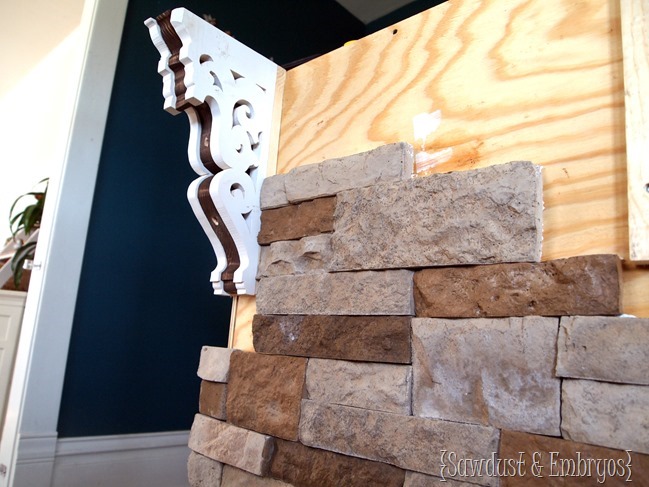
Each ‘stone’ is 2” or 4” in height, with lengths of 4”, 6”, 8”, 10” and 12”, so things fit together really easily. The hardest part is trying to be ‘purposefully random’.

Adding a stone veneer (AirStone) to my DIY Breakfast Bar!

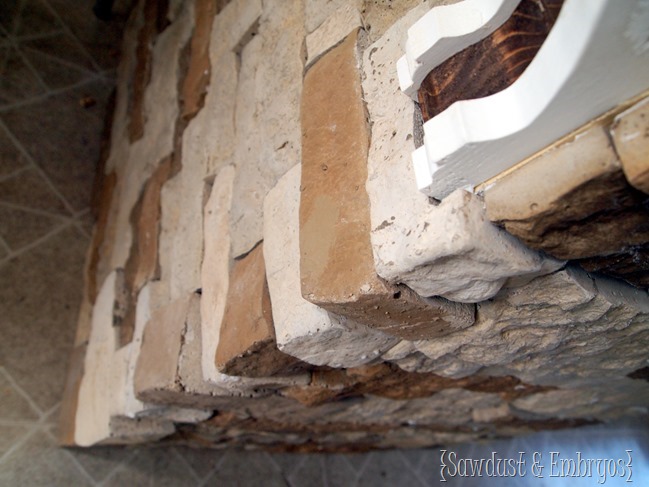
The corner pieces are my favorite… it’s like they thought of everything!

AirStone corners

There is some cutting involved, especially if you have to go around things (like my corbels), but you don’t even need to use a power tool! You can just use a simple hack saw. To keep the ‘dust’ to a minimum, Nick went out to the garage to use the band saw or grinder each time I needed one cut. He’s a dear, because getting up from sitting on the floor is no small task these days.


What do you think?! SO FANCY!

Add a breakfast bar to your existing island!

Me thinks I’m going to need to give the rest of the kitchen some TLC so it will all flow… cause right now everything but the island looks a little homeless. The backsplash definitely isn’t working anymore. And I have plans to extend the cabinets up to the ceiling… among other things. Muahaha!

Next week, I’ll be back to show you what I used as the countertop! Till then, have an amahhhzing weekend!

Sawdust-Embryos_thumb5

Disclaimer! We reached out to AirStone and they were delighted to partner with us on this project. While we were provided with free product, we were not compensated monetarily. We just genuinely love their product!!
About Bethany Sy

Nick and Bethany Sy are the creative free-spirits behind DIY/Lifestyle blog, Reality Daydream. They recently purchased a historic mansion and have been documenting the ups and downs of renovation and making this home their own... all while sharing tips and tutorials along the way! When they found themselves in the trenches of infertility, they started a journey that would prove to be their most important DIY project ever, and have 3 beautiful girls to show for it. <3

« Sometimes they snuggle.
Baby Quilts, Inspiration, and Baby Bump {23 weeks} »

Comments

  1. 14

    Tonia Rowe says

    April 8, 2020 at 6:12 pm

    We just did this. Love it but wondering how to seal and protect from stains

    Reply
    • 15

      Bethany Sy says

      April 9, 2020 at 1:02 pm

      We didn’t seal it with anything, and it looked immaculate for years… until we moved. 🙂

      Reply
  2. 16

    Kenz, Interiors By Kenz says

    November 18, 2014 at 10:34 am

    This is STUNNING. Your kitchen is taking on a whole new custom look. LOOOOOOVE it!

    Reply
  3. 17

    Chris Kramer says

    November 16, 2014 at 9:10 pm

    What color did you use for this project? Also did you buy it at Lowe’s?

    Reply
  4. 18

    Beth @ Sawdust and Embryos says

    November 9, 2014 at 12:30 pm

    Haha! Great minds DO think alike! I can’t wait for you to see what we actually do with the backsplash! I think it’s going to be awesome!

    Reply
  5. 19

    Nicole Goodwin says

    November 4, 2014 at 2:29 pm

    holy buckets it’s gorgeous!!!!!!!

    Reply
  6. 20

    Mindy Friedlander-Schaper says

    November 2, 2014 at 6:11 pm

    I love this! I love the look of stone and it’s nice to know that it can be installed easily at home! I looked up the price and it looks okay! Awesome!

    Reply
    • 21

      Beth @ Sawdust and Embryos says

      November 9, 2014 at 12:29 pm

      The price is the best part! I can’t believe how much ‘natural stone’ is. CRAZY!

      Reply
  7. 22

    Andi Filante says

    November 1, 2014 at 6:15 pm

    It looks beautiful Bethany…you did an incredible job!
    -andi

    Reply
  8. 23

    dana s says

    October 31, 2014 at 10:36 am

    eh… I don’t like it….. I LOVE IT!!!!! AWESOME JOB!!!!
    ~dana~ 😉

    Reply
  9. 24

    Tammy says

    October 31, 2014 at 10:07 am

    LOOKS FANTASTIC….!!!! I bet you’ll do some kind of stained wood work for your counter top…!!

    Reply
  10. 25

    Hannah Reid says

    October 31, 2014 at 9:49 am

    This is so gorgeous!

    Reply
  11. 26

    Paige T. says

    October 31, 2014 at 9:02 am

    I’m obsessed!!!!

    Reply
  12. 27

    Renee says

    October 31, 2014 at 2:54 pm

    I LOVE it! My nephew put the same type of product on his breakfast bar in his home. It is just beautiful! Funny, the first things I thought to myself when I saw the finished product was “that backsplash needs to be changed”. What is that saying about great minds????? Can’t wait to see the countertop; I am sure you have done something totally different than the rest of us would! That is a good thing!

    Reply

Trackbacks

  1. Adding stone veneer to breakfast bar (or ANYTHING!) using AirStone... super simple! {Sawdust and Embryos} - Home Decor Coco says:
    May 20, 2015 at 4:58 pm

    […] Source: sawdustandembryos.com […]

    Reply

Leave a Reply Cancel reply

Your email address will not be published. Required fields are marked *

Recipe Rating


  • Facebook
  • Instagram
  • Pinterest
  • RSS
  • YouTube
We are Nick and Bethany! Welcome to our blog, Reality Daydream where we share our DIY adventures!
Click here for lots of art projects using only wood stain on furniture!!
Please feel free to share or pin my posts! You're welcome to use ONE of my images (no collages or pinnables) with a link back to the corresponding post. Please do not edit or crop that single image in any way. Improper use of my photos, ideas or words is a violation of copyright. Thank you!

Categories

Attention: Almost any do-it-yourself project involves risk of some sort. Your tools, materials, and skills will vary, as will the conditions at your project site. Reality Daydream has made every effort to be complete and accurate in the instructions of the plans on this website. Reality Daydream will not assume any responsibility or liability for damages or losses sustained or incurred in the course of your project or in the use of the item you create. Always follow the manufacturer’s operating instructions in the use of tools, check and follow your local building codes, and observe all commonly accepted safety precautions.


Copyright © 2025 · Modern Blogger Pro On Genesis Framework · Customizations by Sweet Theory Designs · Privacy Policy · Log in