• Home
  • About
  • Tutorials
  • Recipes
  • Furniture
  • Contact
    • Contact
    • Infertility
    • Disclosure
    • Privacy Policy
  • Shop
    • Facebook
    • Instagram
    • Pinterest

Reality Daydream

The Dream is Free, The Hustle Sold Separately

  • Home
  • About
  • Tutorials
  • Recipes
  • Furniture
  • Contact
    • Contact
    • Infertility
    • Disclosure
    • Privacy Policy
  • Shop

Royal Design Stencil Review!

October 29, 2012 by Bethany Sy

Top of the mornin’ to ya!

I’m excited to FINALLY show you a finished project today… one of the things I’ve been slaving away at in the evenings when Nick is away at work.

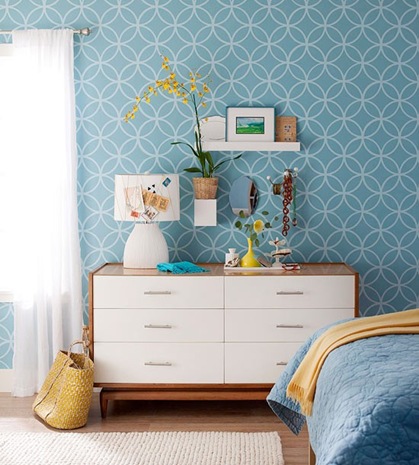
Based on my love of stenciling, you can imagine my excitement when Royal Design Studios offered to send me one of their stencils FOR FREE to review! Pure awesomeness! I got to choose any stencil from their wide selection. I knew I wanted an ‘all over stencil’, and when I saw this circle lattice design… I knew it was THE ONE.

Royal Design Studios Stencil

THEN… a couple days later, I was looking at my pins on my Pinterest Boards and noticed that I had pinned projects with this same design not once but TWICE! (here and here)… guess I’ve been subconsciously loving this pattern all along! It was meant to be.

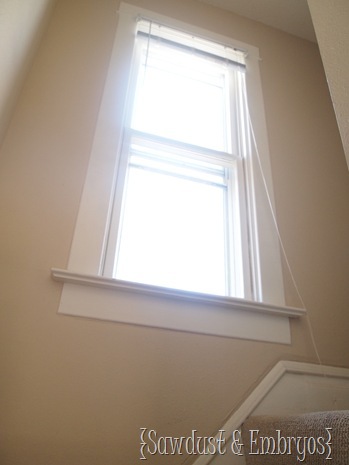
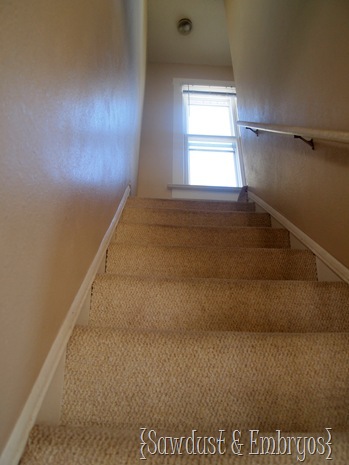
I knew just where I wanted to use this pattern too… you see our stairs and hallway are so. very. BEIGE.

PA072792

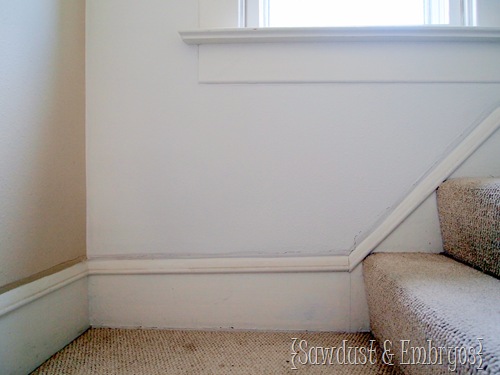
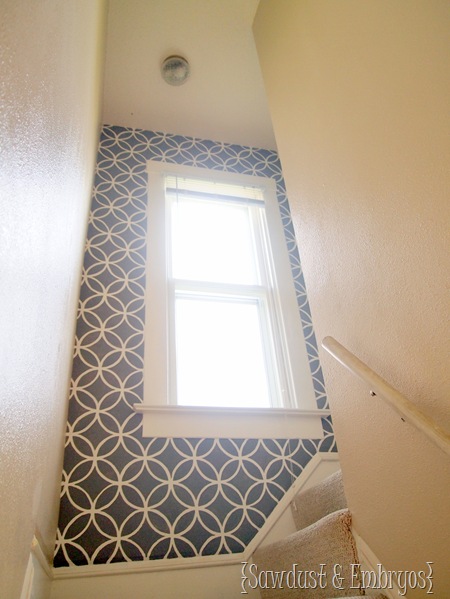
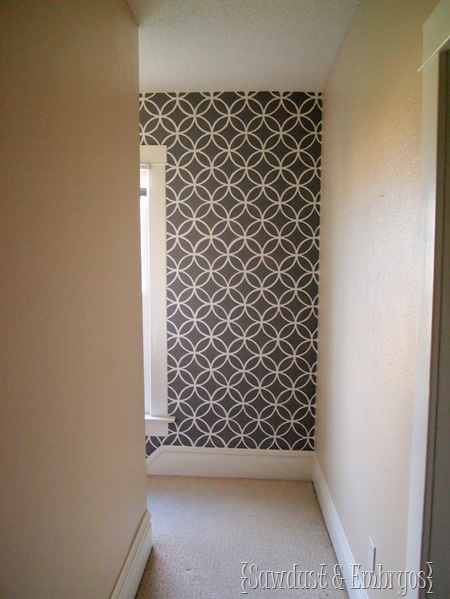
So I decided to stencil this wall at the top of the stairs to add some texture (both when walking up the stairs, AND toward the stairs from the upstairs bedrooms).

PA072796

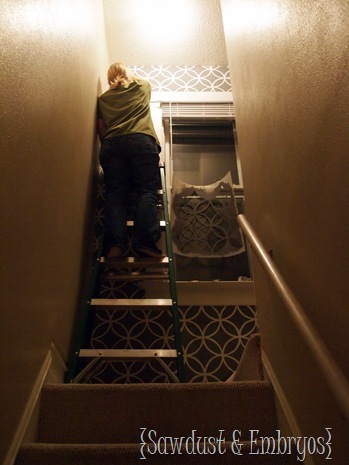
I started by painting this wall white.

PA082845

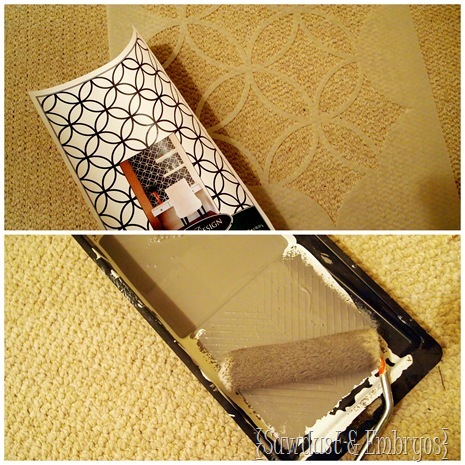
And then whipped out my sweet stencil!

stencil

Royal Design Studios provides great instructions, tutorials, and how-to videos on their website… so you JUST CAN’T GO WRONG!

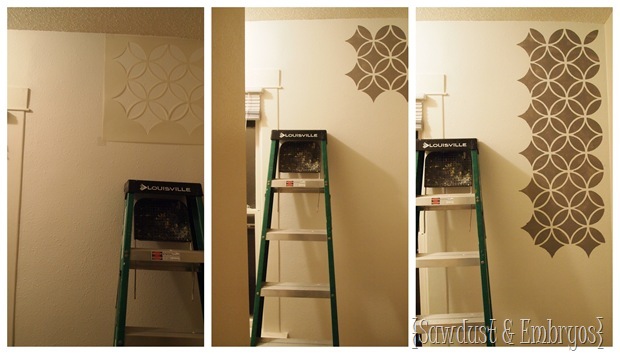
hallway stencil

I have to admit… this whole job took a lot longer than I planned on, because I’m such a perfectionist. I ended up doing some touch-ups (which you’ll have with any painting job), but the more I ‘touched-up’ the more KEPT TOUCHING UP! I needed to just walk away because unless your nose was 6 inches from the wall, you wouldn’t even notice the little things *I* was noticing.

PA283238

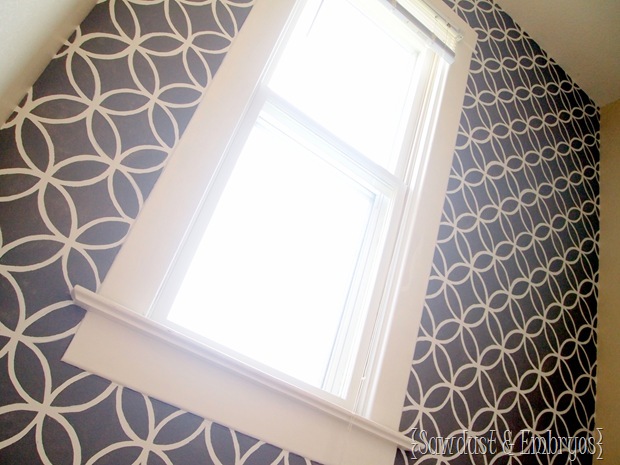
But I absolutely LOVE the finished product. It was so totally worth the time put into it!

PA283250

And it adds such a pop of interest and texture in what’s arguably the most boring and BLAH part of our whole house. I have plans for curtains and a chandelier up next… SO EXCITED!

PA283252

Here’s the view from upstairs:

PA283246

Upgrade, right?

hallway before and after

You guys… the best news YET? Royal Design Studios has agreed to do a GIVEAWAY for our readers. Stay tuned for that one week from today!

I was not paid for this review, only provided with their product to try out for myself ! All opinions are 1000% my own !
blank-001

Related:

  • Sven sofa review
    Article Sven Review

    Howdy friends! We've been using and abusing our Sven Sofa and Armchair from Article for…

About Bethany Sy

Nick and Bethany Sy are the creative free-spirits behind DIY/Lifestyle blog, Reality Daydream. They recently purchased a historic mansion and have been documenting the ups and downs of renovation and making this home their own... all while sharing tips and tutorials along the way! When they found themselves in the trenches of infertility, they started a journey that would prove to be their most important DIY project ever, and have 3 beautiful girls to show for it. <3

« A Moment of Weakness
Wedding Weekend Extravaganza »

Comments

  1. 20

    Christy Ray says

    May 3, 2018 at 3:49 am

    can i ask what color that is?!? i’ll admit, I was concerned at first but the finished project looks amazing!! I’m not big on browns, tans or neutrals except for a very, VERY few and that one is great!! I love stenciling too!!

    Reply
    • 21

      Bethany Sy says

      May 3, 2018 at 11:17 am

      Oh man, sorry Christy! This post is so old, I have no memory of what brand or color paint I used. I’ve gotten smart over the years and started sharing that info in the posts because someone will always ask. So sorry!

      Reply
  2. 22

    Bonnie says

    May 7, 2014 at 1:38 pm

    looks great! I have this stencil and will tackle in the next day or so. Question: how did you do the border of the wall (top, sides)? In the first picture, there is the gap of white, but at the end the pattern is going “off the wall”…help..?!

    Reply
    • 23

      Bethany @ Sawdust and Embryos says

      May 7, 2014 at 4:07 pm

      Bonnie, the corners were tricky… I’m not going to lie! I just folded the stencil into the corner and got my brush in as far as I could. Then I just did a lot of couch-ups and ‘eyeing’ it to finish it all the way to the corner. It’s not perfect… but nothing I do is! 🙂

      Reply
  3. 24

    Anonymous says

    March 17, 2013 at 5:44 am

    Looks fabulous! Well done.

    Reply
  4. 25

    Nicole says

    October 30, 2012 at 3:32 am

    SO gorgeous!!! Can’t wait to see what you do with the chandelier 🙂

    Reply
  5. 26

    Renee says

    October 30, 2012 at 2:27 am

    It is beautiful! I absolutely love it! I need to do this somewhere in my house but I am just not as brave as you. I would mess it up somehow! Thanks for sharing!

    Reply
  6. 27

    Anonymous says

    October 29, 2012 at 5:05 pm

    I just love this, see you could come to NY, sight see, fix all my wish list and I’ll babysit! win-win. Right? Mary in NY

    Reply
    • 28

      Beth @ Sawdust and Embryos says

      October 29, 2012 at 6:19 pm

      Mary! If you weren’t so far away, you’d have a deal!
      Be safe during this crazy storm!

      Reply
  7. 29

    Anonymous says

    October 29, 2012 at 4:44 pm

    Hi There! Any advice/hints tips you can give on the process? I just ordered this stencil last week coincidently! Did you use flat/gloss paint? How long did it take? How did you do the corners, sides…. did you cut the stencil? THANKS!

    Reply
    • 30

      Beth @ Sawdust and Embryos says

      October 29, 2012 at 4:50 pm

      It seemed like it took FOREVER because I just worked on it a little here and there, but the actual time spent stenciling was probably 2-3 hours. As far as corners and along the ceiling, I just rolled as close as I possibly could (leaving about an inch unpainted) and then free-handed the rest. I never cut the stencil… you shouldn’t have to either. The Royal Designs website has lost of tutorials as well. I encourage you to check it out. I used flat gray paint… just because it’s what I had on hand. I don’t think the paint finish matters at all.

      Reply
    • 31

      Anonymous says

      October 29, 2012 at 8:07 pm

      Thanks so much for the info!

      Reply
  8. 32

    Heather P. says

    October 29, 2012 at 4:41 pm

    Wow! Turned out totally gorgeous! 🙂

    Reply
  9. 33

    Jen says

    October 29, 2012 at 4:39 pm

    That looks sweet! Totally makes that space better.

    Reply
  10. 34

    Niki Weaver says

    October 29, 2012 at 4:25 pm

    LOVE it! This is one of my favorites of your projects which is saying a lot. Great choice on the pattern. Makes me wish we had a boring stairwell wall of our own to jazz up. Just amazing!

    Reply
  11. 35

    MamideRay says

    October 29, 2012 at 4:00 pm

    it looks darn good! Nice job!

    Reply
  12. 36

    Dharma says

    October 29, 2012 at 3:23 pm

    I love this 🙂 So worth the effort (which I can say because I am a stencil-chicken so far….but you are inspiring me big time 🙂

    Reply
  13. 37

    Kenz @ Interiors By Kenz says

    October 29, 2012 at 3:23 pm

    LOVE that pattern!

    Reply

Trackbacks

  1. Suggested Browsing says:
    July 5, 2015 at 10:14 am

    Suggested Browsing

    Royal Design Stencil Review! – Sawdust and Embryos

    Reply
  2. Patchwork Herringbone Stenciled Wall Mural | Paint + Pattern says:
    July 30, 2014 at 2:27 pm

    […] one little project at a time. They love to stencil and have used Royal Design Studio stencils on stairway landing walls, dining room area rug and several other projects. The one that particularly caught our eye and we […]

    Reply
  3. Stencil Color Stories: Warming Up to Gray | Paint + Pattern says:
    December 29, 2013 at 7:26 am

    […] Sawdust and Embryos took their stair landing up a step (or two!) with the Endless Circles Lattice Stencil. […]

    Reply

Leave a Reply Cancel reply

Your email address will not be published. Required fields are marked *

Recipe Rating


  • Facebook
  • Instagram
  • Pinterest
  • RSS
  • YouTube
We are Nick and Bethany! Welcome to our blog, Reality Daydream where we share our DIY adventures!
Click here for lots of art projects using only wood stain on furniture!!
Please feel free to share or pin my posts! You're welcome to use ONE of my images (no collages or pinnables) with a link back to the corresponding post. Please do not edit or crop that single image in any way. Improper use of my photos, ideas or words is a violation of copyright. Thank you!

Categories

Attention: Almost any do-it-yourself project involves risk of some sort. Your tools, materials, and skills will vary, as will the conditions at your project site. Reality Daydream has made every effort to be complete and accurate in the instructions of the plans on this website. Reality Daydream will not assume any responsibility or liability for damages or losses sustained or incurred in the course of your project or in the use of the item you create. Always follow the manufacturer’s operating instructions in the use of tools, check and follow your local building codes, and observe all commonly accepted safety precautions.


Copyright © 2025 · Modern Blogger Pro On Genesis Framework · Customizations by Sweet Theory Designs · Privacy Policy · Log in