One of my besties, Angie, is moving to my town from a couple hours away, and I could NOT be more excited! I wanted to make her a house-warming gift, so I asked her to pick out something on Pinterest for me to DIY for her. She decided on this headboard turned teacup rack as a Fiestaware display for her teacups, and I was up for the challenge! It’s been a minute since I’ve done a good ‘’ol’ upcycled furniture or repurposing project! And who does love some good upcycled headboard ideas!
We found and old headboard on craigslist. These things are a dime a dozen. You can find them at thrift stores, garage sales, the FB marketplace… they’re everywhere!
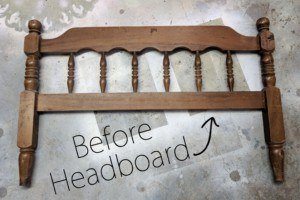
As you can see, this headboard is different from the one in the inspiration pic. But the FUN of repurposing something is to problem solve it into what you want it to be! The point of this post isn’t to be a step-by-step tutorial as much as it is just to inspire you to see something and know that you can make it into something else with a little troubleshooting. It’s fun!
Repurposed Headboard Ideas for Fiestaware Display
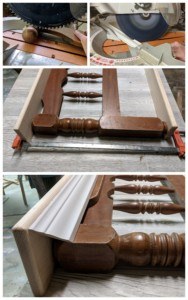
We started about by cutting off the spheres on the tops of the headboard, as well as the top sliver of the center board. Since we’re adding crown molding, we wanted it to cleanly wrap around the edge to the sides. You should be able to see more of what I’m talking about by looking at these pics below.
 *This post contains affiliate links*
We cut a 1×4 piece of pine to be our top shelf and routed the edges to make them smooth and rounded. We cut our crown molding with our Sliding Compound Miter Saw, and if you need some extra instruction on the angles of installing crown molding on an outside corner, see my friend Sandra’s tutorial here.
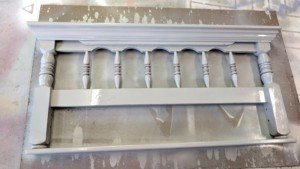
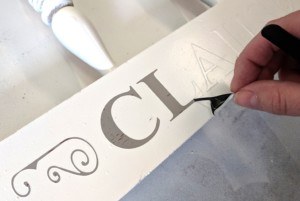
I painted the whole thing with this gray primer (there’s a reason I went with gray! Stay with me!), and applied a little personalization in the form of a vinyl decal (from my vinyl ninja friend Dana!) that I’m using as a stencil! Claus is there last name.
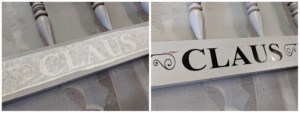
Leaving the vinyl in place, I painted the whole thing flat white (this stuff). It’s only glossy in the pic below because the paint is still wet.
Let the paint dry for at least an hour, then go in and remove the vinyl to reveal the gray paint color beneath!

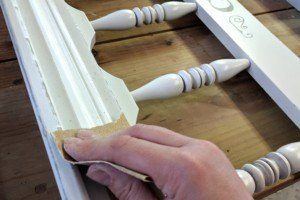
Pretty right? Do you see now why I used the gray primer? I wanted the letters and design from the vinyl decal stencil to allow the gray to shine through! To take it one step further, I went back with some 220 grit sandpaper and roughed up the edges a bit to give it a ‘shabby chic’ feel and allow that gray accent color to come through even more.
Shabby chic isn’t necessarily my personal style of choice for my home, but it’s still fun to make for others. And I looooove how this turned out!
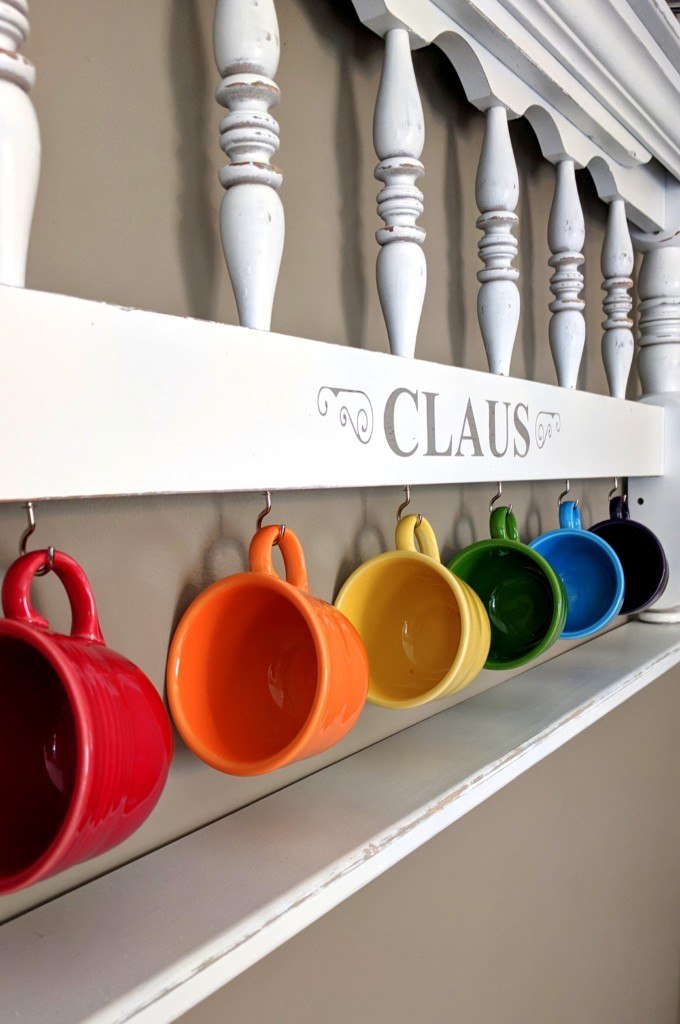
I used an angle driver to drill in some tiny pilot holes so the cup hooks wouldn’t crack the wood. It also just makes them SO MUCH EASIER to screw in. I just nailed in some D-rings on the back for easy hanging. Such a fun fiestaware display!

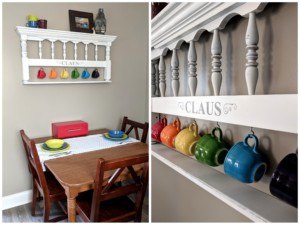
I love adding a little quirkiness and character to my home, and I’m so glad my friend Angie does too! This was a super fun project!
Be sure to check out our other upcycled projects here!
~Bethany
Related:
-

When the twins moved into what used to be the guest bedroom, I knew I…
Very Ice indeed
This is such a sweet gift for your friend.
Love this!
ps if Clause is THEIR last name, they’re gonna be ticked you dropped their / there “E”
Best,
Grammar police
Spell In-corrector
I can count on you Bernadette!! <3 Thanks for letting me know! Auto-correct strikes again. 😉