Designing a room in advance is NOT my forte. I would be a terrible interior designer!
So blindly having to make BIG design decisions about my ‘future kitchen’ last year… when our kitchen was only but a hole in the ground …was anxiety inducing TO SAY THE LEAST.

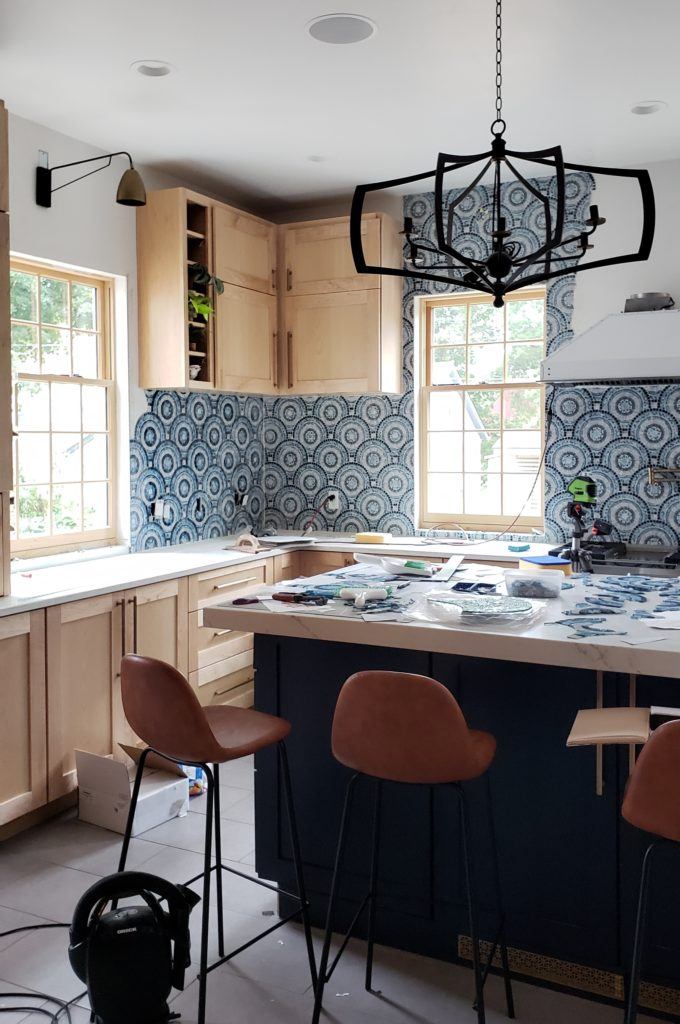
So when the flooring and cabinets started going in, and the kitchen started to feel like it was coming together, I think a lot of my friends were surprised by the ‘safe’ choices I made.
I went from chartreuse painted cabinets in the old house to natural maple wood cabinets in the new house?

BUT WAIT! You haven’t seen the backsplash yet. 😉
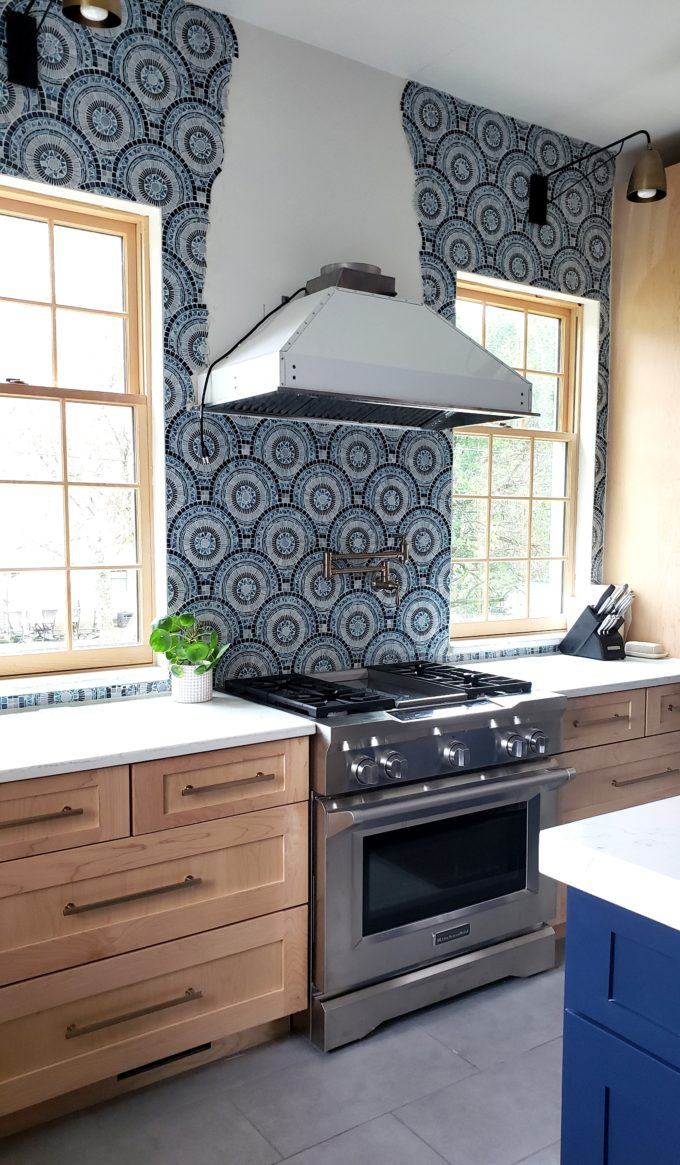
And the backsplash is where my color-and-pattern-loving-self really shines. And it’s going to make a BIG STATEMENT since it’s going from counter to ceiling on both walls!

*This post is sponsored by our friends at Artistic Tile! Thank you for supporting the fabulous brands that make Reality Daydream possible!*
I knew when the backsplash started going into place, everything would be pulled together and finally MAKE SENSE. I searched high and low for the perfect backsplash tile. It had to have a large pattern with navy blue color involved to tie in the island.
I finally found two that I lovvvved… and they happened to be by the same company Artistic Tile, and I was SO OVERJOYED when they wanted to work with us for this project! Do you remember when I had you guys help decide between the two!
I was leaning toward this one anyway, so I was so excited when you guys voted in agreement. Thanks for validating my feelings!

Those are INDIVIDUAL pieces of glass! And each circle mosaic came with the tiny pieces already assembled with a mesh backing. For this reason, I thought installing this backsplash would be a breeze!

We’ve done our fair share of tiling before, but I’ll be the first to admit we had no idea what we were getting ourselves into with this backsplash installation. It was tedious templating and cutting glass, but we really got into a groove and enjoyed this process!
BUT FIRST… Della took this pic of Nick and I installing the hood, and I most certainly couldn’t leave it out.

We found the center of the wall behind our range, and put our laser level in place. Using a laser level is MANDATORY for this type of thing. It saved us so many times.
Once we found the center, we started at the bottom center and worked our way up from there.

This was our strategy… Nick would measure and make cardboard templates for the mosaics that needed to be cut, and I would cut the tiles using glass nippers and an Xacto knife for the mesh backing. While I was cutting glass, he would be buttering up the wall with thinset so he’ll be ready to press the tile into place once I’m done cutting it to size.


Seeing it come together before our eyes was so exciting, and kept us pushing forward! And YOU GUYS cheering us on in our Instagram Stories was helpful too. 😉

This doesn’t even have grout on it yet… but I’m SO GIDDY WITH EXCITEMENT! Isn’t this glass mosaic tile by Artistic Tile to die for?


I was in SO MUCH SHOCK at what a difference the grout made. I was already head-over-heals in love with the backsplash (pre-grout!) and couldn’t imagine loving it anymore. But it’s so crazy how the grout just makes everything POP and makes the pattern even more defined!

Our kitchen still has a good handful of things that need to be done (building the rest of the hood, installing crown molding to attach the cabinets to the ceiling… to name a few), but I can honestly say that this room finally feels like US! It’s the perfect marriage between our style and the style of our historic home!

Having the kitchen finally coming together with all the details makes me so emotional. Especially after all we’ve done to get to this point!! And even though we’re not DONE, this backsplash feels like the icing on the cake!

There will be chunky crown molding attaching the cabinets to the ceiling. And if you really squint, you can picture the completed vent hood going alllll the way up to the ceiling.


We finally got the arm lights above the windows and chandeliers fully wired and working. And it makes for such a warm soft glow in the mornings and evenings.


Obviously I need some serious help with shelf-styling. But my friend Hilary is going to come over sometime and help me make it perfect. She’s SO GOOD!
We’re going to be taking a short break from working on the kitchen to fix the ceiling in the living room (SO MANY PROJECTS!) but it won’t be long before we’re back to add the finishing touches!
Bethany
~~~~~~~~~~~~~~~~~~~~~~
Thank you for pinning!

just browsing projects on pintrest and came across your site with the lotus flower wood staining. i knew immediately that this was something i had to try. i paint and do projects with alcohol ink and some tile work and other crafts to keep me occupied.
i have never come across wood staining techniques before and it is 4 a.m. and i can’t wait to get out and buy some wood and try this project.
everything you guys do aside from staining and tile work is just amazing! how talented you are!
i live in a VERY small town in montana and need to do things to keep me occupied. i have been looking for backsplash that really spoke to me
and after seeing your kitchen (which is beautiful), i now know what kind of backsplash i will be looking for.
thank you for sharing all your projects. will be on your site on a daily basis i’m sure.
That backsplash is amazing. I checked out the website. Gorgeous tiles.
What is the source of that beautiful tile? Thanks!!
So gorgeous!
I love it! What a beautiful kitchen!
Gorgeous kitchen.You both put a lot of thought into it! Definitely a dream kitchen!!❤
The kitchen looks great and I absolutely LOVE the backsplash!! ❤️❤️
Such a beautiful tile backsplash, so bold and the result is breathtaking!
love love love it so much