• Home
  • About
  • Tutorials
  • Recipes
  • Furniture
  • Contact
    • Contact
    • Infertility
    • Disclosure
    • Privacy Policy
  • Shop
    • Facebook
    • Instagram
    • Pinterest

Reality Daydream

The Dream is Free, The Hustle Sold Separately

  • Home
  • About
  • Tutorials
  • Recipes
  • Furniture
  • Contact
    • Contact
    • Infertility
    • Disclosure
    • Privacy Policy
  • Shop

Drexel: Part 1

December 28, 2010 by Bethany Sy

A client has commissioned us to revive their beautiful, solid wood Drexel china cabinet that they purchased several years ago at an estate auction. What a great find! I’ve never seen anything like it! Though they love the china cabinet, the yellow just wasn’t doing it for them, and was an eyesore in their dining room. They considered having it refinished and sanded down to the wood, stained and polyed. They even got a quote from a professional! But in the end, they decided they wanted it painted with a shabby-chic look, and after stumbling across our website, they contacted us!!!

We started by removing the doors and putting aside all the hardware. Lucile and Blanche were a huge help.

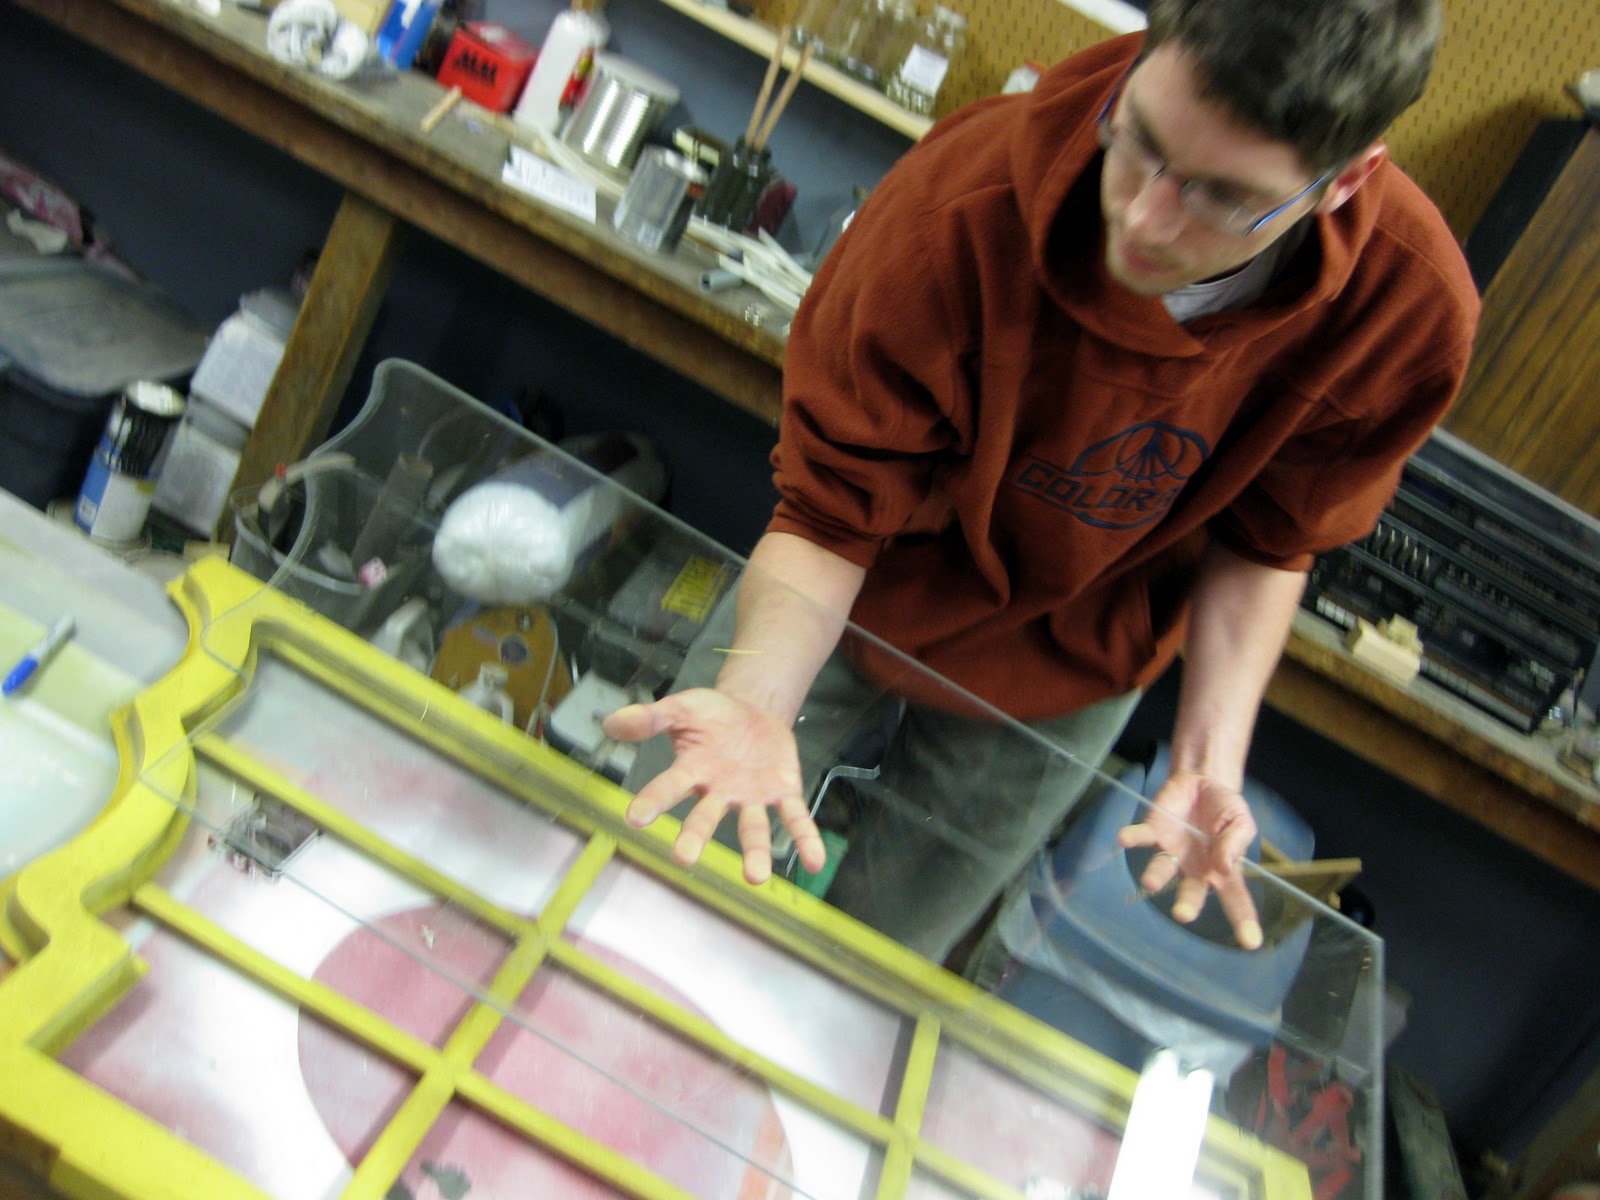
We CAREFULLY removed the glass, then sanded everything down just a little. Enough that the primer would have something to ‘grab on to.’

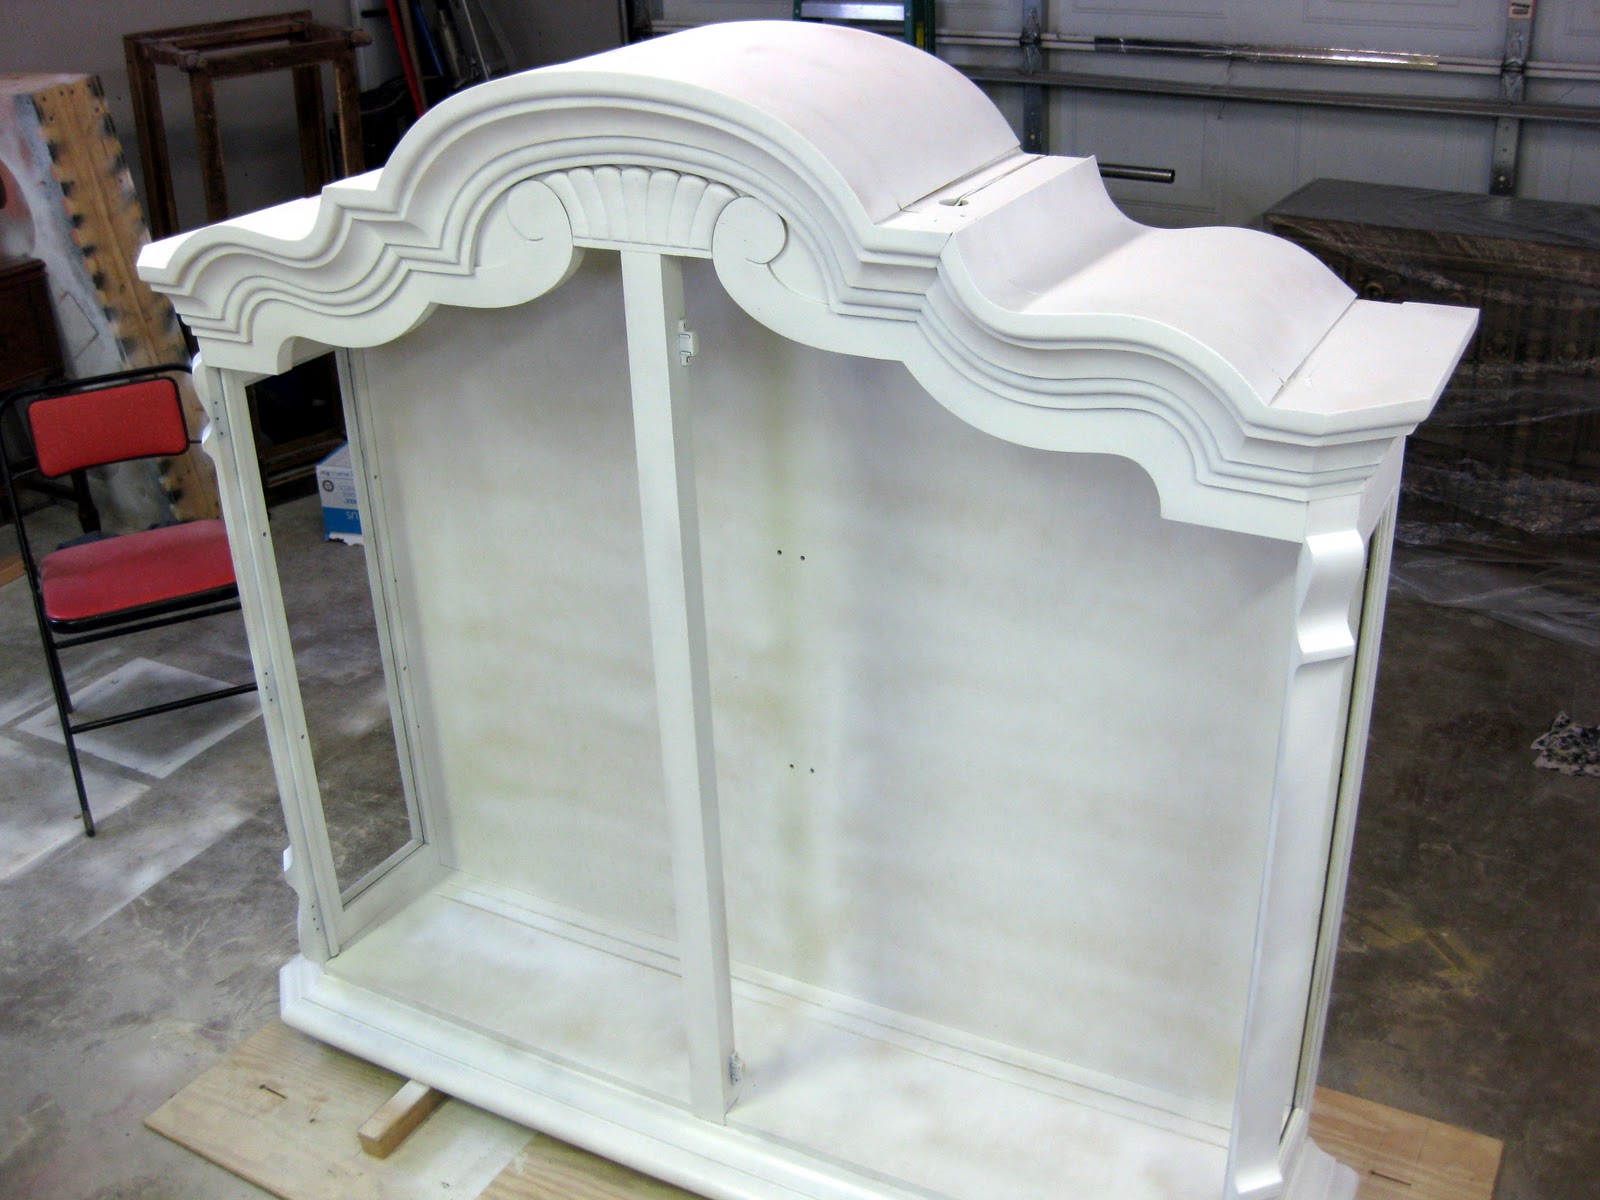
Being pregnant and all (!!!!!!!!!!!!!!!), Nick is responsible for all the spray painting… but he doesn’t mind. I do have a paint-mask-respirator-thing that I use while sanding or painting with acrylic/latex paint. But when it comes to serious fumes, I’m just not gonna take any chances. Seems like pure common sense to me. Here’s the Drexel after Nick primed her. Kinda lovin’ it dressed in white!

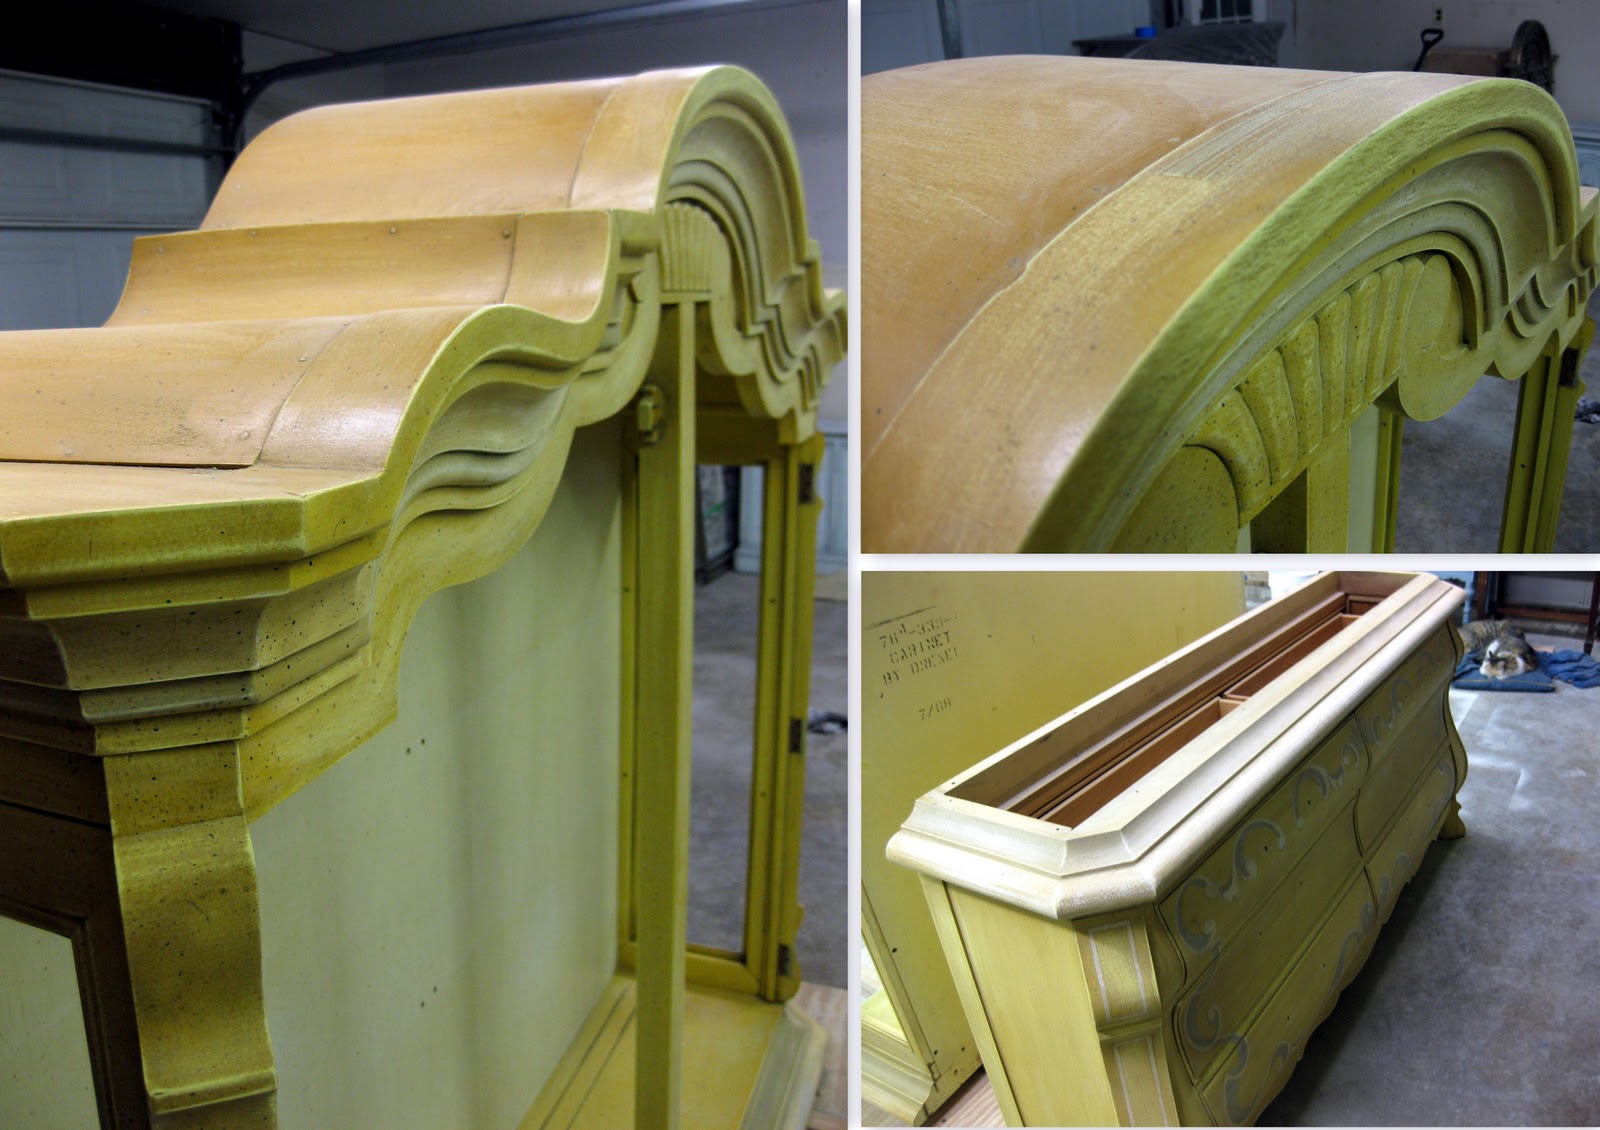
Then we put on a nice thick coat of chocolate brown. The reason for this is so that once the final ivory coat is on, we can sand down the edges and details here and there and have the chocolate brown show through. Trust us, it’ll be awesome. She kinda looks great dressed in rich chocolatey brown, eh? Ok, the truth of the matter is that a piece like this would look incredible in just about any color. We feel lucky to have been chosen for the job!!

This is as far as we’ve gotten, but we wanted to give a progress report to avoid an excessively lengthy post when it’s finished. And because we enjoy leaving people on the edge of their seats.

Related:

  • Stripping an Old Stained Desk

    We love the original wood of our library, and wanted to find a desk that…

  • How to Apply Wood Veneer

    If you follow us on the 'gram, you know I've been stripping the finish off…

About Bethany Sy

Nick and Bethany Sy are the creative free-spirits behind DIY/Lifestyle blog, Reality Daydream. They recently purchased a historic mansion and have been documenting the ups and downs of renovation and making this home their own... all while sharing tips and tutorials along the way! When they found themselves in the trenches of infertility, they started a journey that would prove to be their most important DIY project ever, and have 3 beautiful girls to show for it. <3

« excited is all…
Life Update »

Comments

  1. 6

    Bethany says

    June 11, 2011 at 12:32 pm

    We don’t have a sprayer, though that would be nice. My husband is the sprayer! Him and a can of good ol’ Krylon!

    Reply
  2. 7

    Disco Jess says

    June 10, 2011 at 11:02 pm

    Very nice! May I ask what sprayer you are using? It’s a great even coat!

    Reply
  3. 8

    Anonymous says

    February 9, 2011 at 5:30 am

    02/08/2011
    all right Bethany thats enough teasing!
    show us the “after pics”

    Reply
  4. 9

    Tammy says

    December 28, 2010 at 11:51 pm

    love the piece. just gorgeous. enjoy playing the pregnancy card! lol

    Reply
  5. 10

    renee' says

    December 28, 2010 at 11:49 pm

    Love the details in this hutch! Where do you people find these things????

    Reply
  6. 11

    Sommer says

    December 28, 2010 at 6:41 pm

    Girl I’m inluv with that hutch OMG! And yay for the give away… She’s my real life bff =)

    Reply

Leave a Reply Cancel reply

Your email address will not be published. Required fields are marked *

Recipe Rating


  • Facebook
  • Instagram
  • Pinterest
  • RSS
  • YouTube
We are Nick and Bethany! Welcome to our blog, Reality Daydream where we share our DIY adventures!
Click here for lots of art projects using only wood stain on furniture!!
Please feel free to share or pin my posts! You're welcome to use ONE of my images (no collages or pinnables) with a link back to the corresponding post. Please do not edit or crop that single image in any way. Improper use of my photos, ideas or words is a violation of copyright. Thank you!

Categories

Attention: Almost any do-it-yourself project involves risk of some sort. Your tools, materials, and skills will vary, as will the conditions at your project site. Reality Daydream has made every effort to be complete and accurate in the instructions of the plans on this website. Reality Daydream will not assume any responsibility or liability for damages or losses sustained or incurred in the course of your project or in the use of the item you create. Always follow the manufacturer’s operating instructions in the use of tools, check and follow your local building codes, and observe all commonly accepted safety precautions.


Copyright © 2025 · Modern Blogger Pro On Genesis Framework · Customizations by Sweet Theory Designs · Privacy Policy · Log in