My girl Cypress is 11 now, and she’s sooo ready for a “big girl” room! However she still loves the patchwork stenciled wall that she helped with 8 years ago. I still love it too, so I’m glad she wanted to keep it!
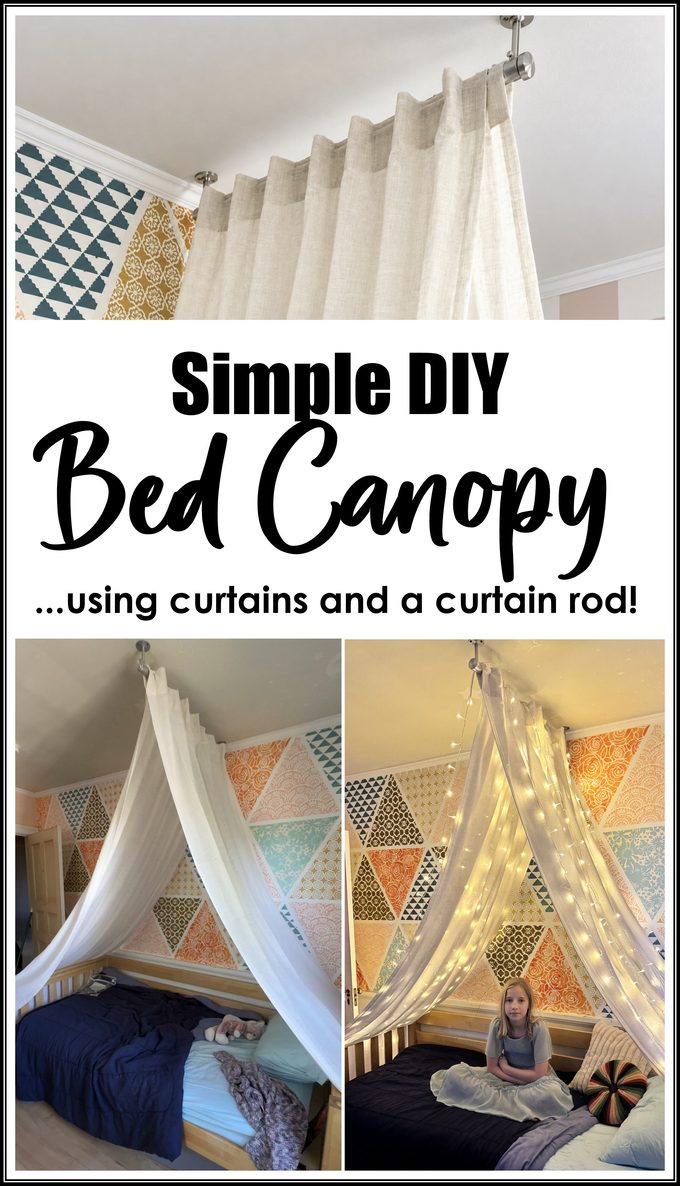
I decided to move her bed to this wall to use it as a focal point. And it will be even more stunning once we get some kind of canopy or tent in place!
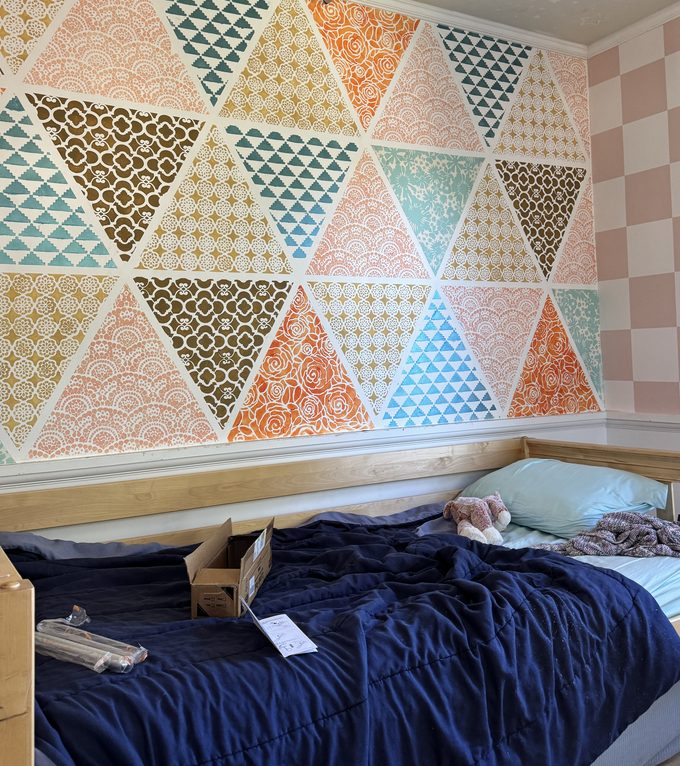
I scanned the internet and pinterest for tent ideas, or different DIY canopy ideas for beds, but I kept coming up short. I wanted something that would work or her daybed, but also still work if we end up getting a full size bed at some point.
I spent more time “researching” and trying to find inspiration than I care to admit. But what I should have done was just LET the creative idea come to me like the good ole days!
I had the idea to use a curtain rod affixed to the ceiling! If that sounds overly simple, it really IS! But you do have to get the right curtains for this. Here are the exact products I used:
Supplies for Simple Bed Canopy Tent
- Curtain rod
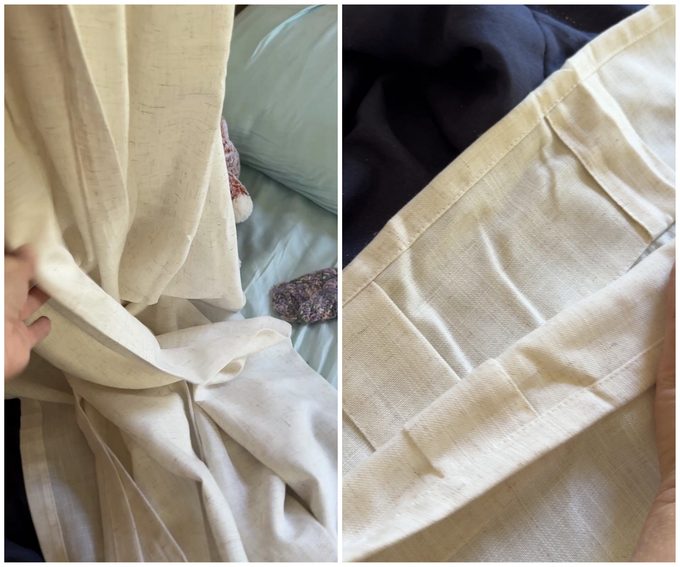
- Two curtains with tabs (make sure you order the right length!)
- Twinkle lights! (optional)
Start out by assembling your curtain rod. You won’t need all the pieces, because it has the ability to be very long! I only wanted mine to be about 2.5 feet. Then hold up the brackets and mark with a pencil where the screws will go, and drill a pilot hole in those spots before screwing in the included screws.
Note: if you’re not on a stud, be sure to use the included drywall anchors so the bed canopy will be strong and won’t pull out of the ceiling.
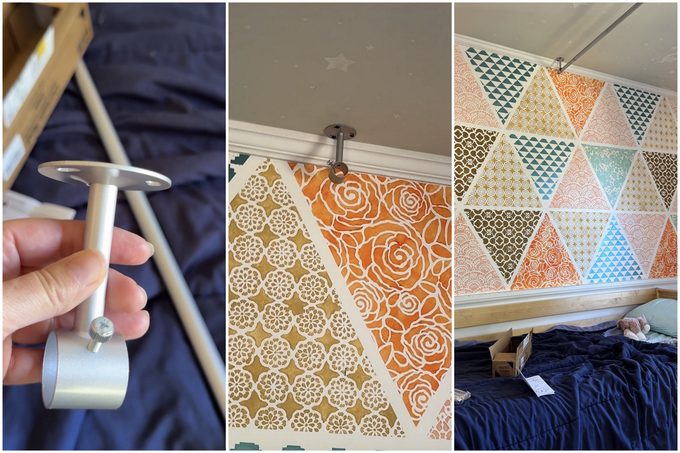
Now that our curtain rod is securely attached to the ceiling, we’re ready to make this truly a tent! What is a canopy without fabric? I tried sourcing fabric or this project, but even with Hobby Lobby’s deep discount, it was still welllll over $100 for fabric. And I ended up saving myself time too, because the curtains I ordered are so perfect and there’s NO sewing involved!
Take down the pole part of the curtain rod, and begin pushing it through the tabs on the curtains, alternating the sides of the tabs as you go. It should look like this
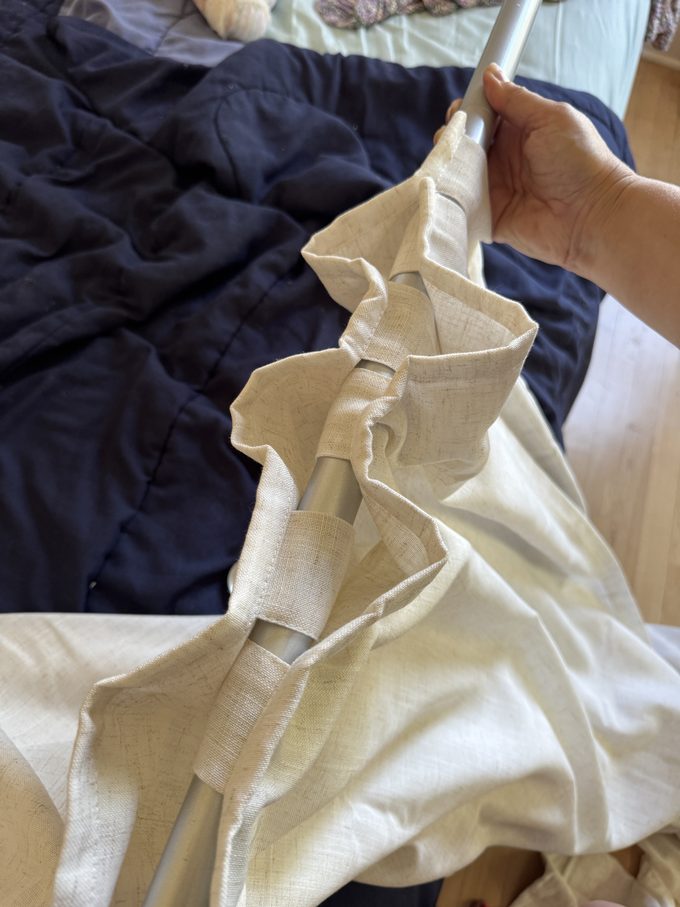
BRUH (as my teenagers would say) THAT IS ALL. All we need to do is put the curtain rod up into the brackets and tighten the screws that will hold it in place.
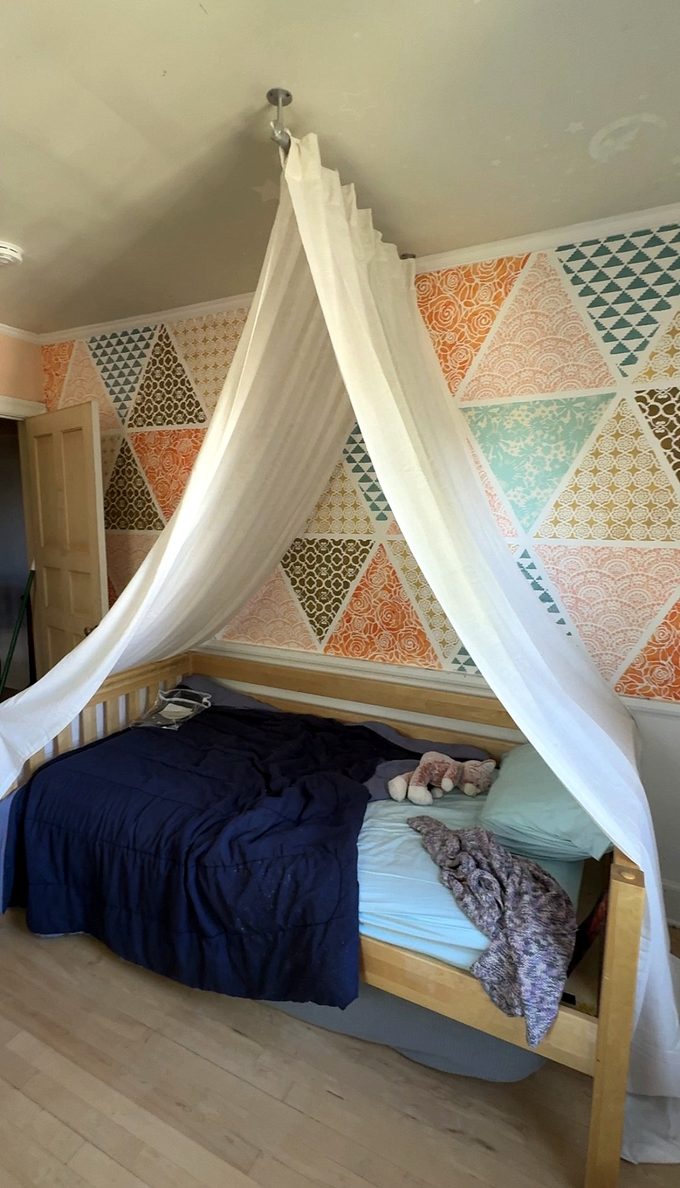
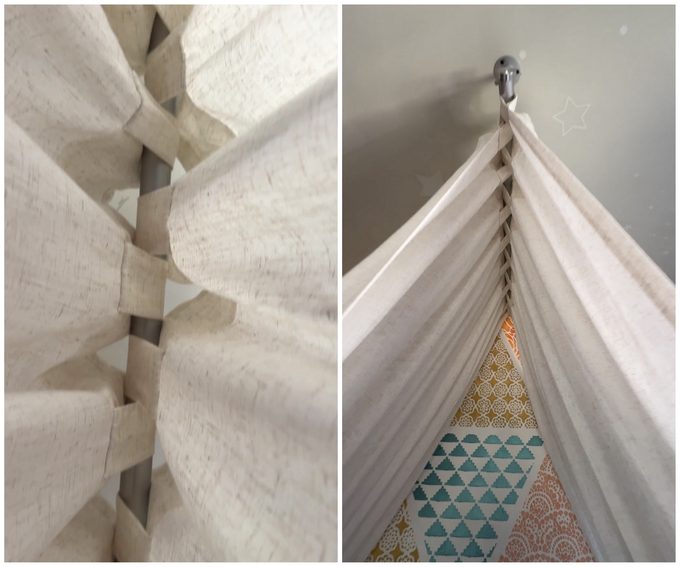
Suuuuuch a simple concept, right? And it still provides the satisfaction of completing a DIY project. And you’ll get major bonus points with the preteen for making her a bed canopy with allll the vibes.
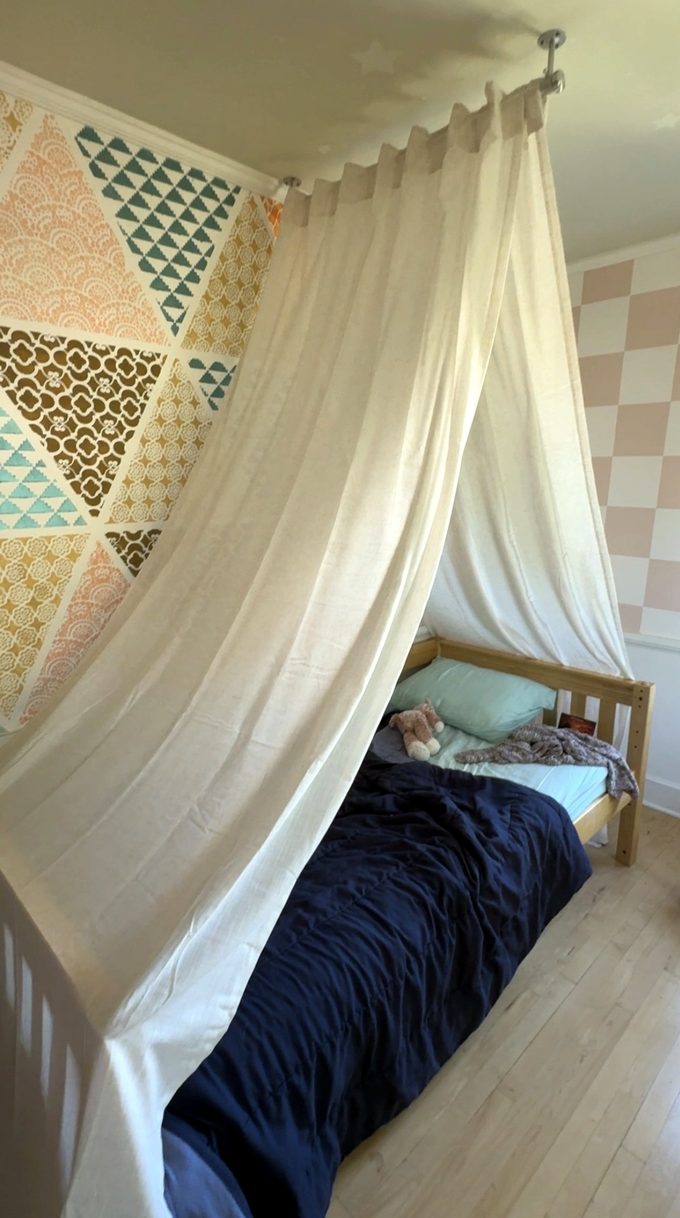
We found these twinkle lights that were perfect for draping down either side of the curtain canopy. It’s amazing how some sparkly lighting can make it feel so magical!
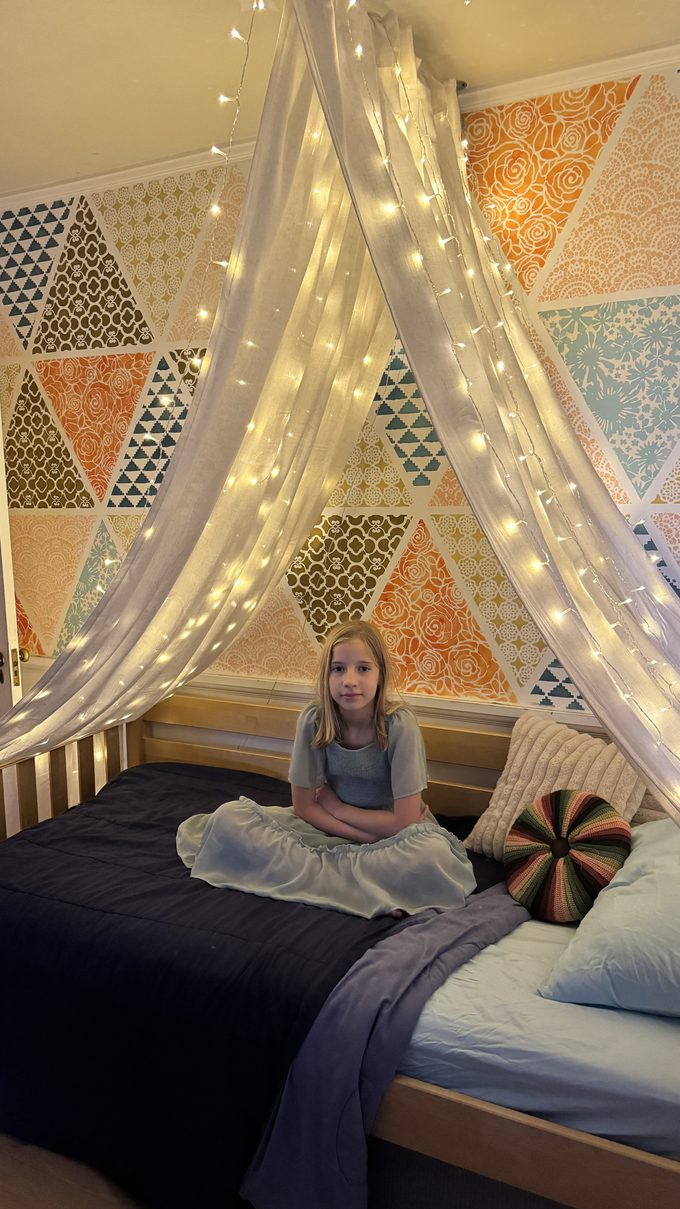
I hope you’ll give this canopy project a try! And if you do, be sure to tag me on the socials… we’re @RealityDaydream on Instagram, Facebook, and Tiktok. Or you can always email pics to beth@realitydaydream.com. I love it when you are inspired by my ideas!
Go forth and be creative!
Bethany
~~~~~~~~~~~~~~~~~~~~~~~
Thank you for pinning!

Related:
-
If you haven't already, you may want to read Chapter 1 and Chapter 2 first.…
-

Happy Monday! How’s that for an oxymoron? Let me tell you how this went... Ring,…
-

It's Meghan from Cupcakes with Sprinkles! I am always excited to be here sharing a…

Leave a Reply