HEY guys!! Nick here again! Don’t roll your eyes… I GOT this!
I must say, some mornings I just wake up and want to share the joy… We just love you guys/gals and consider you all family (well some of you are actually family). We would invite you all to come over for a big ol’ family dinner and games, but I’m pretty sure this quaint farmhouse wouldn’t contain the masses of this very special family.
Besides that, some of you might not ever leave and as much as we love you, we don’t really want your pajama-clad rears camping out on our couch for months at a time…
So… Now that i am finally wrapping up with the mudding, scraping, and texturing touch-ups on our eternal (figurative, not literal) wall/ceiling project, I am freed up to talk to you about furniture and our life happenings. Yay!
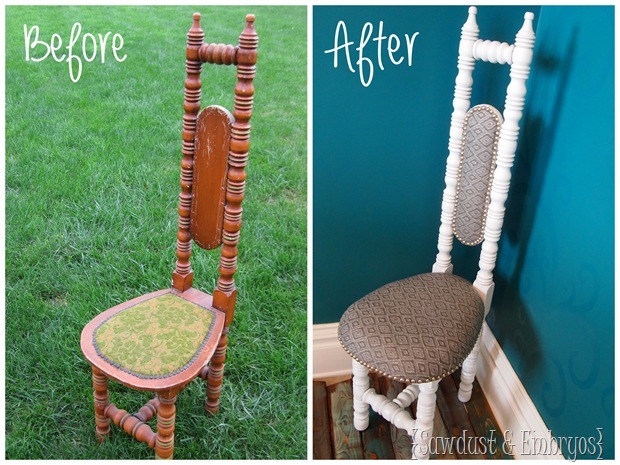
I tried my hand at a little upholstery recently when I knocked this sweet hall chair out of the park (CONFIDENCE! …not arrogance!), and wanted to share my findings…
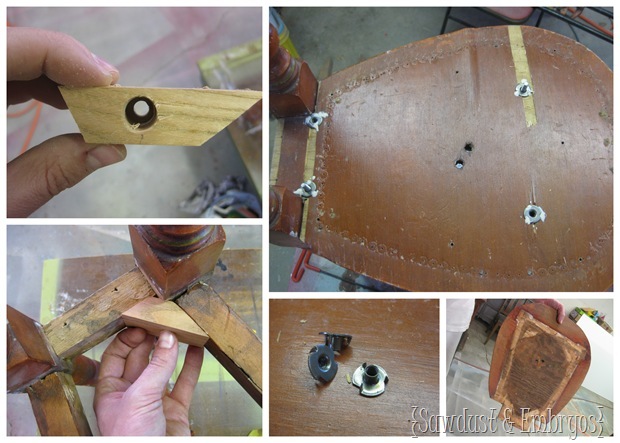
I wanted this chair to have a fully padded seat; SO how do I accomplish that and still manage to mount the seat you ask? Well do you remember the additional bracing I put on the chair? Yes, I drilled holes in them and through the seat, then I installed T-Nuts and checked the fit… voila it fits!
On to the upholstery!
So I knew i wanted this seat to be about two inches thick, luckily our local store notoriously known for the crazy’s (starts with a Wal and ends with a Mart… but who’s naming names?) had a two pack of one inch foam for seven bones. This could be a cheap alternative for someone needing thick foam. I quickly got out my spray adhesive and adhered them suckers together with spray-adhesive. Then I adhered it to the seat and went to carving with my electric knife. Ironically it was also bought at the same store for seven dollars.
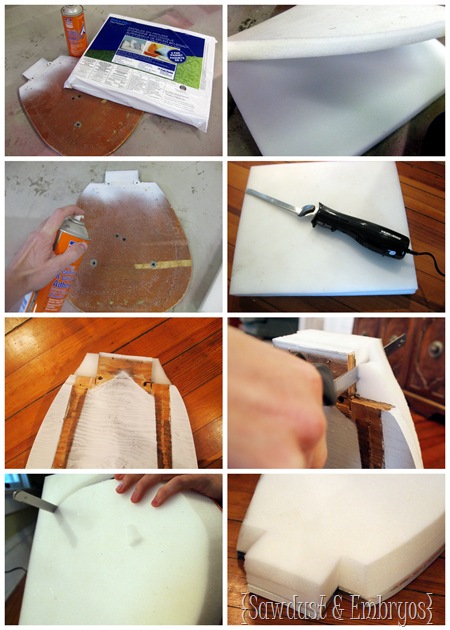
Foam installed – check!
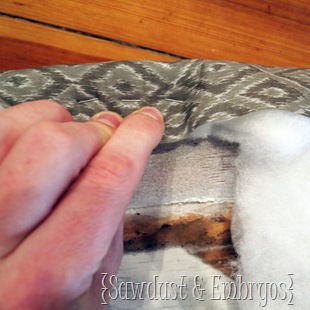
After stapling a double layer of batting; I pulled out my freshly ironed fabric (yes we iron our fabric) and placed it neatly on the seat. I lined it up to be on center (attention to detail is essential), and began stapling, being careful not to pull too tight to avoid a bumpy/uneven edge. I actually had to remove some staples and re-staple it because of this.
 |
 |
And then cut off the excess fabric.
There you have it… one upholstered seat!
We did the same for the back: foam… batting… staple!
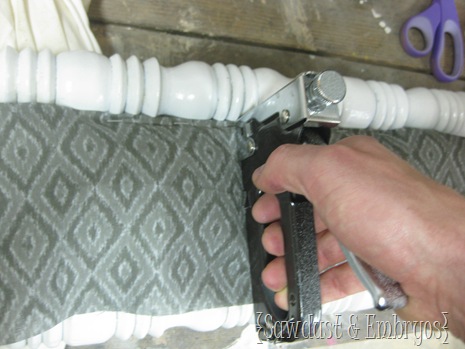
I wasn’t too worried about the staples showing on the back of the chair because the upholstery tacks will cover them.
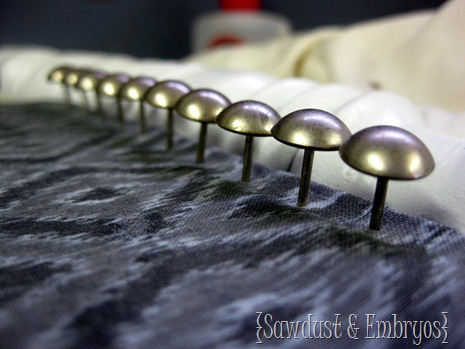
If you’re interested in our tutorial demonstrating how to apply Upholstery Tacks in a STRAIGHT LINE… click here!
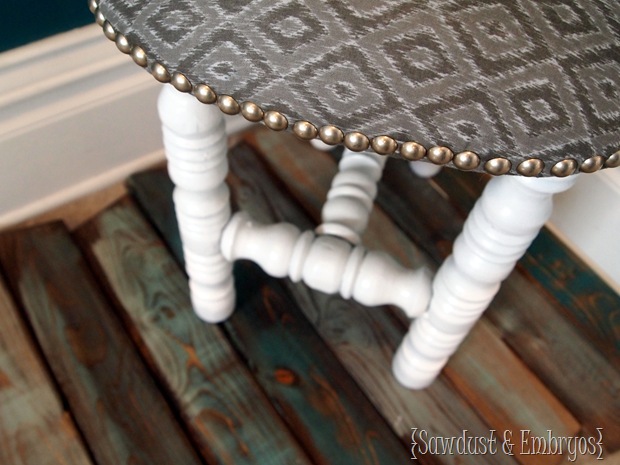
Wow, you all truly are family… forced to listen to my ramblings like that unwanted relative you just can’t shake. We all have one. And if you say you don’t you know it means, you (like me) are that one… HA!
Anywho, if you’re looking for more upholstering tutorials or inspiration, you can click here or here!
Have you been working on any good projects lately? Or have any stories of crazy relatives? Or taken pictures of yourself with inanimate objects staged as a smoking gun? I figured as much.


I used to nanny for a family that had that same.exact.chair…and they used it as the naughty chair!
*I may have already told you this story before, I may be losing my mind*
Nice upholstery! Good job…..Keep going like that, Beth and Nick!
The chair is pretty funky! Great job!! I’m looking forward to learning about those furniture tacks. I recently finished reupholstering a chair, and I gave up on the tacks because they kept bending.
New reader to your blog and new blogger. Love this blog so far!! :o)
You did a awesome job and made it look so easy!!! Tomorrow I shall be “casing” your painted light fixture… corssing fingers it turns out 🙂
Whoa – that chair is awesome!! The white with that fabric looks amazing.
Ohhh Nick, you crack my stuff up! Such a funny funny! Is that a MEAT carving knife?! LOL
Chair is awesome. You guys rock.
I’d love to come over for game night. Think the drive from OKC will be cool with my 13 month old girls?
Great job. Very cute and funky chair. Have to say though, that if I were to visit the ole farmhouse only one cheek of my pajama clad bottom would probably fit on that seat so I’m going for the couch.
Way too complicated and too much work for me, Nick. Great job! You guys have so much creative energy.
Absolutely amazing! It looks great and it’s soooo unique too! Great job!
If you are into upholstery now, we have a child’s size arm chair in Mom’s basement that needs to be redone. It may be an antique or just old, probably 100 years. It need lots of help. We will bring it sometime if you want it.
Great job! I will be interested to see how you line up your tacks. Me and lining up upholstery tacks do not mix well. My dad was an upholsterer for 50 years and this was a job he couldn’t get me to master. (BTW, I think I live fairly close to you guys… my dad had the upholstery shop in your county seat!) I have not commented before, but I wanted to tell you how beautiful your furniture is. Most of our furniture in our home was found on a curb or at the end of an auction, then brought back to life. Love the new and creative things you are doing!