• Home
  • About
  • Tutorials
  • Recipes
  • Furniture
  • Contact
    • Contact
    • Infertility
    • Disclosure
    • Privacy Policy
  • Shop
    • Facebook
    • Instagram
    • Pinterest

Reality Daydream

The Dream is Free, The Hustle Sold Separately

  • Home
  • About
  • Tutorials
  • Recipes
  • Furniture
  • Contact
    • Contact
    • Infertility
    • Disclosure
    • Privacy Policy
  • Shop

Drexel: Finale (FINALLY)

February 15, 2011 by Bethany Sy

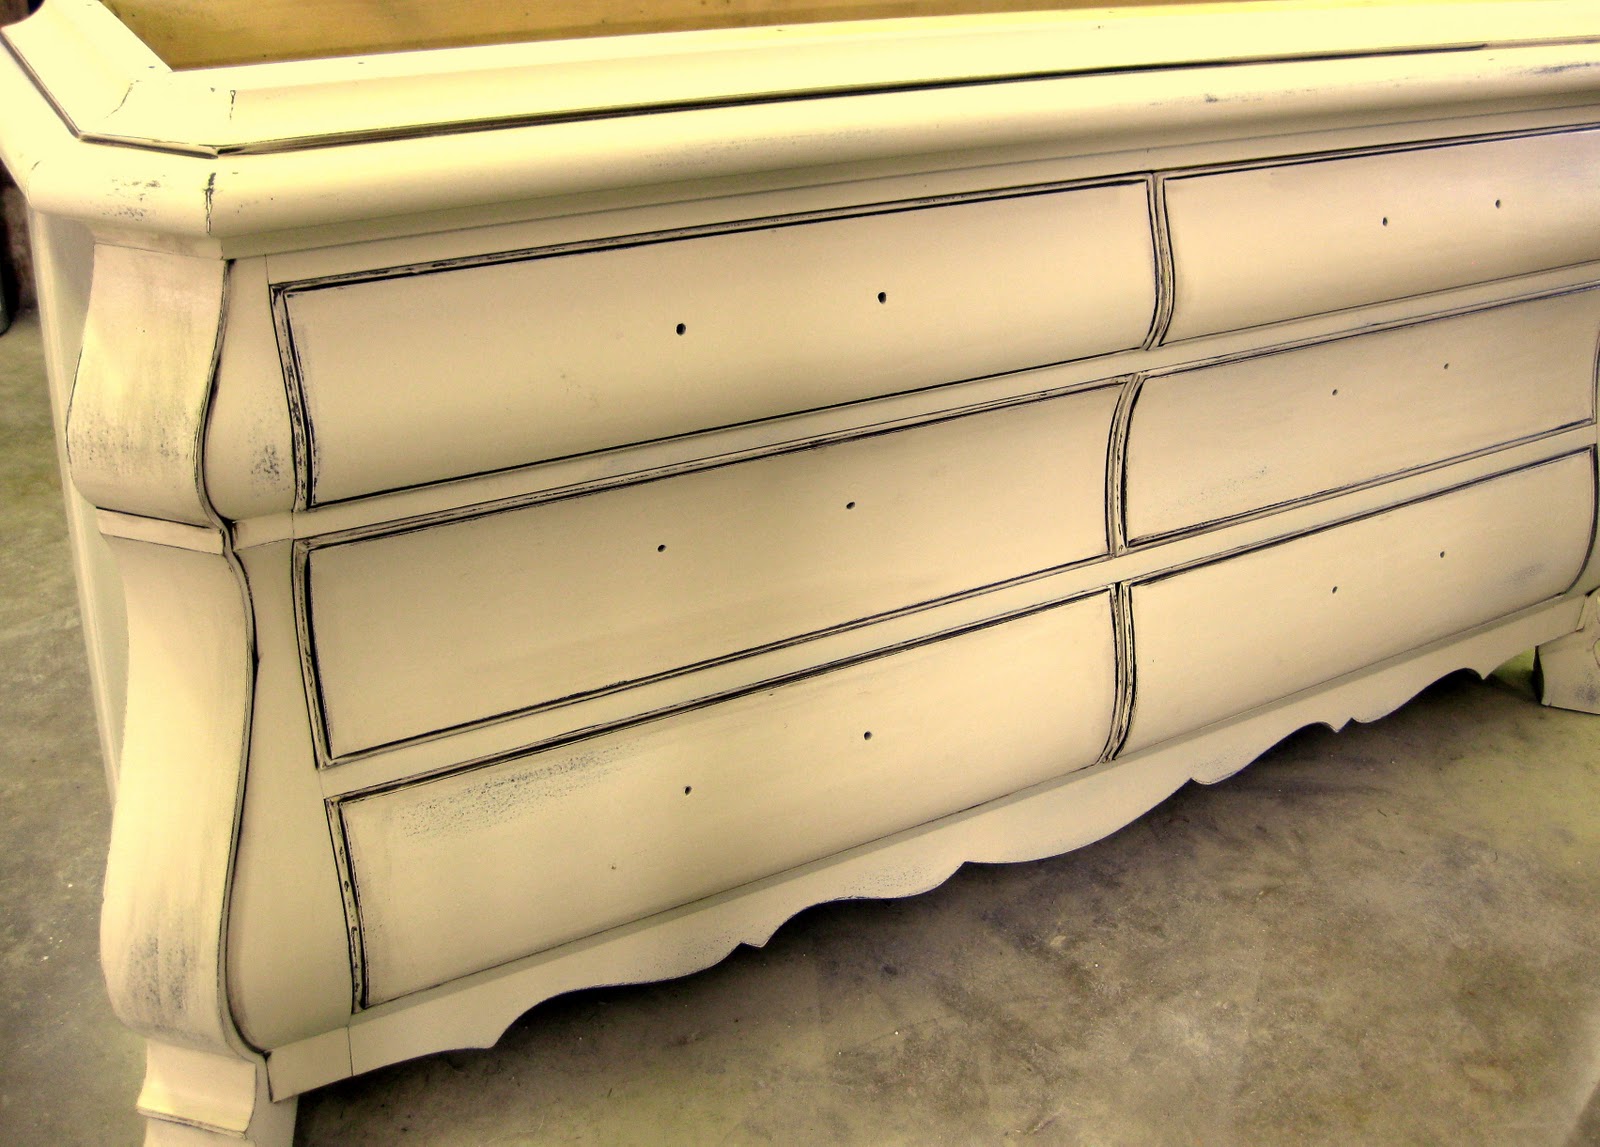
If you’ve been around long enough (with inexplicable patience) to remember Part 1 of our Drexel makeover, you’ll remember that it went from Beauty-and-the-Beast-Yellow, to primed-white, to chocolate brown. And because we’re not-so-bright, we didn’t photograph the next step, so I”ll just tell you. We put on a nice thick coat of satin Ivory. Just imagine it in your little head.

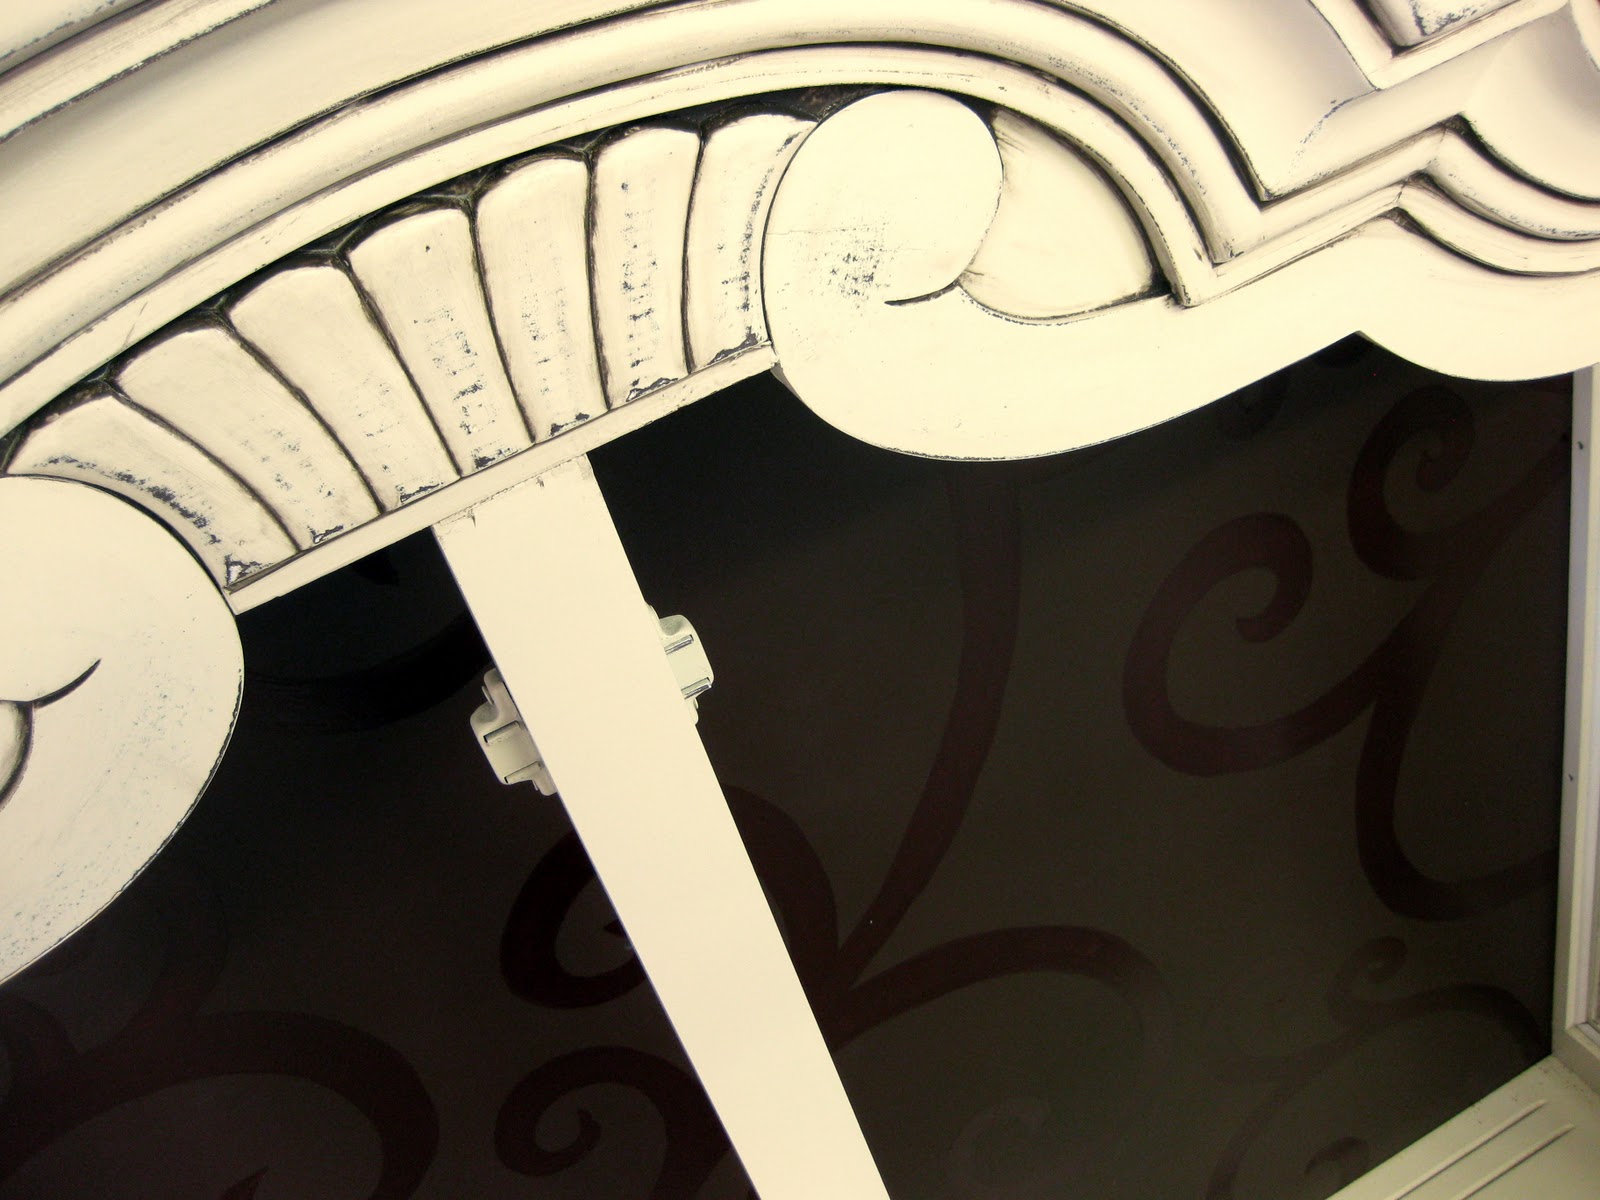
While Nick was doing all the fume-y painting out in the garage, me and my gas-mask painted some glossy swirls on what will be the back of the china cabinet. I ended up not loving this lighter creamy brown color, and opted instead for an espresso brown of the exact same shade as the backboard, only in high gloss. It was worth the extra work of painting it over. I love that technique!

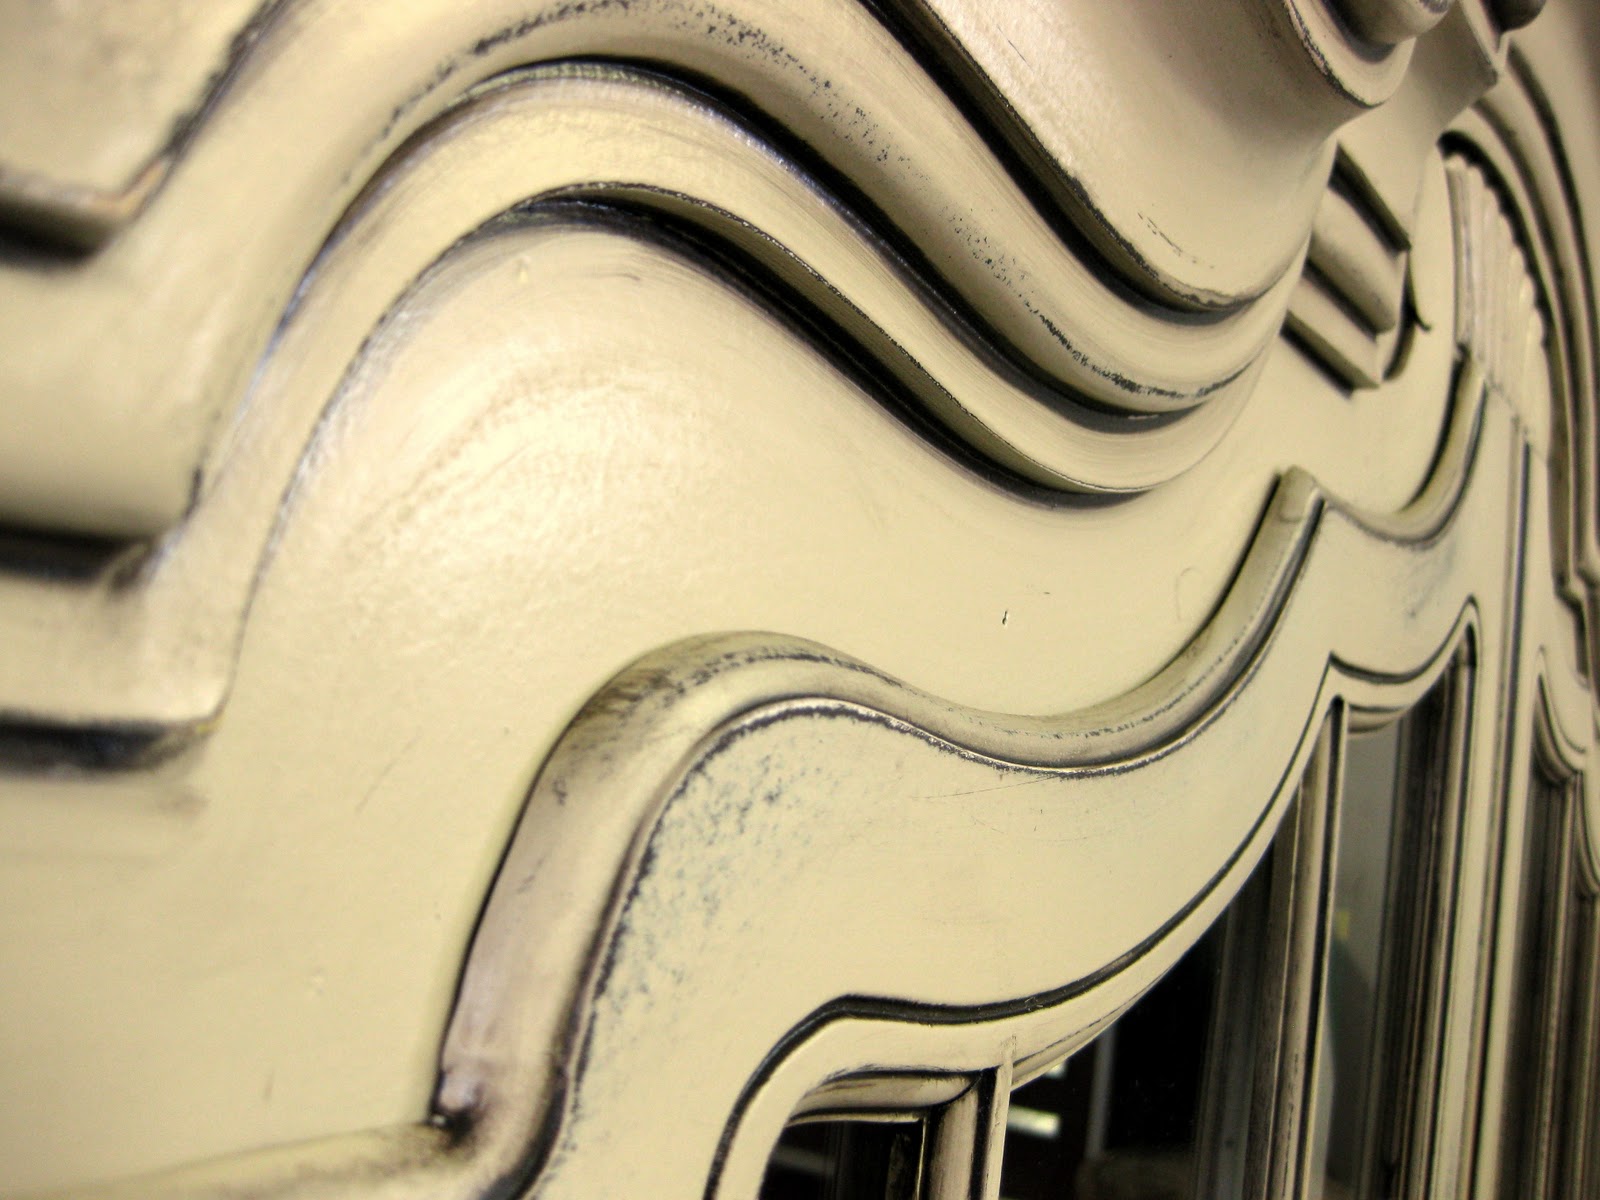
We then sanded the edges of the whole china cabinet (so the brown would show through here and there) and glazed with brown as well. What do you think?

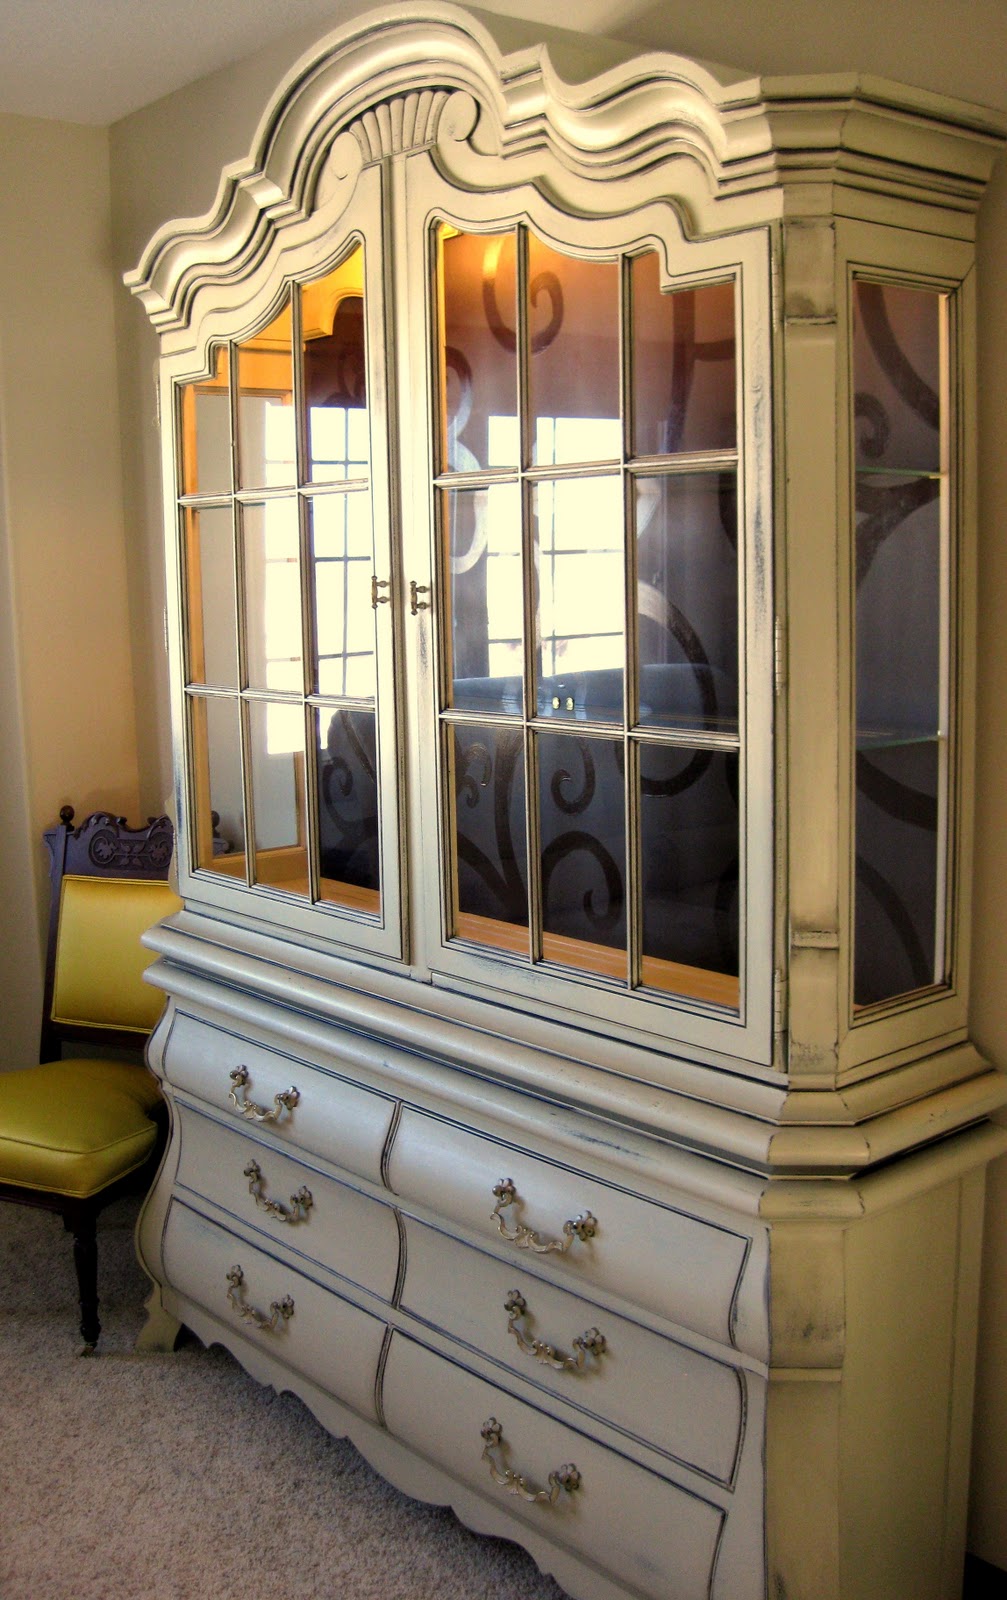
And in the interest of seeing the full dramatic Before and After effect…

Related:

  • Stripping an Old Stained Desk

    We love the original wood of our library, and wanted to find a desk that…

  • Stripey Ombre Mural with Shelves

    Hey friends! I recently shuffled some things around in my studio, and it really got…

About Bethany Sy

Nick and Bethany Sy are the creative free-spirits behind DIY/Lifestyle blog, Reality Daydream. They recently purchased a historic mansion and have been documenting the ups and downs of renovation and making this home their own... all while sharing tips and tutorials along the way! When they found themselves in the trenches of infertility, they started a journey that would prove to be their most important DIY project ever, and have 3 beautiful girls to show for it. <3

« Maybe next time
My New Fave »

Comments

  1. 19

    Robin says

    February 6, 2015 at 6:20 pm

    What color paint glaze did you use??

    Reply
  2. 20

    Anonymous says

    December 21, 2011 at 12:02 am

    I inherited my mom’s “yellow peril” as we nicknamed it, after her death. She used to keep special holiday plates and stuff for when we visited with grandchildren. Everyone said to paint it, but I couldn’t because of the sentimental nickname we gave it!

    Reply
  3. 21

    Prudently Painted Vintage says

    June 10, 2011 at 7:16 pm

    Omg! I am pinning this too! You are awesome!

    Reply
  4. 22

    Bethany says

    April 3, 2011 at 2:45 pm

    The hardware is exactly the same as it was pre-makeover. But we have treated hardware before. It’s important to clean it thoroughly, prime and paint (we spray paint just about everything instead of brushing, it just gives a more even professional finish).

    Reply
  5. 23

    Bethany says

    April 3, 2011 at 2:45 pm

    The hardware is exactly the same as it was pre-makeover. But we have treated hardware before. It’s important to clean it thoroughly, prime and paint (we spray paint just about everything instead of brushing, it just gives a more even professional finish).

    Reply
  6. 24

    Anonymous says

    April 3, 2011 at 7:16 am

    BEAUTIFUL!! did you SPRAY paint the hardware or simply paint it? Also, what kind of paint did you go with? You guys make an amazing team!

    Reply
  7. 25

    Anonymous says

    April 3, 2011 at 7:16 am

    BEAUTIFUL!! did you SPRAY paint the hardware or simply paint it? Also, what kind of paint did you go with? You guys make an amazing team!

    Reply
  8. 26

    ~*mj*~ says

    February 16, 2011 at 7:34 pm

    gorgeous!!

    Reply
  9. 27

    ~*mj*~ says

    February 16, 2011 at 7:34 pm

    gorgeous!!

    Reply
  10. 28

    Brenda says

    February 16, 2011 at 3:14 pm

    LOVE it! Hope all is well with you! I’m looking for a fun display table of some sort for middle of my store if you come across anything! Must be able to see over it so not too high. brenda.chocolatehaus@gmail.com

    Reply
  11. 29

    Brenda says

    February 16, 2011 at 3:14 pm

    LOVE it! Hope all is well with you! I’m looking for a fun display table of some sort for middle of my store if you come across anything! Must be able to see over it so not too high. brenda.chocolatehaus@gmail.com

    Reply
  12. 30

    Tammy says

    February 16, 2011 at 3:11 pm

    love it!!! amazing trasformation. i’m having a party today if you want to link this.

    http://typeadecorating.blogspot.com/2011/02/anything-goes-party-4.html

    Reply
  13. 31

    Tammy says

    February 16, 2011 at 3:11 pm

    love it!!! amazing trasformation. i’m having a party today if you want to link this.

    http://typeadecorating.blogspot.com/2011/02/anything-goes-party-4.html

    Reply
  14. 32

    Renee' says

    February 15, 2011 at 4:10 pm

    Beautiful, simply beautiful………

    Reply
  15. 33

    Renee' says

    February 15, 2011 at 4:10 pm

    Beautiful, simply beautiful………

    Reply
  16. 34

    Nichole @ Barillafab4.blogspot.com says

    February 15, 2011 at 4:04 pm

    WOW…totally love it! amazing job!

    Reply
  17. 35

    Nichole @ Barillafab4.blogspot.com says

    February 15, 2011 at 4:04 pm

    WOW…totally love it! amazing job!

    Reply
  18. 36

    Heidi says

    February 15, 2011 at 1:33 pm

    I think you did yourselves proud! Love it. Love the swirls on the inside, love the colors you picked. The person you did this for is a very lucky girl!

    Reply
  19. 37

    Heidi says

    February 15, 2011 at 1:33 pm

    I think you did yourselves proud! Love it. Love the swirls on the inside, love the colors you picked. The person you did this for is a very lucky girl!

    Reply

Leave a Reply Cancel reply

Your email address will not be published. Required fields are marked *

Recipe Rating


  • Facebook
  • Instagram
  • Pinterest
  • RSS
  • YouTube
We are Nick and Bethany! Welcome to our blog, Reality Daydream where we share our DIY adventures!
Click here for lots of art projects using only wood stain on furniture!!
Please feel free to share or pin my posts! You're welcome to use ONE of my images (no collages or pinnables) with a link back to the corresponding post. Please do not edit or crop that single image in any way. Improper use of my photos, ideas or words is a violation of copyright. Thank you!

Categories

Attention: Almost any do-it-yourself project involves risk of some sort. Your tools, materials, and skills will vary, as will the conditions at your project site. Reality Daydream has made every effort to be complete and accurate in the instructions of the plans on this website. Reality Daydream will not assume any responsibility or liability for damages or losses sustained or incurred in the course of your project or in the use of the item you create. Always follow the manufacturer’s operating instructions in the use of tools, check and follow your local building codes, and observe all commonly accepted safety precautions.


Copyright © 2025 · Modern Blogger Pro On Genesis Framework · Customizations by Sweet Theory Designs · Privacy Policy · Log in